Fix DirectX 12 Not Supported Error on Windows System
Feb. 08, 2025 / Updated by Seraphina to Windows Driver Solutions

Some Windows users may encounter the "DirectX 12 Not Supported" error, which can affect the performance of games and applications, causing graphical stuttering or preventing programs from launching. This guide provides several solutions to help you fix this issue and restore a smooth user experience.
1. Update Graphics Drivers
Graphics drivers are essential for DirectX 12 to function properly. If your graphics driver does not support DirectX 12, you won't be able to use it. Updating your drivers to the latest version can effectively resolve this issue.
Using Driver Talent is recommended for automatic driver detection and updates, ensuring a hassle-free process while avoiding incorrect driver installations.
Download and install the latest version of Driver Talent. Open the software and click "Scan" to detect outdated or missing drivers.
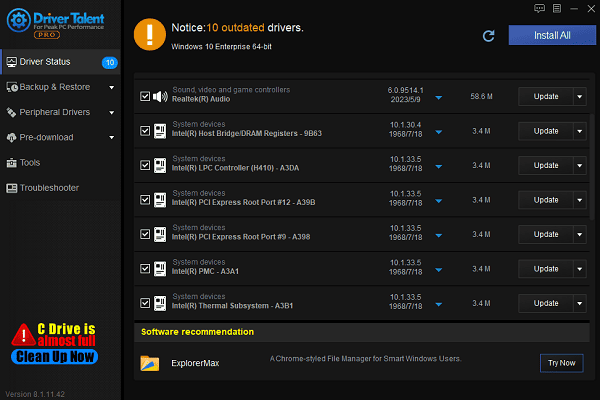
In the scan results, find the NVIDIA, AMD, or Intel graphics driver, then click "Update".
After updating, restart your computer to ensure the new drivers take effect.
2. Use DirectX Repair Tool
Visit the Microsoft official website and download the "DirectX End-User Runtime Web Installer".
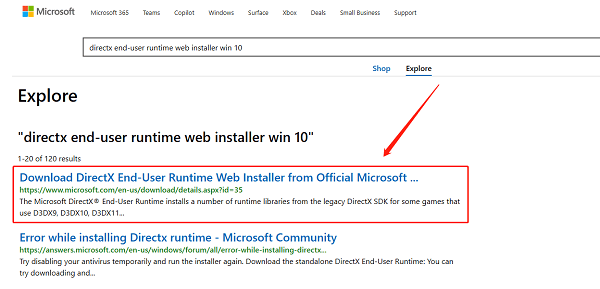
Run the installer; it will automatically scan your system and detect missing or outdated DirectX files.
Choose the "Repair" option and wait for the tool to fix any DirectX-related issues.
After the process is complete, restart your computer and check if DirectX 12 is now enabled.
3. Check If Your GPU Supports DirectX 12
Find Your Graphics Card Model:
Press Win + X and select "Device Manager".
Expand the "Display Adapters" section and right-click your graphics card, then select "Properties".
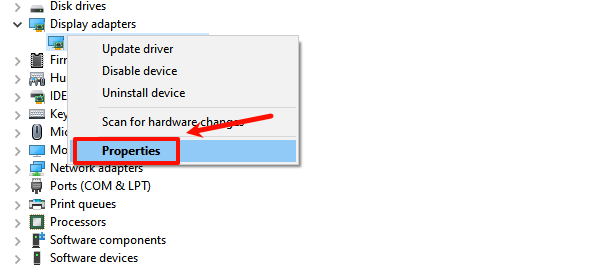
Under the "Details" tab, find your GPU model.
Check DirectX Support for Your GPU:
Visit the official NVIDIA, AMD, or Intel website to check if your GPU supports DirectX 12.
Generally, NVIDIA GTX 900 series and above, AMD Radeon RX 400 series and above support DirectX 12.
If your GPU does not support DirectX 12, upgrading your graphics card may be necessary to take advantage of DirectX 12 features.
4. Check for Windows Updates
Press Win + I to open Settings, then go to "Update & Security".
Click "Check for updates". If updates are available, Windows will automatically download and install them.
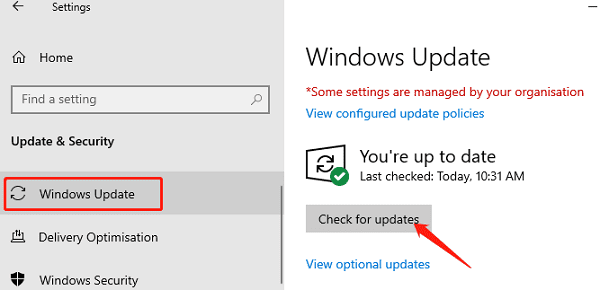
Restart your computer after the update is complete.
Manually Install the Latest DirectX Version:
Sometimes, DirectX updates are not installed automatically. If necessary, manually download and install the latest version of DirectX:
Visit the DirectX download page.
Download and install the latest DirectX package.
Restart your PC to apply the updates.
5. Modify Game Launch Options
Open the game launcher or settings menu. Look for "Graphics" or "Display" options.
If available, select DirectX 12 from the list.
If the game does not provide an in-game DirectX option, you can manually force a different API via Steam launch options:
Right-click the problematic game in Steam and select "Properties".
Under the "General" tab, locate the Launch Options field.
Enter one of the following commands:
-d3d11 (For DirectX 11)
-vulkan (For Vulkan API)
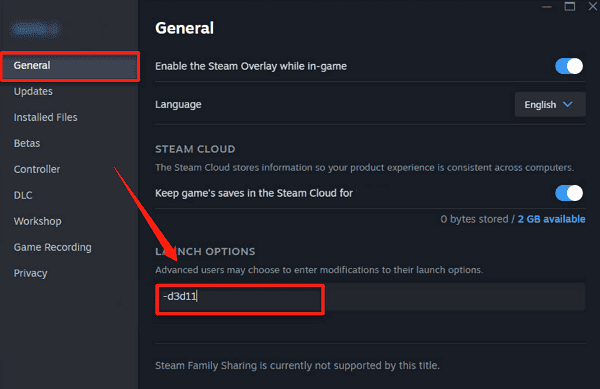
You can enter both options, separated by a space (e.g., -d3d11 -vulkan).
Save the settings and restart the game to see if DirectX 12 can be enabled.
By following these solutions, you should be able to resolve the "DirectX 12 Not Supported" error and enjoy better graphics performance in your games and applications. If the issue persists, consider upgrading your hardware or contacting technical support for further assistance.
See also:
Effective Ways to Fix Computer Speakers Not Working
How to Fix Microphone Not Working on Windows 11
6 Ways to Resolve LogiLDA.dll Missing on Windows
Ways to Fix ntdll.dll Crash Error on Windows
Ways to Fix Windows 10 Not Detecting WiFi Error

|
ExplorerMax |

|
Driver Talent for Network Card | |
| Smart and advanced file explorer tool for Windows platforms | Download & Install Network Drivers without Internet Connection | |||
| 30-day Free Trial | Free Download |


