What is a Wireless Network Card Driver and Wireless Network Card Driver Installation Guide
Apr. 08, 2024 / Updated by Seraphina to Windows Driver Solutions

Wireless Network Card is a hardware device that enables computers to connect to wireless networks. It requires corresponding drivers to function properly. The Wireless Network Card Driver is a software that facilitates communication between the computer's operating system and the wireless network adapter or card installed in the system. This driver enables the wireless network adapter to connect to and communicate with wireless networks, facilitating its proper functioning.
Contents:
1.Wireless Network Card Driver Installation Method
2. Solutions for Device Showing Connected to Wireless Network but No Internet Access
3. Steps to Connect a Printer to a Wireless Network
1. Wireless Network Card Driver Installation Method:
1). Confirm Model and Brand:
Check if your computer already has a wireless network card device, along with its model and brand. You can check this in the computer's Device Manager or on labels in the computer's documentation.
2). Search for the Network Card Model:
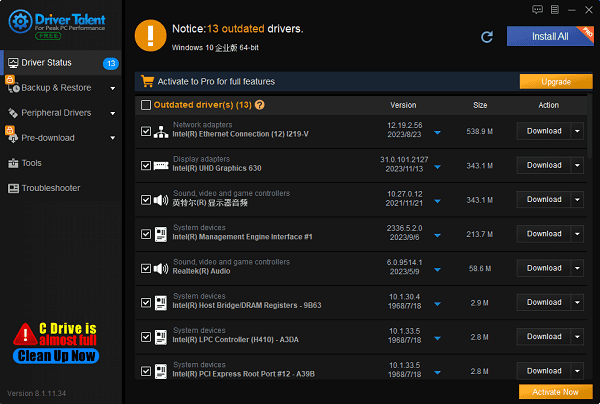
Open a browser and visit the official website of the wireless network card manufacturer. Enter your wireless network card model in the search box and click search. Alternatively, directly open "Driver Talent" to detect the network card driver situation and resolve network card issues.

3). Select the Driver:
In the search results, find the corresponding wireless network card page and click to enter. On the page, select the "Driver & Support" tab, then choose your operating system and language, such as Windows 10 and English.
4). Download the Driver:
In the Driver & Support page, locate the "Driver" section and click "Download". Once the download is complete, find the location of the downloaded file, double-click to run it, and follow the prompts of the installation wizard, agreeing to the license agreement, selecting the installation location and method, etc.
5). Install the Driver:
During the installation process, you may be prompted to insert or enable your wireless network card device. Ensure that your wireless network card is correctly installed in the computer and has sufficient power. If your wireless network card is external, plug it into the computer's USB port or other interfaces. If it is internal, press the wireless network switch or button on the computer.
6). Completion of Installation:
After the installation process is complete, you may need to restart the computer for the changes to take effect. Follow any additional instructions provided by the installation program.
7). Verify Installation:
After restarting the computer, verify whether the wireless network adapter driver is correctly installed. You can do this by checking the Device Manager (on Windows) or the System Information panel to confirm if the wireless network adapter is listed without any error symbols.
8). Connect to the Wireless Network:
In the taskbar at the bottom right corner of the computer, find an icon resembling signal bars or circles, and click it. From the pop-up list, select an available wireless network and enter the password (if any). Click the "Connect" button to begin the connection. Check if you have successfully connected to the wireless network and test the network speed and stability. If you encounter any issues, refer to the manufacturer's website for FAQs or contact customer service for assistance.
2. Solutions for Device Showing Connected to Wireless Network but No Internet Access:
1). Check Other Devices:
Confirm if other devices connected to the same network are experiencing the same issue. If they are, the problem might be with the network itself.
2). Restart Router and Modem:
Sometimes, a simple restart of your router and modem can resolve connectivity issues. Unplug them from the power source, wait for a minute, and then plug them back in.
3). Forget and Reconnect to the Network:
On your device, forget the wireless network you're trying to connect to and then reconnect to it.
4). Check Network Settings:
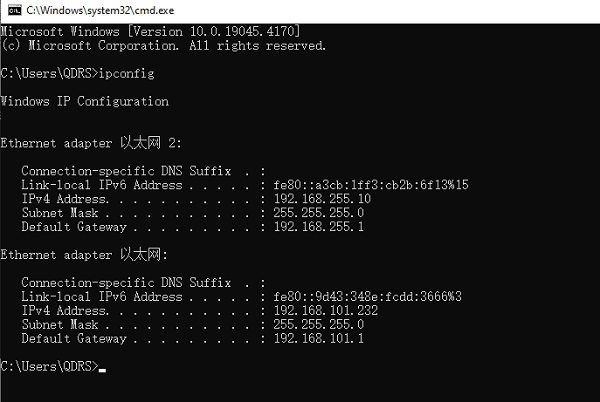
Ensure that your device's network settings are correct. Check the IP address, subnet mask, default gateway, and DNS server settings to make sure they are configured properly.

5). Update Network Drivers:
Make sure your device's network drivers are up to date. Outdated drivers can sometimes cause connectivity problems. You can update drivers through the Device Manager on Windows or use "Driver Talent" to update drivers.
6). Reset Network Settings:
Resetting your device's network settings to their defaults can sometimes fix connectivity issues. However, keep in mind that this will erase saved Wi-Fi passwords and other network configurations.
7). Contact Your Internet Service Provider (ISP):
If none of the above solutions work, the problem might be with your ISP. Contact them to see if there are any known outages in your area or if there are any issues with your internet connection.
3. Steps to Connect a Printer to a Wireless Network:
1). Confirm Printer Compatibility:
Confirm if your printer supports wireless connectivity. Most modern printers offer Wi-Fi connectivity, but older models may require additional hardware or may not support wireless networking.
2). Power On and Prepare the Printer:
Turn on the printer and ensure that it is in a ready state. Check the printer's control panel or display screen for any setup instructions related to wireless connectivity.
3). Access Printer Settings:
Access the printer's settings menu using the control panel or display screen. Look for options like "Wireless Setup" or "Network Settings".
4). Connect to Wi-Fi Network:
In the printer's settings menu, select the option to connect to a Wi-Fi network. The printer will scan for available wireless networks in the vicinity.
5). Select Your Wi-Fi Network:
From the list of available networks, select your Wi-Fi network. If your network is hidden, you may need to manually enter the network name (SSID) and password.
6). Enter Wi-Fi Password:
If prompted, enter the password for your Wi-Fi network using the printer's keypad or touchscreen display. Ensure that the password is entered correctly to avoid connection issues.
7). Complete Setup:
Once the printer successfully connects to the Wi-Fi network, it may perform a test or print a confirmation page. Follow any on-screen instructions to complete the setup process.
8). Install Printer Drivers:
If you haven't already done so, install the printer drivers on your computer. You can typically download the drivers from the printer manufacturer's website or use the installation CD that came with the printer.
9). Add Printer on Computer:
On your computer, navigate to the "Devices and Printers" or "Printers & Scanners" section in the Control Panel or Settings. Click "Add a printer" or "Add a device" and follow the prompts to detect and install the printer.

10). Print Test Page:
After adding the printer, print a test page to verify that it is successfully connected to the wireless network and communicating with your computer.
The above are explanations on what is a Wireless Network Card Driver and a Wireless Network Card Driver Installation Guide. I hope this helps everyone. If you encounter issues with network cards, graphics cards, Bluetooth, sound cards, you can use "Driver Talent" for detection and repair, as well as driver downloads, installations, backups, and more, for flexible driver management.
See also:
How to install sound card drivers
Steps to clean up a full C drive on the computer
Dota 2 crash troubleshooting guide
No Internet Connection-5 Common Solutions
One-Click Audio Recovery for Computer

|
ExplorerMax |

|
Driver Talent for Network Card | |
| Smart and advanced file explorer tool for Windows platforms | Download & Install Network Drivers without Internet Connection | |||
| 30-day Free Trial | Free Download |


