Five Methods to Resolve "KernelBase.dll" Crashing Issue
Jun. 11, 2024 / Updated by Seraphina to Windows 11
Discover solutions to "KernelBase.dll" errors in Windows OS. Learn repair methods to fix program crashes & system errors caused by this crucial file's corruption.
What is "KernelBase.dll"
"KernelBase.dll" is a critical DLL file in the Windows operating system, containing a set of essential programs and driver functions crucial for the system's normal operation. This file is typically created automatically during the installation of the operating system and can be accessed by multiple programs simultaneously. Due to its significance, damage or loss of "KernelBase.dll" may result in program crashes and system errors.
Repair 1: Update Your Drivers
If your computer has outdated or missing drivers, it may lead to "KernelBase.dll" errors and crashes. You can update drivers using the following two methods:
1). Automatic Update
Driver Talent will automatically identify your system and find the correct drivers. You don't need to know the exact system your computer is running, eliminating the risk of downloading and installing incorrect drivers or encountering installation errors.
Click the download button and install Driver Talent.
Run Driver Talent and click the Scan button. Driver Talent will scan your computer and detect any problematic drivers.
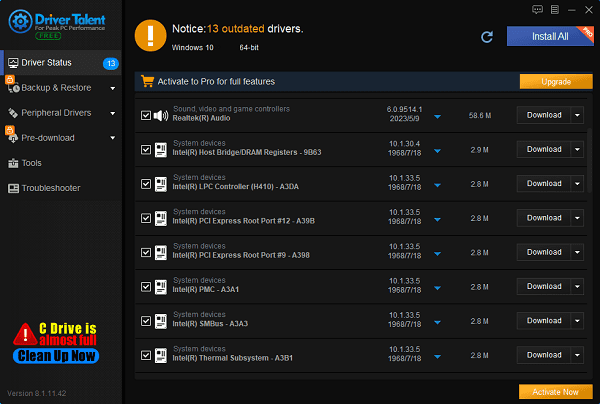
Click the download button next to the flagged device to automatically download and install the correct version of the driver.
2). Manual Update
(1). Identify the hardware device and model
Press the Windows + R keys, type devmgmt.msc, and press Enter to open Device Manager.
In Device Manager, locate the device for which you need to update the driver, right-click on the device, and select "Properties".
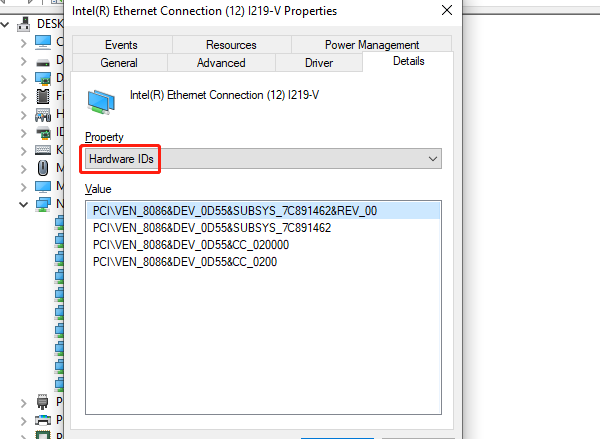
In the "Properties" window, select the "Details" tab, then select "Hardware IDs" from the drop-down menu. Note down the manufacturer and model information of the hardware device.
(2). Visit the manufacturer's website
Open a browser and visit the official website of the hardware device manufacturer.
Search for the support or download page and enter the device model and operating system information.
(3). Download the latest driver
Find the latest driver on the manufacturer's website, ensuring it is compatible with your device and operating system.
Download the driver installation package to your computer.
(4). Install the new driver
Double-click the downloaded driver installation package and follow the on-screen instructions to install it.
After installation, restart your computer to ensure the new driver takes effect.
Repair 2: Restore the "KernelBase.dll" File
1). Download the "KernelBase.dll" file
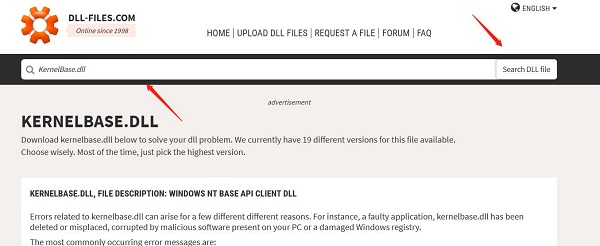
Go to the DLL-Files website.
Enter "KernelBase.dll" in the search bar and click "Search DLL file".
2). Select the appropriate file version
Find the appropriate version of the "KernelBase.dll" file in the search results (usually choose the latest version).
Download the file.
3). Unzip and copy the file
(1). After downloading, unzip the file package.
(2). Copy the "KernelBase.dll" file to the corresponding system folder:
For 64-bit operating systems, copy it to the C:\Windows\SysWOW64 folder.
For 32-bit operating systems, copy it to the C:\Windows\System32 folder.
4). Restart your computer
Restart your computer to ensure the new "KernelBase.dll" file takes effect.
Repair 3: Update the Windows System
1). Open Windows Update settings
Press the Windows logo key on your keyboard, then type "update".
Click "Check for updates" to open Windows Update settings.
2). Check for updates
On the Windows Update page, click the "Check for updates" button.
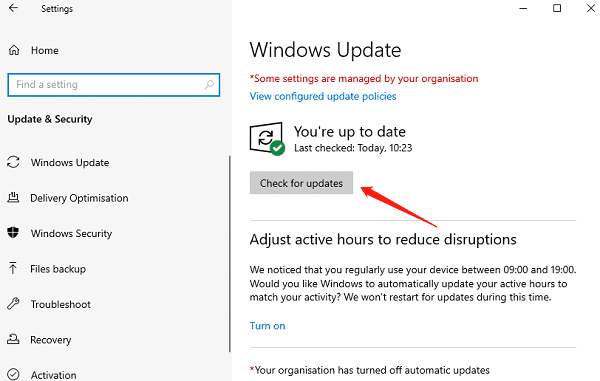
The system will start searching for available updates.
3). Download and install updates
If updates are available, the system will automatically download and install them.
This process may take some time, so please be patient.
4). Restart your computer
After the updates are installed, the system may prompt you to restart your computer.
Click the "Restart now" button, or restart your computer at your convenience to ensure all updates take effect.
Repair 4: Reinstall the Problematic Program
Open Control Panel: Press the Windows logo key and R key simultaneously on your keyboard to open the Run dialog. Type "control" and press Enter to open Control Panel.
Uninstall the problematic program: View Control Panel by category and select "Uninstall a program". Right-click on the problematic program and select "Uninstall".
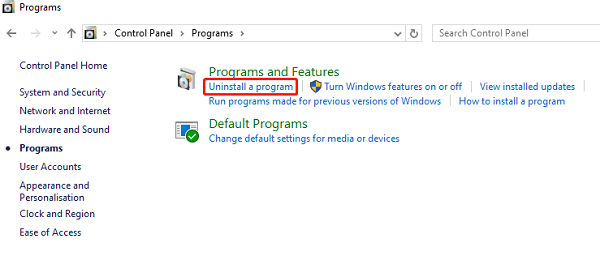
Restart your computer: After uninstallation is complete, restart your computer. Then, download the latest version of the problematic program from its official website and follow the on-screen instructions to install it.
Repair 5: Run the System File Checker
1). Open Command Prompt as an administrator
Press the Windows logo key and R key, type "cmd", then press Ctrl + Shift + Enter to open Command Prompt as an administrator.
2). Run the System File Checker
Copy and paste the command "Dism /Online /Cleanup-Image /ScanHealth" and press Enter.
Once the command operation is complete, type the command "sfc /scannow" and press Enter.
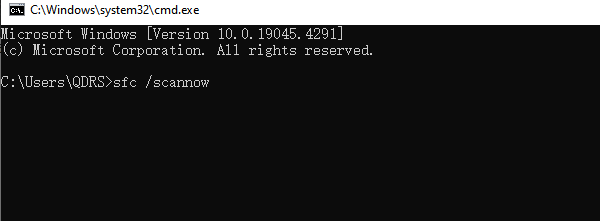
3). Wait for the scan to complete
The System File Checker will start scanning system files and repair them if necessary.
4). Restart your computer
After the scanning and repair process is complete, restart your computer to apply the changes.
Through these methods, you can better maintain and repair "KernelBase.dll"-related issues in your system, ensuring stability and reliability. Timely updating drivers and system patches can address potential vulnerabilities and errors, ensuring smooth communication between your computer and hardware devices during operation.
See also:
4 Ways to Add Bluetooth Icon to Taskbar on Windows 11
Top 5 Solutions for Laptop Keyboard Not Typing Letters
How to Fix Network Driver Errors
Methods to Fix Graphics Card Driver Failure
7 Ways to Enhance Your Audio Experience

|
ExplorerMax |

|
Driver Talent for Network Card | |
| Smart and advanced file explorer tool for Windows platforms | Download & Install Network Drivers without Internet Connection | |||
| 30-day Free Trial | Free Download |


