7 Methods to Fix Realtek High Definition Audio Not Plugged In
Jul. 30, 2024 / Updated by Seraphina to Windows 11
The "Realtek High Definition Audio Not Plugged In" issue is a common problem for Windows users that can affect audio output. This article offers seven methods to help you fix it.
Method 1: Check Physical Connections
Ensure that the audio cables are securely connected to the correct ports on your computer and speakers or headphones.
Try connecting your headphones or speakers to another device to ensure they are working correctly.
Connect the audio device to different audio ports on your computer to rule out port damage.
Method 2: Update Audio Drivers
Outdated, damaged, or incompatible drivers can cause performance issues, hardware malfunctions, or system crashes. It is recommended to use Driver Talent to automatically detect and update drivers, saving time and avoiding the risk of downloading or installing incorrect drivers.
Click the download button to get the latest version of Driver Talent. After installation, open the software and click "Scan".
After scanning, it will display which drivers are missing or need updating. Find the audio driver in the list and click the "Download" button.
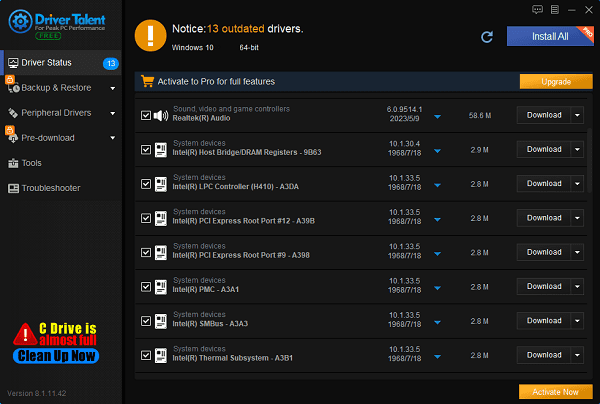
After updating, restart your computer to ensure the updated drivers take effect.
Method 3: Enable and Set Default Playback Device
Right-click the volume icon in the bottom-right corner of the taskbar and select "OpenSound Settings".
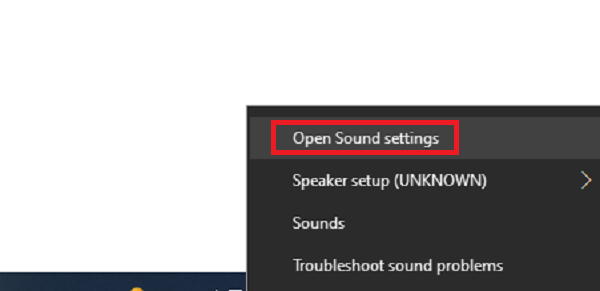
In the "Sound Settings" window, click "Sound Control Panel".
In the "Playback" tab, find your audio device, right-click it, and select "Enable".
Right-click your audio device again and choose "Set as Default Device".
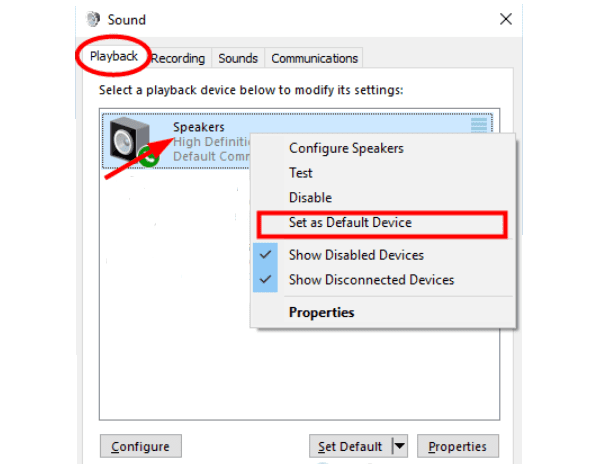
Click "OK" to save the settings.
Method 4: Run Windows Audio Troubleshooter
Press the Windows key + I to open the "Settings" app, then select "Update & Security".
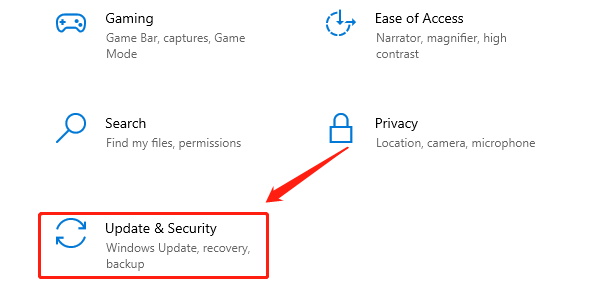
In the left menu, choose "Troubleshoot" and click "Additional Troubleshooters".
Find "Playing Audio" and click the "Run Troubleshooter" button.
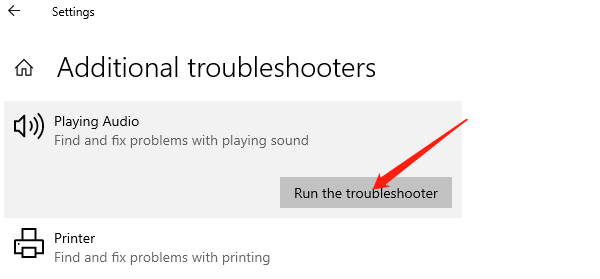
Follow the on-screen instructions to complete the troubleshooting process.
Method 5: Check Audio Services
Press the Windows key + R to open the "Run" dialog, type services.msc, and press Enter.

In the "Services" window, locate the "Windows Audio" service.
Right-click "Windows Audio" and select "Properties". Ensure the service status is "Running" and the startup type is "Automatic".
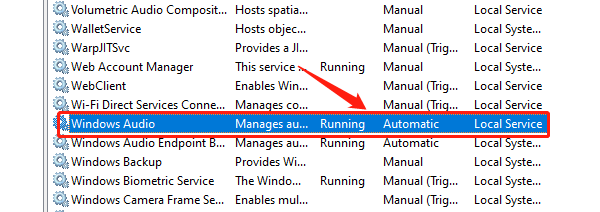
If the service is not running, click the "Start" button. If it is running, click "Stop", then click "Start" again.
Method 6: Disable Front Panel Jack Detection
Type "Realtek HD Audio Manager" in the search bar and open the application.
Click the "Speakers" tab, then click the folder icon in the upper right corner to open "Device Advanced Settings".
Check the box for "Disable front panel jack detection", then click "OK" to save the settings and close Realtek HD Audio Manager.
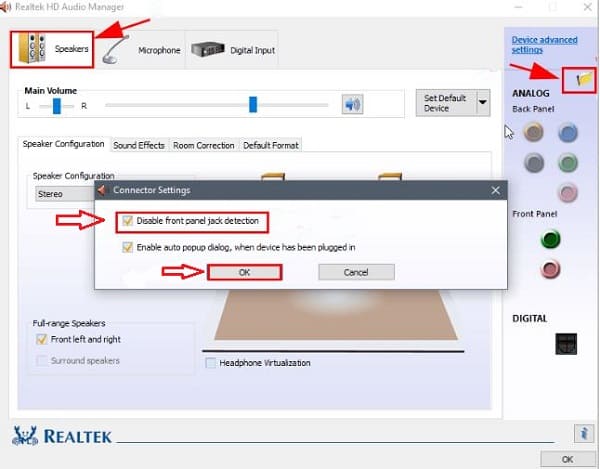
Restart your computer and test the sound to see if it works.
Method 7: Reset Audio Settings
Press the Windows key + I to open the "Settings" app.
Select "System", then choose "Sound" from the left menu.
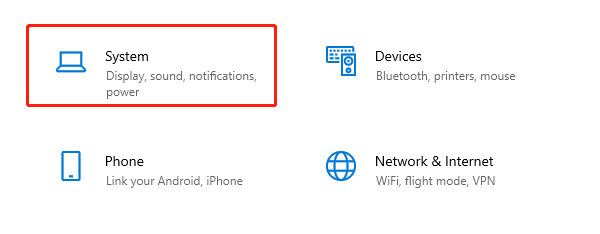
In the "Sound" settings, scroll down to "Advanced sound options" and click "App volume and device preferences". Ensure all settings are set to default.
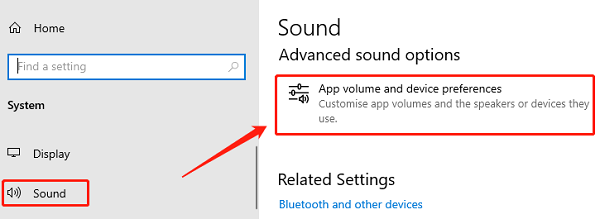
After resetting, restart your computer to apply the changes.
These seven methods should help fix the "Realtek High Definition Audio Not Plugged In" issue. If the problem persists, check your audio hardware connections or contact technical support. Hopefully, these solutions will enhance your audio experience.
See also:
NVIDIA VS AMD: Which Graphics Card is Right for You
How to Enhance Network Connection Stability Using Network Cards
How to Fix Missing Icons on Computer Desktop
Methods to Fix Disappearing Mouse Arrow
Why Driver Updates Are Crucial

|
ExplorerMax |

|
Driver Talent for Network Card | |
| Smart and advanced file explorer tool for Windows platforms | Download & Install Network Drivers without Internet Connection | |||
| 30-day Free Trial | Free Download |


