Top 5 ways to fix no internet connection on Windows 11
May. 16, 2024 / Updated by Seraphina to Windows 11
When your Windows 11 computer suddenly loses internet connectivity, it can disrupt your workflow or entertainment activities. This guide will walk you through a series of troubleshooting steps to diagnose and resolve connectivity issues, ensuring you can quickly get back online.
1. Fix Drivers
Method 1: Update Drivers
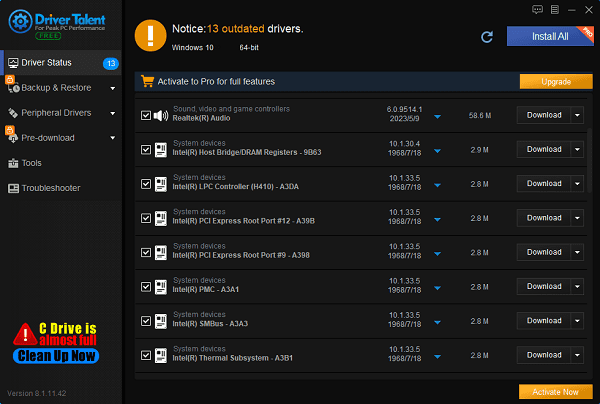
If the network drivers are outdated or disabled by other programs (such as viruses), you can download Driver Talent for updates.
Driver Talent can quickly scan your computer within seconds and display all driver updates in a list.
Once Driver Talent is running, it can automatically enable all disabled drivers. You don't need to check each driver one by one. With one software, Driver Talent, downloading, updating, installing, or restoring drivers is easier than ever.
Method 2: Rollback Drivers
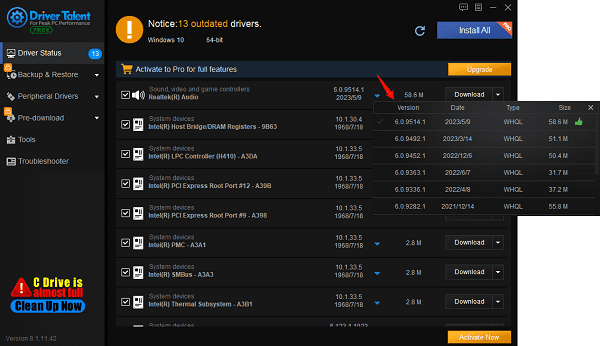
If applying driver updates results in no network connectivity, rolling back to a previous version may solve the issue. To rollback a driver update to a previous version on Windows 11, follow the step:
Open Driver Talent and click on the inverted triangle, where you can download previous driver versions.
Method 3: Network Adapter Settings
Step 1: Network Adapter Properties
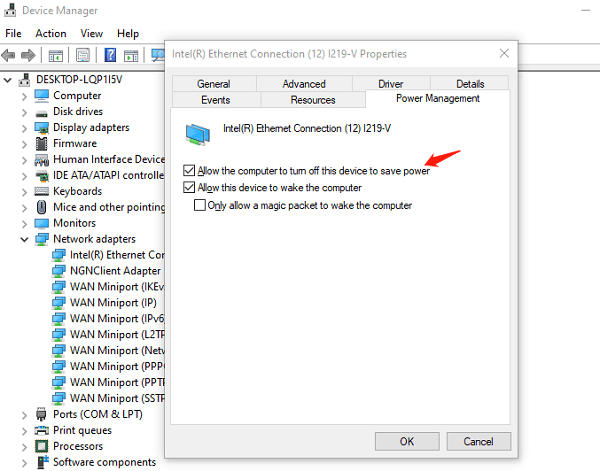
In Device Manager, right-click your network adapter and select "Properties".
Step 2: Power Management
Uncheck "Allow the computer to turn off this device to save power" to prevent power-saving features from disconnecting your network connection.
Step 3: Advanced Tab
Explore advanced settings to ensure there are no configurations restricting network access.
Uninstall Network Adapter:
Residual data from old versions can affect the use of updated drivers. Therefore, you need to uninstall all data and files of the network adapter driver, and then reinstall it.
Method 4: Restore Drivers
Using Driver Talent, device drivers can be restored. Furthermore, with the restore function, if there are any problems with the driver files in the future, the driver of the same version can be reinstalled immediately.
2. Basic Network Troubleshooting
Method 1: Internet Connection Check
Step 1: Network Icon Status
Check the network icon in the system tray. If a yellow triangle or red "X" is displayed, there is a connection issue.
Step 2: Restart Router and Modem
Turn off your router and modem, wait for 30 seconds, then restart them. This often resolves temporary network failures.
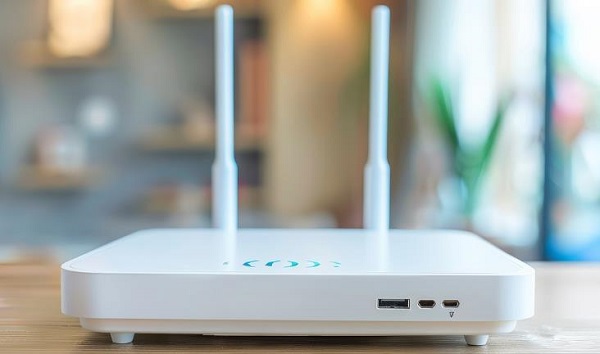
Step 3: Check Physical Connections
Ensure all cables are securely connected, including those from the modem to the router and from the router to the computer.
Method 2: Network Reset and Diagnostics
Step 1: Windows Network Troubleshooter
Go to "Settings" > "Network & Internet" > "Internet" > "Network Troubleshooter". Windows will attempt to identify and fix common issues.
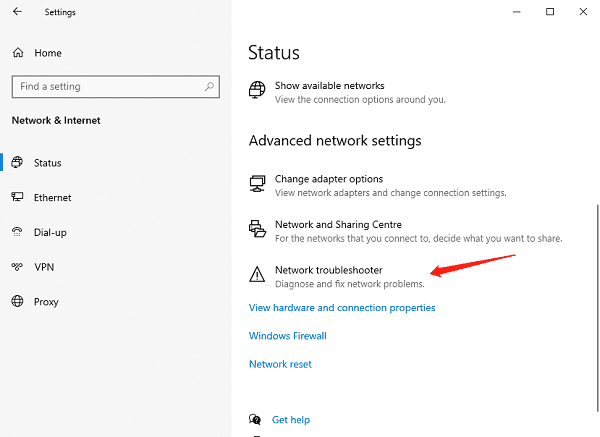
Step 2: Network Reset
If troubleshooting fails, go to "Advanced network settings" > "Network reset" in the "Network & Internet" settings. Note that this will remove all network adapters and settings, and you will need to set up connections again.
3. Refresh IP Configuration and Clear DNS Cache
Step 1: Command Prompt
Open Command Prompt by typing "cmd" in the Start menu, right-clicking, and selecting "Run as administrator".
Step 2: Refresh IP Address
Enter ipconfig /release and press Enter, then enter ipconfig /renew and press Enter. This will refresh your IP configuration.
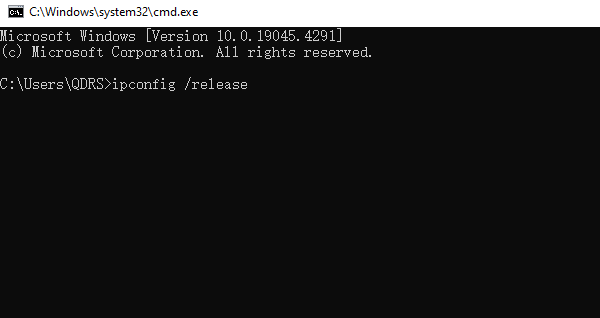
Step 3: Clear DNS Cache
Execute ipconfig /flushdns to clear the DNS resolver cache, which can resolve DNS-related connection issues.
4. Check Internet Connection Speed
Before delving into complex solutions, verify your internet speed to ensure this isn't a performance issue.
Step 1: Speed Test Websites
Visit websites like SpeedTest.net or Fast.com and run speed tests in your web browser. Ensure no other devices are heavily using the network during testing.
Step 2: Interpret Results
Compare the test results with the speed advertised by your ISP (Internet Service Provider). If significantly lower, contact your ISP to report potential service issues.
5. Temporarily Disable Security Software
Third-party security software can protect your computer from malware but may also block internet access for no reason. By disabling them and testing connectivity, you can confirm if security software is causing issues. You can try disabling antivirus on Windows 11:
Press WIN+I together and search for Windows Security.
In Windows Security, look at the left side of the panel.
Choose Virus & threat protection.
In the right panel of Virus & threat protection, look in the middle section.
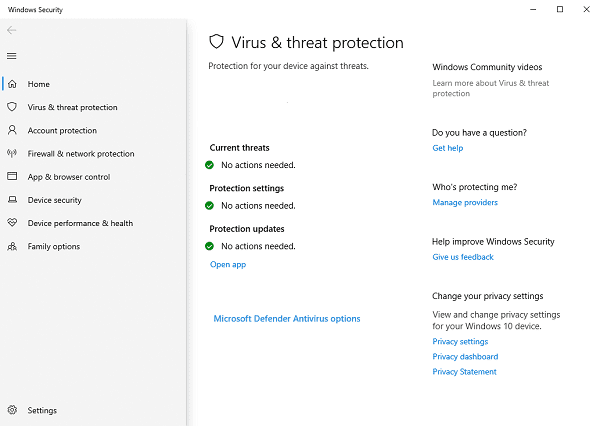
Choose virus & threat protection settings - manage settings.
Turn off the Real-time protection toggle switch.
Resolving internet connection issues on Windows 11 requires a systematic approach, from simple checks to more complex fixes. By methodically executing these steps, you can accurately pinpoint and rectify underlying causes, whether it's a simple network glitch, outdated drivers, or improperly configured software. If all methods fail, seeking help from your Internet Service Provider or professional assistance may be necessary. With these strategies, you'll be able to restore your connection and regain online freedom effectively.
See also:
How can I speed up my Fast Wireless Network Card
What is error 202 amd but there is no updates
How to Resolve Sound Issues on Your Computer
Connecting Wireless Headphones to a Computer in 4 Ways
Six Ways to Open Windows 11 Task Manager

|
ExplorerMax |

|
Driver Talent for Network Card | |
| Smart and advanced file explorer tool for Windows platforms | Download & Install Network Drivers without Internet Connection | |||
| 30-day Free Trial | Free Download |
