How to Fix Mouse Lagging and Stuttering on Windows 11
Jul. 17, 2024 / Updated by Seraphina to Windows 11
Mouse lagging and stuttering on Windows 11 can affect your productivity and gaming experience. This article will provide simple and effective steps to help you solve this problem and make your mouse run smoothly again.
1. Check Hardware Connections
Ensure that the mouse is firmly connected. For wireless mouse, check the battery level and the receiver connection.
Try connecting the mouse to other USB ports to rule out port issues.
2. Update Drivers
Outdated, damaged, or incompatible mouse drivers may cause the mouse to malfunction. It is recommended to use Driver Talent to automatically detect and update drivers, saving time and avoiding the risk of downloading or installing incorrect drivers.
Click the download button to get the latest version of Driver Talent. After installation, open the software and click "Scan".
After scanning, it will show which drivers are not installed or need updating. Find the mouse driver in the results list and click the "Download" button.
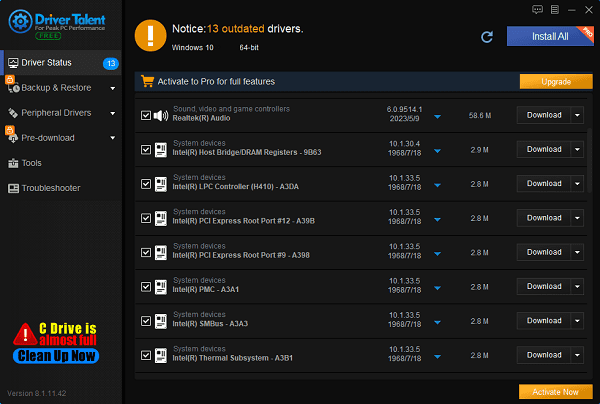
After the update, it is recommended to restart the computer to ensure that the updated driver can take effect.
3. Disable Adaptive Sync Settings
Right-click on the desktop and select "NVIDIA Control Panel".
In the left menu, find and click "Set up G-SYNC" under "Display".
Uncheck "Enable G-SYNC, G-SYNC Compatible" on the right.
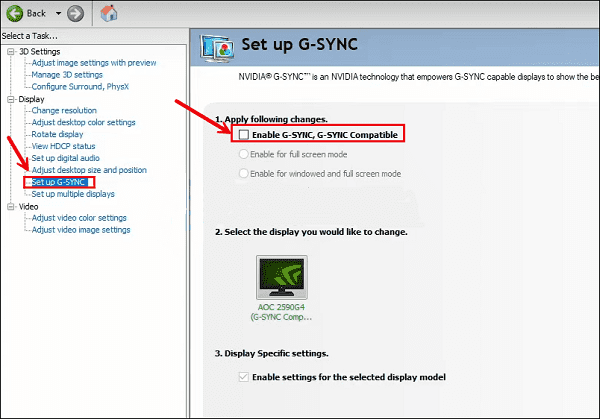
Click the "Apply" button to save changes.
Restart the computer to ensure the changes take effect.
4. Disable Enhance Pointer Precision
Press Windows + R keys to open the Run dialog box, type main.cpl and press Enter.
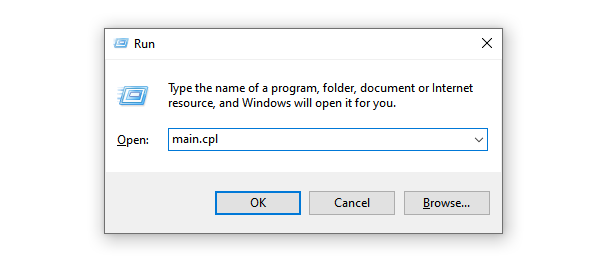
In the "Mouse Properties" window, select the "Pointer Options" tab.
Uncheck "Enhance pointer precision".
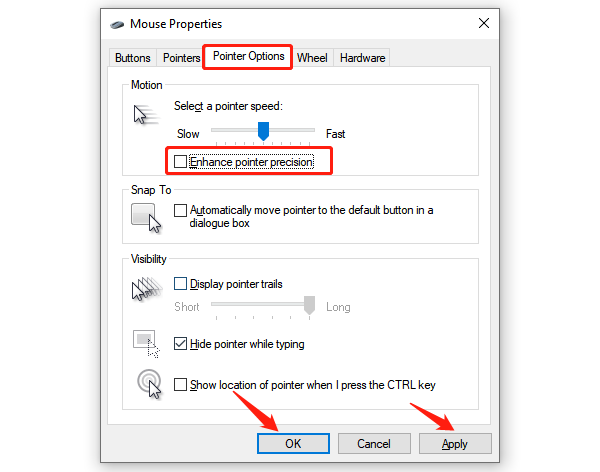
Click "Apply" and then "OK".
Restart the computer to ensure the changes take effect.
5. Disable Mouse Trails
Press Windows + R keys to open the Run dialog box, type main.cpl and press Enter.

In the "Mouse Properties" window, select the "Pointer Options" tab.
Uncheck "Display pointer trails".
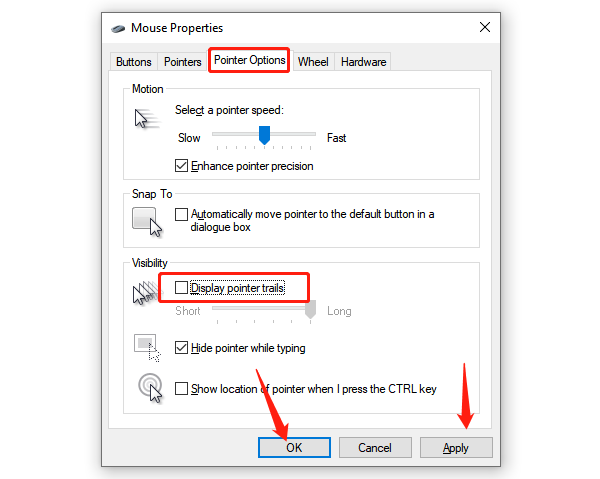
Click "Apply" and then "OK".
Restart the computer to ensure the changes take effect.
6. Disable High Precision Event Timer (HPET)
In the Windows search bar, type "cmd", right-click "Command Prompt", and select "Run as administrator".
Enter the following command and press Enter: bcdedit /deletevalue useplatformclock.
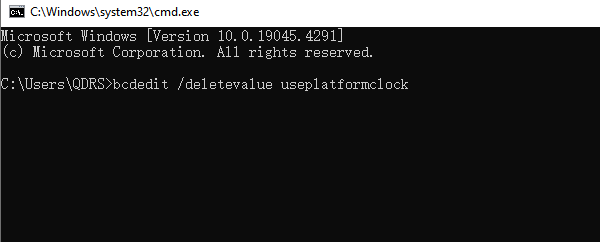
Close the command prompt and restart the computer to ensure the changes take effect.
7. Check Windows Updates
Press Windows + I keys to open the "Settings" app.
Click "Update & Security".
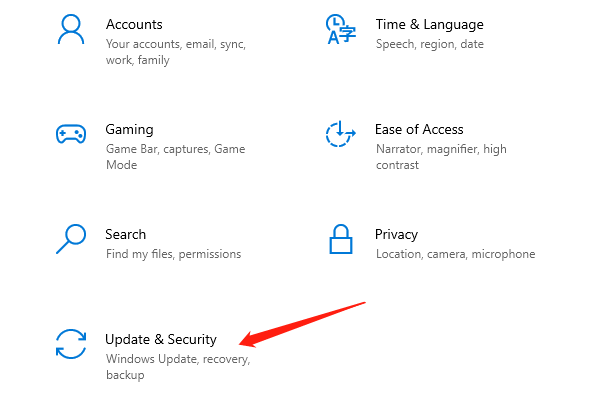
In the "Windows Update" tab, click "Check for updates".
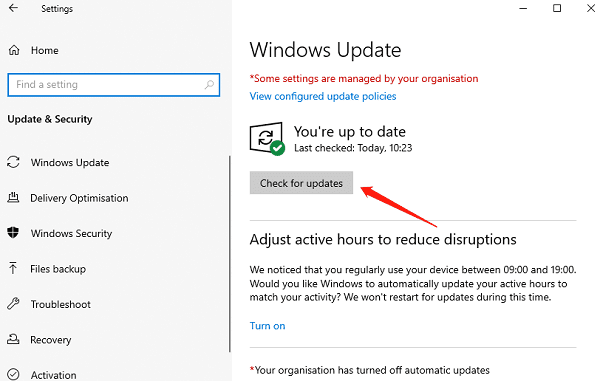
If updates are available, Windows will automatically download and install them.
Once the installation is complete, click "Restart now" or schedule a restart time.
By following the above steps, you should be able to fix mouse lagging and stuttering issues on Windows 11, thereby enhancing your user experience. Hope these methods are helpful to you, and happy computing!
See also:
Six Ways to Open Windows 11 Task Manager
Solution to system crash after graphics card driver upgrade
How to Check and increase network speed in a computer
How to update a graphics card driver
How to Restore the Missing Volume Icon Windows

|
ExplorerMax |

|
Driver Talent for Network Card | |
| Smart and advanced file explorer tool for Windows platforms | Download & Install Network Drivers without Internet Connection | |||
| 30-day Free Trial | Free Download |


