6 Ways to Fix NVIDIA Control Panel Access Denied
Jul. 14, 2024 / Updated by Seraphina to Windows 11
Users encountering an "Access Denied" error when accessing the NVIDIA Control Panel can disrupt their ability to manage graphics settings. Here are several methods to resolve this issue.
Method 1: Update NVIDIA Graphics Driver
An outdated, corrupted, or incompatible graphics driver can cause the NVIDIA Control Panel access denied issue. It is recommended to use Driver Talent to automatically detect and update the driver, saving time and avoiding the risk of downloading or installing the wrong driver.
Click the download button to get the latest version of Driver Talent. Install and open the software, then click "Scan".
After the scan, it will display any drivers that need to be installed or updated. Find the NVIDIA graphics driver in the results list and click the "Download" button.
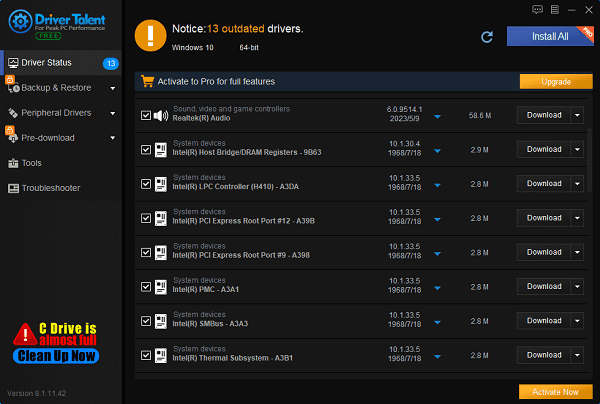
After the update, it is recommended to restart your computer to ensure the updated driver takes effect.
Method 2: Reinstall NVIDIA Graphics Driver
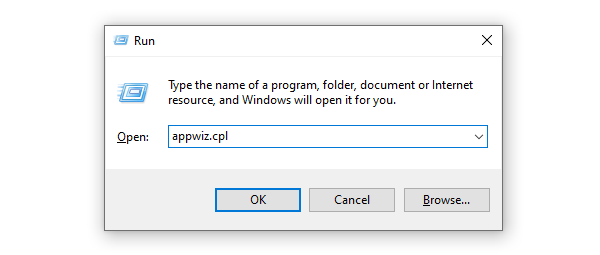
①. Press Windows + R, type appwiz.cpl, and press Enter.
 r
r
②. In the list of installed programs, find the NVIDIA Graphics Driver, right-click, and select Uninstall.
③. Visit the NVIDIA official website and download the latest driver compatible with your graphics card model and operating system.
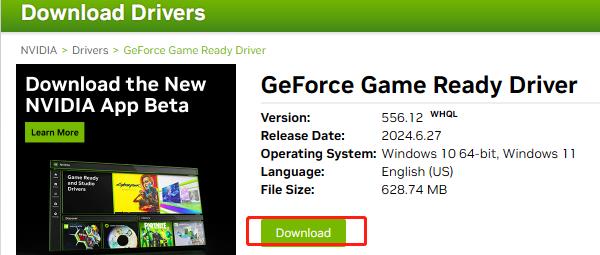
④. Install the new driver and follow the prompts to complete the installation.
⑤. After installation, restart your computer.
Method 3: Restart NVIDIA Services
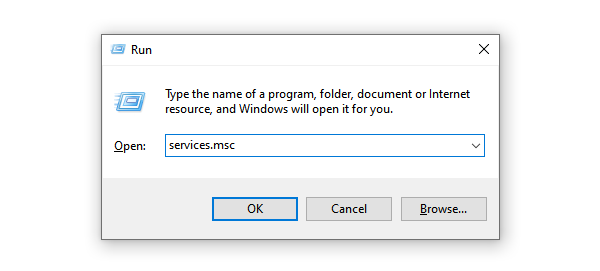
①. Press Windows + R to open the Run dialog box.
②. Type services.msc and press Enter.
③. In the list of services, find NVIDIA Display Container LS.
④. Right-click the service and select Restart.
⑤. Try reopening the NVIDIA Control Panel.
Method 4: Run the NVIDIA Control Panel as Administrator
①. Press Windows logo key + E to open File Explorer.
②. Navigate to C:\Program Files\NVIDIA Corporation\Control Panel Client, right-click on the nvcplui.exe file, and select Properties.
③. In the Properties window, go to the Compatibility tab, and check the box for "Run this program as an administrator".
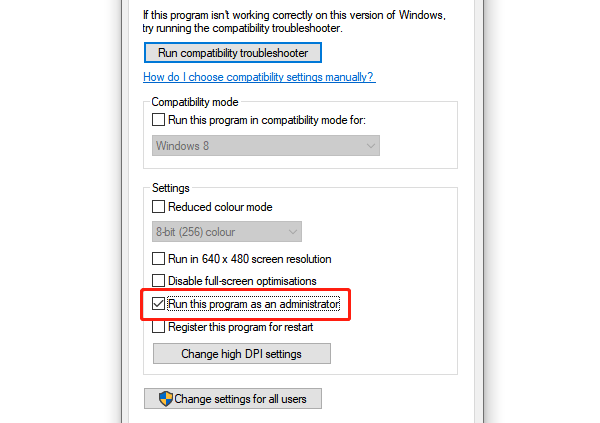
④. Click Apply and then OK.
⑤. Right-click on the nvcplui.exe file and select "Run as administrator".

⑥. Run the NVIDIA Control Panel and check if the "Access Denied" message still appears.
Method 5: Modify Registry
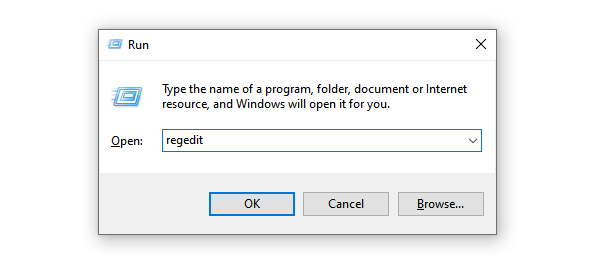
①. Press Windows + R, type regedit, and press Enter to open the Registry Editor.
②. Navigate to HKEY_LOCAL_MACHINE\SYSTEM\CurrentControlSet\Services\nvlddmkm\Display.
③. In the right pane, find and right-click NvCplHandle, then select Permissions.
④. Ensure your user account has full control permissions. If not, add the appropriate permissions.
⑤. Close the Registry Editor and restart your computer.
Method 6: Turn Off Game Bar
①. Press Windows logo key + I to open Windows Settings.
②. In Settings, click Gaming.
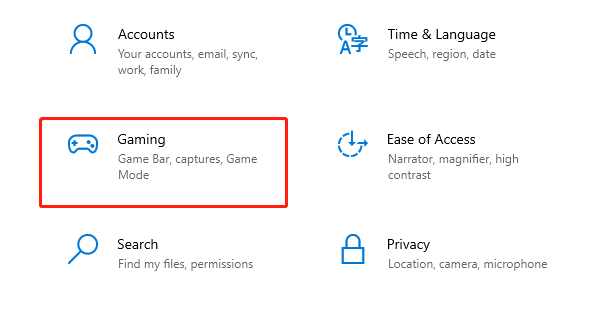
③. On the Gaming settings page, select Game Bar.
④. Click the button to turn off the Game Bar.
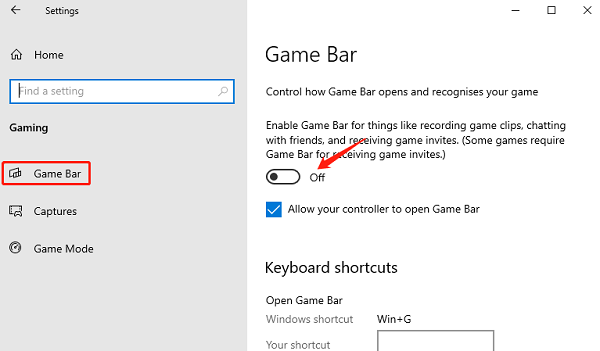
⑤. Ensure all Game Bar options are turned off to prevent interference with the NVIDIA Control Panel.
⑥.Close the settings window, run the NVIDIA Control Panel, and check if the "Access Denied" message still appears.
By following these methods, you should be able to resolve the NVIDIA Control Panel access denied issue. If the problem persists, consider further hardware checks or contacting NVIDIA support. Hopefully, these solutions help, and your system runs smoothly.
See also:
How to Fix SteamVR Not Working Issues
6 Ways to Fix a Jumping Mouse Scroll Wheel
Guide to Fixing Network Adapter Issues on Windows
How to Resolve Windows 10 Installation Failure Issues
Guide to Fixing Microphone Not Working on Windows 11

|
ExplorerMax |

|
Driver Talent for Network Card | |
| Smart and advanced file explorer tool for Windows platforms | Download & Install Network Drivers without Internet Connection | |||
| 30-day Free Trial | Free Download |


