
Windows 10 users may face the "Wi-Fi not detected" error, disrupting wireless connections. This article offers common solutions to fix the issue and restore network connectivity.
1. Check Driver Updates
Outdated or corrupted wireless network drivers are one of the key reasons Wi-Fi cannot be detected. Updating the drivers can effectively resolve the issue of Wi-Fi not being detected. It is recommended to use Driver Talent to automatically detect and update drivers, saving time and avoiding the risk of downloading or installing incorrect drivers.
Click the download button to get the latest version of Driver Talent. After installation, open the software and click "Scan".
Once the scan is complete, the results will show which drivers are missing or need updating. Find the wireless network driver in the list and click the "Download" button.
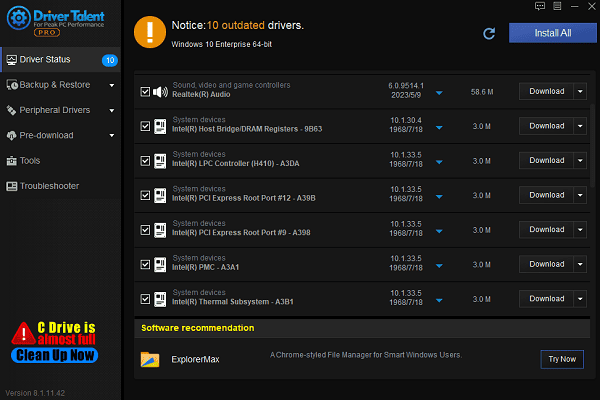
After updating, it is recommended to restart the computer to ensure the updated driver takes effect.
2. Reconnect to the Current Network
Click the Wi-Fi icon in the lower-right corner of the taskbar.
Select the network you are currently connected to, and click "Disconnect".
After waiting a few minutes, reconnect to the same Wi-Fi network and enter the password to connect.
Check if the Wi-Fi connection is restored.
3. Disable Power Saving Mode
Press Windows + X and select "Device Manager".
In Device Manager, expand "Network Adapters", right-click your Wi-Fi adapter, and select "Properties".
Go to the "Power Management" tab and uncheck "Allow the computer to turn off this device to save power".
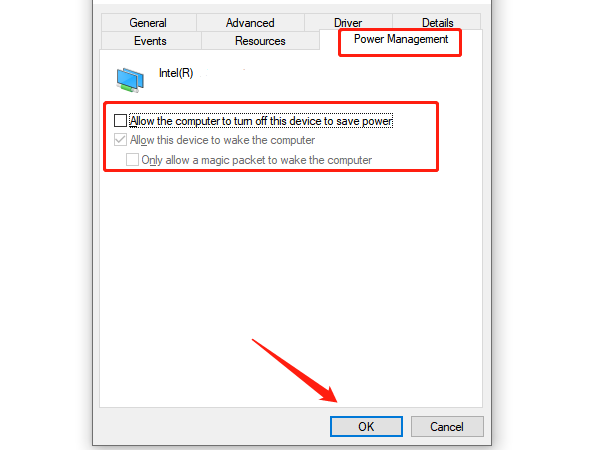
Click "OK" to save the settings and exit Device Manager.
Restart the computer and check if the Wi-Fi connection is restored.
4. Enable WLAN AutoConfig
Press Windows + R to open the Run dialog.
Type "services.msc", then press Enter.
In the Services window, find "WLAN AutoConfig" and make sure its Status is Running.
If it is not running, right-click the service and select "Start". If it is running, right-click and select "Restart".
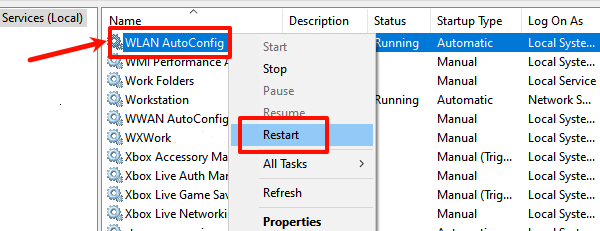
Double-click the service and make sure the "Startup type" is set to "Automatic".
Click "OK" to save the settings, then restart the computer.
5. Run Internet Connection Troubleshooter
Open Settings and click "Update & Security".
From the left menu, select "Troubleshoot", then click "Additional troubleshooters".
Find "Internet Connections" and click "Run the troubleshooter".
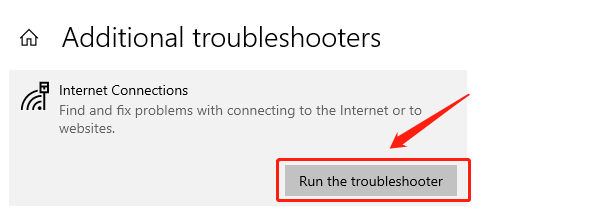
The system will automatically scan for and fix connection issues. Follow the on-screen instructions.
After scanning and fixing, reconnect to the Wi-Fi network and check if the issue is resolved.
6. Update the Operating System
Open Settings and click "Update & Security".
From the left menu, select "Windows Update", then click "Check for updates".
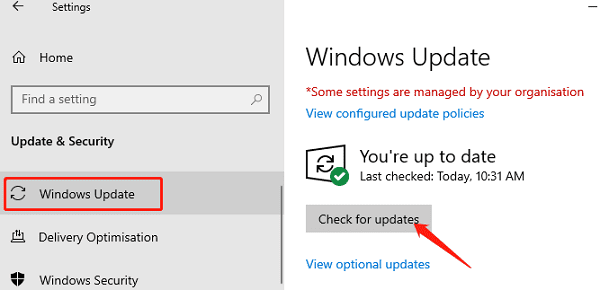
If updates are available, click "Download and install".
After the update is complete, restart the computer and check if the Wi-Fi issue is resolved.
These methods should help you resolve the "Wi-Fi not detected" issue on Windows 10. If the problem persists, it is recommended to contact technical support for further assistance.
See also:
How to Fix Mouse Arrow Disappearance on Windows 10
6 Ways to Fix an Unresponsive Wireless Mouse
Fixing Valheim Keeps Freezing on PC


