Solution for High CPU Usage by Windows Driver Foundation
Nov. 14, 2024 / Updated by Seraphina to Windows 10

Many users face high CPU usage from Windows Driver Foundation (WDF). This article offers solutions to fix the issue and boost performance.
1. Update Device Drivers
Outdated or faulty device drivers are a common cause of high CPU usage by Windows Driver Foundation (WDF). Updating drivers can resolve potential conflicts and compatibility issues. Use Driver Talent to automatically detect and update drivers efficiently while avoiding errors.
Download the latest version of Driver Talent, install it, and open the software. Click "Scan".
Review the scan results for missing or outdated drivers. Locate the relevant drivers and click "Download".

Restart your computer after updating to ensure the changes take effect.
2. Disable the Windows Driver Foundation Service
Press Windows + R, type "services.msc", and press Enter.
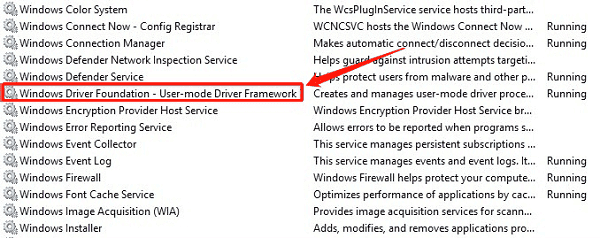
In the Services window, scroll down to find "Windows Driver Foundation - User-mode Driver Framework".

Right-click the service and select Properties.
Under Startup Type, choose "Disabled".
Click Stop to halt the service, then click "Apply" and "OK".
Restart your computer to check if CPU usage improves.
Note: Disabling this service may affect the functionality of some hardware devices, such as printers or external peripherals. Only disable it if it is confirmed to be the cause of high CPU usage.
3. Run the System File Checker (SFC) Tool
Open the Command Prompt as an administrator.
Type the following command and press Enter: sfc /scannow
The SFC tool will scan system files and repair any detected issues. This process may take a few minutes.
Restart your computer after the scan and check if the issue is resolved.
4. Disable Unnecessary Startup Items and Services
Press Ctrl + Shift + Esc to open the Task Manager.
Navigate to the Startup tab. Identify unnecessary startup programs, right-click them, and select Disable.
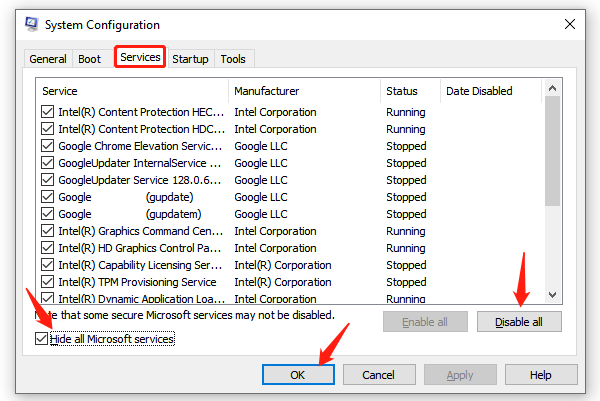
Press Windows + R, type "msconfig", and press Enter.
Go to the Services tab, check Hide all Microsoft services, and disable unnecessary third-party services.

Click "Apply" and "OK".
Restart your computer to see if CPU usage has decreased.
5. Run System Maintenance Troubleshooter
Open the Control Panel by searching for it in the search bar.
Set the view to Large Icons, locate Troubleshooting, and open it.
Click "View All" on the left panel.
Find "System Maintenance" and click on it.

Follow the on-screen instructions to complete the troubleshooting process.
Restart your computer and check if the issue is resolved.
6. Check for Windows Updates
Press Windows + I to open Settings.
Navigate to "Update & Security" and click "Check for Updates".
If updates are available, click "Download and Install" and wait for the process to complete.
Restart your computer and monitor CPU usage.
7. Inspect Hardware Devices
Ensure all hardware devices, such as external hard drives, printers, and graphics cards, are properly connected.
Press Windows + X and select Device Manager.
Expand the relevant device category, right-click the device, and select Properties. Check the Driver tab to confirm the device's status.
Replace or repair faulty hardware, especially those causing driver-related issues.
8. Reset Windows System
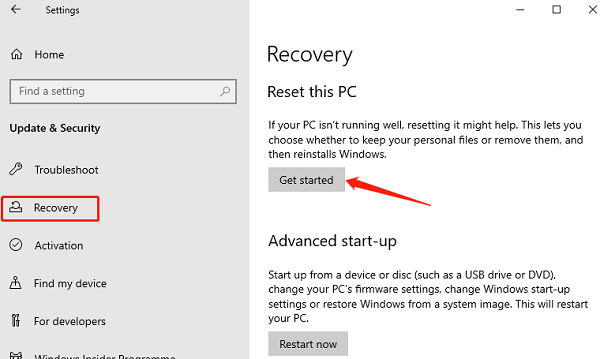
Press Windows + I to open Settings, and navigate to "Update & Security".
Click Recovery and select "Get Started" under Reset this PC.

Choose Keep My Files to retain personal data.
Follow the on-screen instructions to complete the reset process. The system will restart and begin resetting.
After the reset, check if the Windows Driver Foundation service still causes high CPU usage.
By following these steps, you can optimize system performance and restore a smoother computing experience. If the issue persists, consider seeking professional technical support for further assistance.
See also:
Guide to Reinstalling the Windows 10 Operating System
How to Fix God of War Keep Crashing on PC
Guide to Improving Graphics Performance
How to Fix Critical Process Died in Windows 10
How to Fix Logitech Mic Not Working

|
ExplorerMax |

|
Driver Talent for Network Card | |
| Smart and advanced file explorer tool for Windows platforms | Download & Install Network Drivers without Internet Connection | |||
| 30-day Free Trial | Free Download |


