Windows 10 Speaker Not Working Troubleshooting Guide
Jun. 16, 2024 / Updated by Seraphina to Windows 10
Discover how to troubleshoot and fix Windows 10 speaker issues with our comprehensive guide. From checking basic connections and updating drivers to running audio troubleshooters and setting default devices, ensure your sound output is always optimal. Follow these steps to regain clear and smooth audio.
Step 1: Check Basic Connections
Check Connections: Ensure the speakers are correctly plugged into the computer.
Power: Make sure the speakers are turned on.
Volume: Check and adjust the volume settings on both the speakers and Windows.
Step 2: Update Audio Drivers
1). Using Driver Management Software
Driver Talent is an all-in-one solution for managing device drivers. It saves time and effort while avoiding the risk of downloading or installing incorrect drivers.
Click the download button to get the latest version of Driver Talent. After installation, open the software and click "Scan".
After scanning, it will show which drivers are not installed or need updating. Find the audio driver in the results list and click the "Download" button.
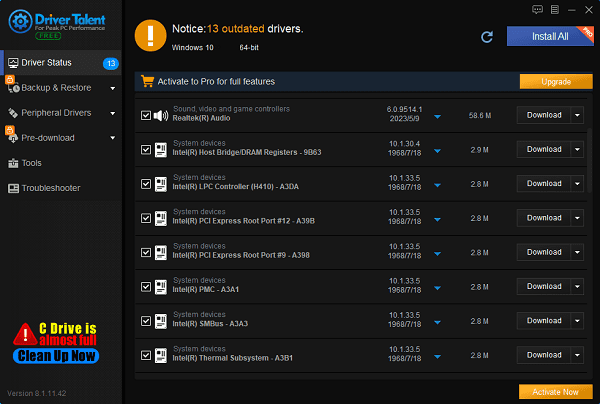
Once the update is complete, it is recommended to restart your computer to ensure the new driver takes effect.
2). Using Device Manager
Right-click the Start button and select "Device Manager".
Expand the section and right-click your audio device.
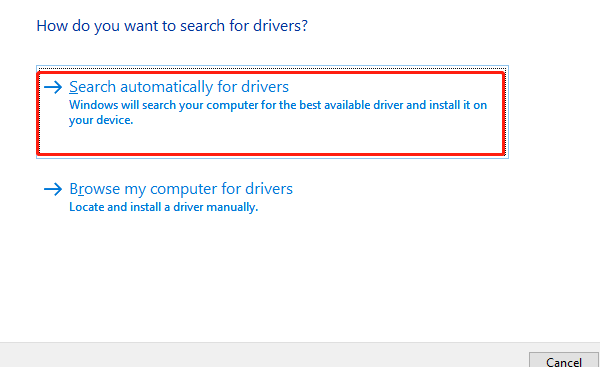
Select "Update driver", then choose "Search automatically for drivers".
Step 3: Check Sound Settings
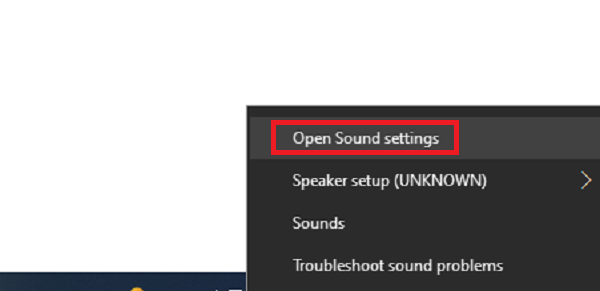
Right-click the Sound Icon: In the taskbar, right-click the sound icon and select "Open Sound settings".
Select Output Device: Ensure the correct output device (your speakers) is selected.
Volume Mixer: Open the volume mixer and ensure all related applications and system volumes are turned up and not muted.
Step 4: Run Audio Troubleshooter
Settings: Go to Settings > Update & Security > Troubleshoot.
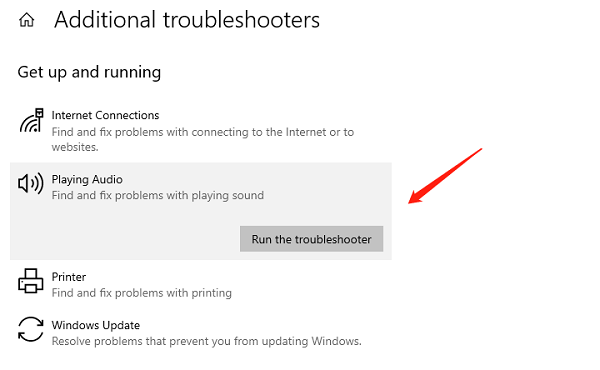
Additional Troubleshooters: Select "Playing Audio" and run the troubleshooter.
Step 5: Restart Windows Audio Service
Run Command: Press Win + R, type services.msc, and press Enter.
Windows Audio: Find "Windows Audio", right-click it, and select "Restart".
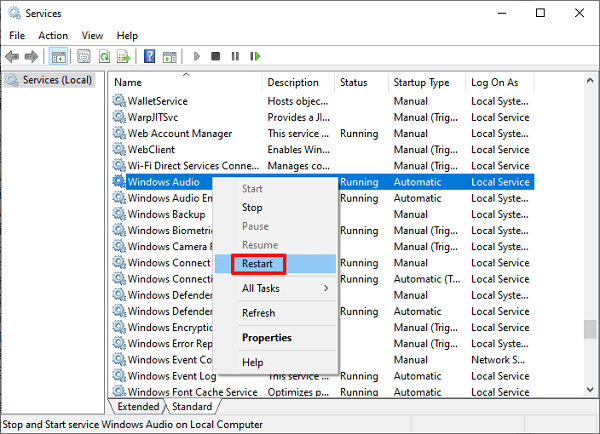
Dependency Services: In the "Windows Audio" properties, go to the "Dependencies" tab and ensure all dependent services are running.
Step 6: Set Default Playback Device
Sound Settings: Go to Control Panel > Hardware and Sound > Sound.
Playback Tab: In the "Sound" window, switch to the "Playback" tab. Right-click your speakers and select "Set as Default Device".
Step 7: Check Windows Updates
Settings: Go to Settings > Update & Security > Windows Update.
Check for Updates: Install any available updates and restart your computer.
Step 8: Check Sound Card
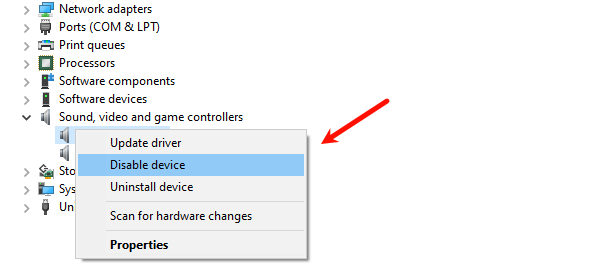
Device Manager: Open Device Manager and expand "Sound, video and game controllers".
Disable/Enable: Right-click your sound card, select "Disable device", then "Enable device".
Step 9: Test with Different Hardware
Replace Speakers/Headphones:
Try using different speakers or headphones to rule out hardware issues.
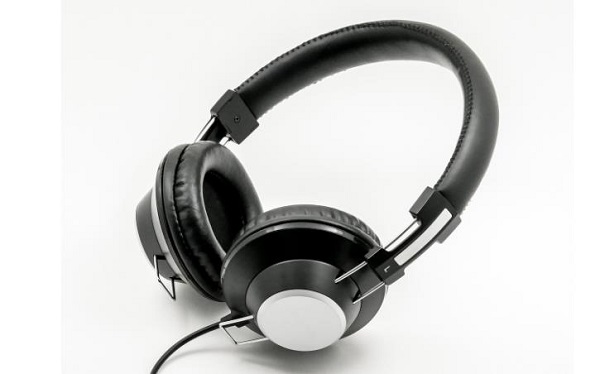
Connect the new speakers or headphones to your computer and see if they work properly.
If the issue persists after trying the above steps, consider deeper hardware issues or contact a professional technician for further inspection. Regularly checking and maintaining your audio devices and drivers can prevent similar problems and ensure a smooth multimedia experience.
See also:
Solutions for Fixing GTA 5 Not Launching Issues
How to Fully Utilize Your Graphics Card Performance
How to Resolve Sound Card Driver Conflicts
What to Do If Your Internet Speed is Always Slow
What to do if Win10 graphics driver installation fails and causes a black screen

|
ExplorerMax |

|
Driver Talent for Network Card | |
| Smart and advanced file explorer tool for Windows platforms | Download & Install Network Drivers without Internet Connection | |||
| 30-day Free Trial | Free Download |


