5 Ways to Resolve LogiLDA.dll Missing on Windows
Jan. 10, 2025 / Updated by Seraphina to Windows 10

Many Windows users encounter the "LogiLDA.dll missing" error, especially when launching programs or games. This article offers effective solutions to fix the issue and restore normal functionality.
1. Check for Driver Updates
Outdated or corrupted drivers may lead to system file issues, including missing DLL files. Regularly checking for driver updates is an effective way to resolve such problems. We recommend using Driver Talent to automatically detect and update drivers, saving time and avoiding the risk of downloading or installing incorrect drivers.
Click the download button to get the latest version of Driver Talent. After installation, open the software and click "Scan".
After scanning, it will display the drivers that are missing or need updating. Find the driver that needs updating and click the "Download" button.
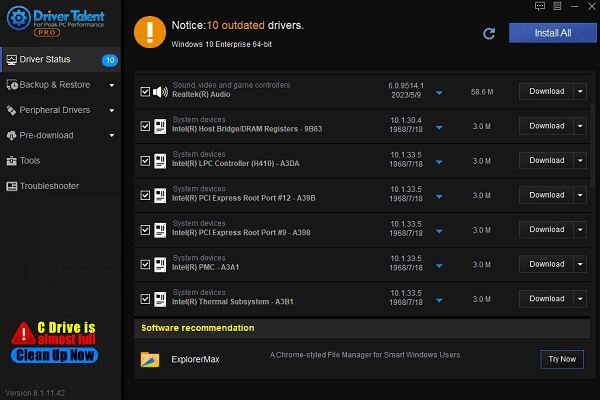
Once the update is complete, it is recommended to restart your computer to ensure that the updated drivers are applied.
2. Download and Replace the LogiLDA.dll File
Search for "LogiLDA.dll download" in your browser.
Choose a trusted DLL download website and make sure the DLL file comes from a reliable source.
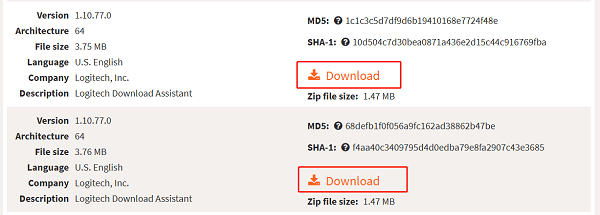
Once downloaded, copy the LogiLDA.dll file to the following directory:
C:\Windows\System32 (for 32-bit systems)
C:\Windows\SysWOW64 (for 64-bit systems)
If you encounter permission issues, right-click the folder, select "Run as Administrator", and paste the file.
Once done, restart your computer and check if the issue is resolved.
Tip: Only download DLL files from reliable sources to avoid installing malicious software or viruses.
3. Run the System File Checker Tool
Press Windows + S, type "Command Prompt", and select "Run as administrator".
In the command window, enter the following command: sfc /scannow
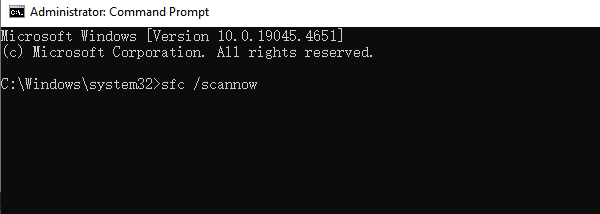
Press Enter, and the system will automatically scan and repair all system file issues.
After the scan is complete, restart your computer and check if the LogiLDA.dll issue has been resolved.
4. Delete the Logitech Download Assistant Registry Key
Press Windows + R to open the Run dialog.
Type "regedit" and press Enter to open the Registry Editor.
In the Registry Editor, navigate to the following path:
Computer\HKEY_LOCAL_MACHINE\SOFTWARE\Microsoft\Windows\CurrentVersion\Run
Find the "Logitech Download Assistant" key, right-click it, and select "Delete".
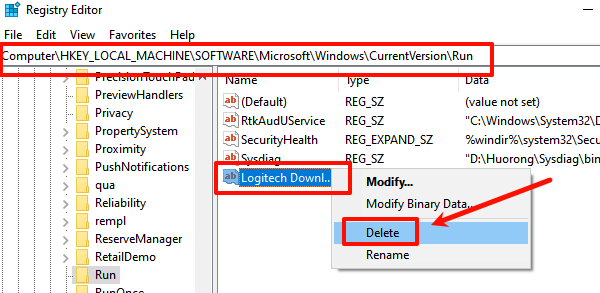
Close the Registry Editor and restart your computer.
5. Check for Malware Infections
Open "Windows Security" or "Windows Defender", and click "Virus & Threat Protection".
Select "Quick Scan" or "Full Scan". The system will start scanning your computer for potential malware or viruses.
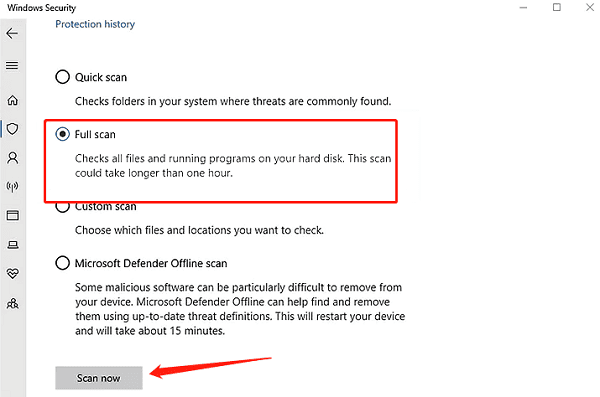
If any malware is detected during the scan, follow the prompts to repair or remove it.
Once the scan is complete, restart your computer and check if the LogiLDA.dll file has returned to normal.
These methods can help resolve the missing LogiLDA.dll issue and restore your Logitech devices' functionality. If the problem persists, contact technical support for further assistance.
See also:
6 Simple Ways to Fix Nvidia Driver Crashing
Effective Ways to Fix League of Legends Not Opening
How to Fix Overwatch 2 Not Launching
Fix the "Wireless Service Is Not Running" Windows 10
5 Ways to Fix WiFi Adapter Is Disabled on Windows 10

|
ExplorerMax |

|
Driver Talent for Network Card | |
| Smart and advanced file explorer tool for Windows platforms | Download & Install Network Drivers without Internet Connection | |||
| 30-day Free Trial | Free Download |


