How to Resolve a Disabled Wireless Network Adapter
Jul. 14, 2024 / Updated by Seraphina to Windows 10
When using a wireless network, the proper functioning of the wireless network adapter is crucial. However, sometimes the adapter may become disabled, preventing you from connecting to Wi-Fi. This article introduces several effective methods to fix this issue.
Method 1: Update the Wireless Network Driver
Outdated, corrupted, or incompatible wireless network drivers may cause the adapter to be disabled. It is recommended to use Driver Talent to automatically detect and update drivers, saving time and avoiding the risk of downloading or installing the wrong driver.
Click the download button to get the latest version of Driver Talent. After installation, open the software and click "Scan".
Once the scan is complete, it will show any drivers that need to be installed or updated. Find the wireless network driver in the results list and click the "Download" button.
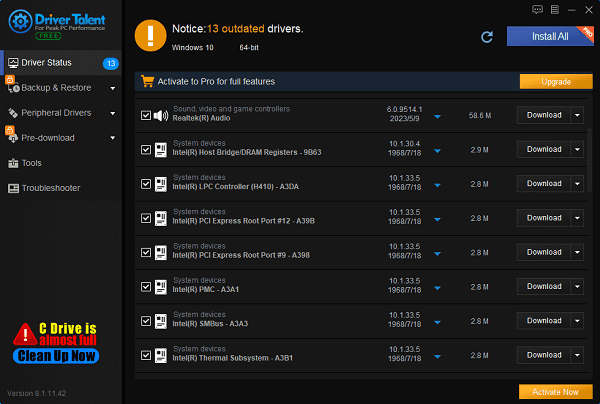
After updating, it is recommended to restart your computer to ensure the new driver works properly.
Method 2: Enable the Wireless Network Adapter via Device Manager
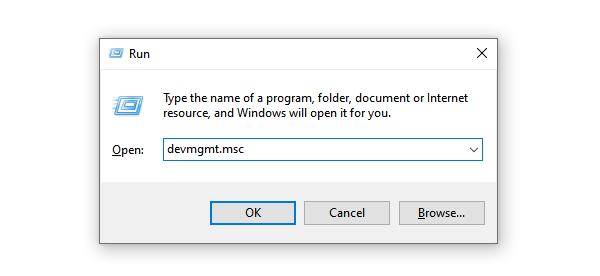
①. Press the Windows key + R simultaneously to open the Run dialog.
②. Type devmgmt.msc and press Enter. You will be prompted for permission; click "Yes" to open Device Manager.
③. In the Device Manager window, double-click "Network adapters" to expand the list.
④. Find the network adapter containing "wireless" in its name, right-click it, and select "Enable device".
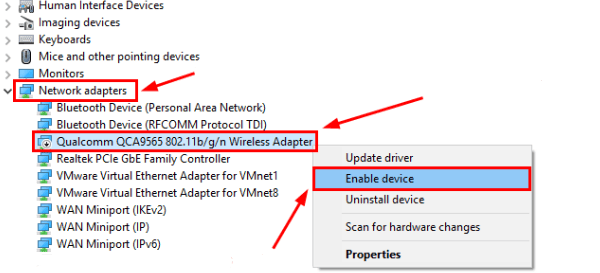
⑤. Disabled wireless network adapters usually have a downward arrow. This arrow will disappear once the adapter is enabled.
⑥. After enabling, check if you can connect to the internet via Wi-Fi. Normally, you should be able to surf the web after enabling the wireless network adapter.
Method 3: Enable the Wireless Network Adapter via Command Prompt
1). Rename the Wireless Network Adapter
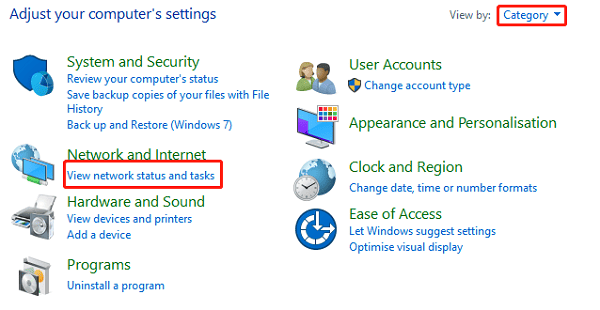
①. Open the Control Panel and set the view to "Category". Click "View network status and tasks".
②. On the left panel, click "Change adapter settings".
③. Right-click your wireless network adapter (usually gray with a signal icon), then select "Rename" and rename it to "Wi-Fi".
2). Open Command Prompt
①. Press the Windows key + R simultaneously to open the Run dialog.
②. Type cmd and press Ctrl, Shift, and Enter simultaneously to run Command Prompt as an administrator.
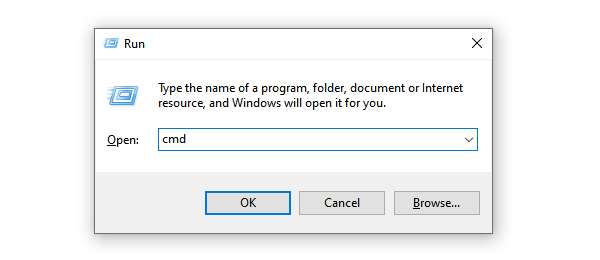
③. You will be prompted for permission; click "Yes" to run Command Prompt.
3). Enter Command
①. In Command Prompt, type the following command and press Enter: netsh interface set interface Wi-Fi enabled.
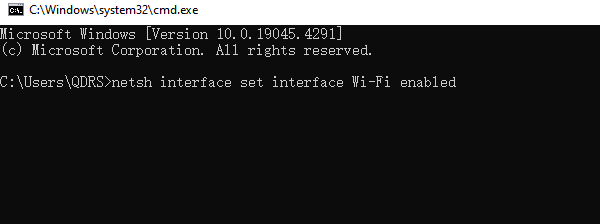
②. Wait a few seconds, and the wireless network adapter will be enabled.
Method 4: Check the Wireless Network Service Status
1). Open Services Manager
①. Press the Windows key + R, type services.msc, and press Enter.
2). Check Service Status
①. In the Services Manager window, find the "WLAN AutoConfig" service.
②. Right-click the service and select "Properties".
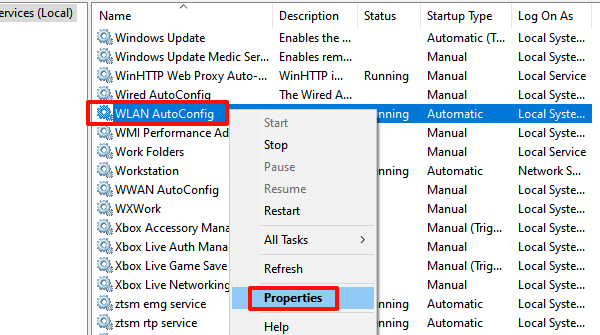
③. Ensure the startup type is set to "Automatic", then click the "Start" button if the service is not running.
④. Click "Apply" and "OK" to save changes.
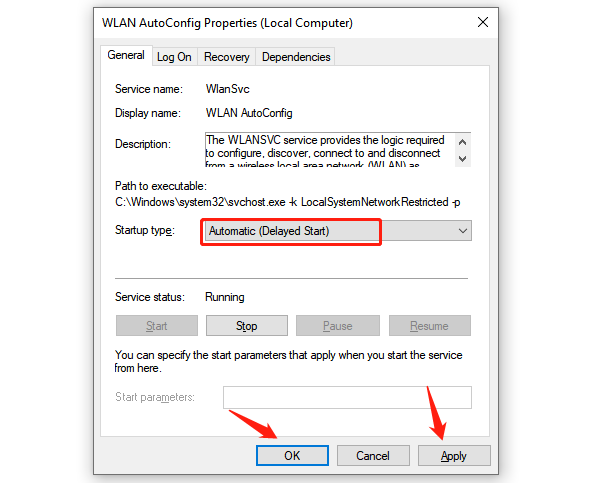
⑤. Restart your computer and check if you can connect to the internet via Wi-Fi.
Method 5: Reset Network Settings
1). Open Network Settings
①. Press the Windows key + I to open Settings.
②. Click "Network & Internet".
③. On the left panel, select "Status", then scroll down and click "Network reset".
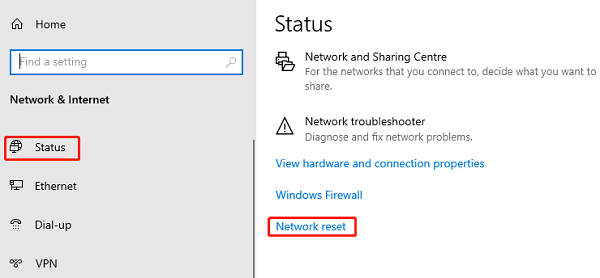
2). Reset Network
①. Click the "Reset now" button. The system will prompt you to confirm the operation; click "Yes".
②. Your computer will automatically restart and reset network settings.
3). Reconfigure Network
①. After restarting, reconfigure your wireless network connection, enter the Wi-Fi password, and connect to the network.
Method 6: Ensure the Wireless Network Switch is Enabled
1). Check Physical Switch
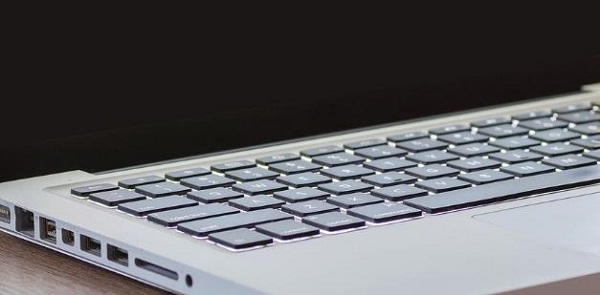
①. Check if your device has a physical switch, usually located on the side or front of the laptop. Ensure the switch is turned on.
2). Use Function Keys
①. Some laptops use function keys (such as F1-F12) to control wireless networks.
②. Look for the key with a wireless signal icon and press it simultaneously with the Fn key to enable the wireless network.
By following these methods, you should be able to fix a disabled wireless network adapter. If the problem persists, check the hardware or contact technical support. Hopefully, these methods help, and your wireless network connection runs smoothly.
See also:
How to Fix SteamVR Not Working Issues
6 Ways to Fix a Jumping Mouse Scroll Wheel
Guide to Fixing Network Adapter Issues on Windows
How to Resolve Windows 10 Installation Failure Issues
Guide to Fixing Microphone Not Working on Windows 11

|
ExplorerMax |

|
Driver Talent for Network Card | |
| Smart and advanced file explorer tool for Windows platforms | Download & Install Network Drivers without Internet Connection | |||
| 30-day Free Trial | Free Download |


