How to Fix Critical Process Died in Windows 10
Nov. 11, 2024 / Updated by Seraphina to Windows 10

When using Windows 10, users may encounter the "Critical Process Died" error. This article provides effective solutions to help you fix this issue and restore your computer's normal operation.
1. Update Drivers
Outdated or incompatible drivers can cause the "Critical Process Died" error. Updating drivers for the graphics card, network adapter, and other critical hardware can resolve driver-related issues. Using Driver Talent for automatic driver detection and updates can save time and avoid the risk of incorrect driver installation.
Download the latest version of Driver Talent, install it, open the software, and click "Scan".
After scanning, it will display any missing or outdated drivers. Find the drivers needing updates and click the "Download" button.
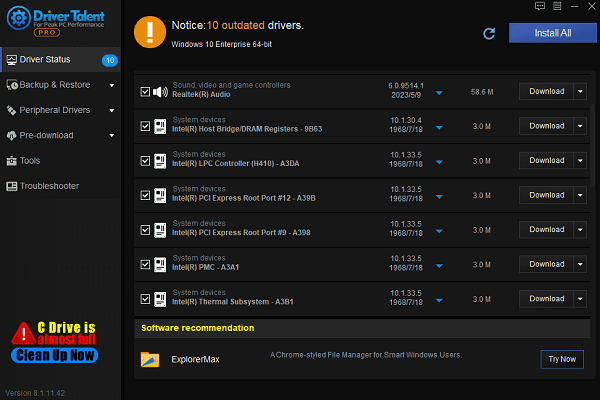
After updating, restart your computer to ensure the new drivers are fully effective.
2. Start Windows in Safe Mode
Click the "Start" button in the lower-left corner, then click the power icon. While holding the Shift key, click "Restart" to enter advanced startup options.
In the "Choose an Option" menu, select "Troubleshoot" > "Advanced Options" > "Startup Settings" > "Restart".
After restarting, a list of startup settings will appear. Press F4 to enter "Safe Mode" or F5 for "Safe Mode with Networking".
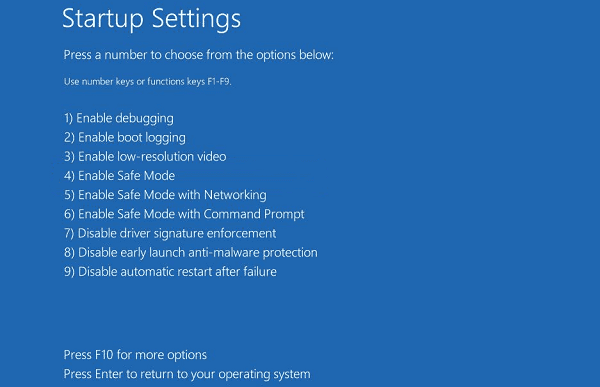
In Safe Mode, try uninstalling recently installed programs or running troubleshooting tools to check if the problem is resolved.
3. Perform a Clean Boot
Disable startup items:
Press Windows + R, type "msconfig", and press Enter to open the System Configuration window.
In the System Configuration window, go to the "Startup" tab and click "Open Task Manager".
In Task Manager, disable all startup items. After disabling them, close Task Manager and return to the System Configuration window.
Disable non-Microsoft services:
In the System Configuration window, go to the "Services" tab, check "Hide all Microsoft services", then click "Disable All".
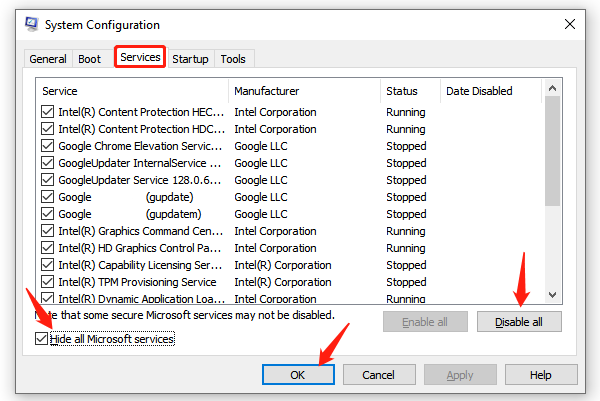
Click "OK" and restart your computer. This will start the computer with a minimal setup, which helps identify issues caused by startup programs or services.
4. Run the System File Checker Tool
Type "Command Prompt" in the search box and open it as an administrator.
In the command window, enter the following command and press Enter: sfc /scannow
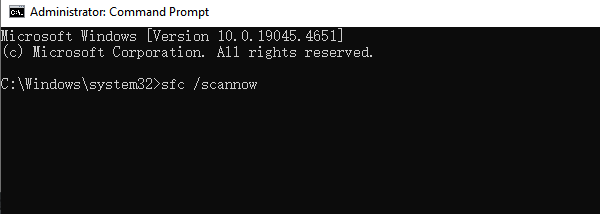
The system will scan and repair any corrupted system files. This process may take some time, so please wait patiently.
After the scan, the Command Prompt will display the results. If issues were found and repaired, restart the computer to check if the problem is resolved.
5. Check Hard Drive Health
Type "Command Prompt" in the search box and open it as an administrator.
Enter the following command and press Enter: chkdsk C: /f /r

This command will scan and repair errors on the hard drive, with /f to fix errors and /r to locate and repair bad sectors.
If prompted to schedule a scan at the next restart, enter "Y" and restart the computer. The hard drive scan may take some time; once completed, check if the drive is functioning properly.
6. Run the DISM Command
Type "Command Prompt" in the search box and open it as an administrator.
Enter the following command and press Enter:
DISM /Online /Cleanup-Image /RestoreHealth
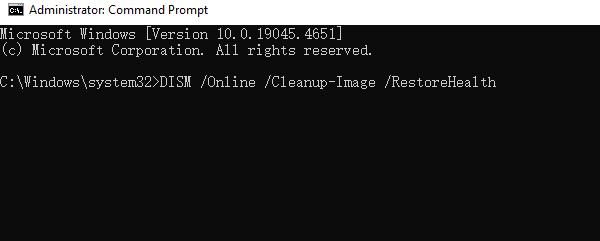
This command will fix issues in the Windows image, which may take some time. Wait for the command to finish executing.
7. Uninstall Recent Windows Updates
Click the "Start" button and select the "Settings" icon.
In Settings, go to "Update & Security" > "Windows Update", then click "View Update History".
In "Update History", click "Uninstall Updates". This will display a list of recent updates. Select and uninstall updates that might be causing the issue.
After uninstalling, restart the computer to check if the problem is resolved.
8. Perform a System Restore
Press Windows + R, type "rstrui", and press Enter to open the System Restore window.
In the System Restore window, select a restore point from before the issue occurred. If no suitable restore points are available, you may need to enable System Restore for future use.
After selecting a restore point, confirm the restore settings and click "Finish" to begin the process.
The system will restart and automatically restore, which may take some time. Once completed, check if the system is functioning normally.
By following these steps, you can effectively resolve Windows system errors and restore system functionality. If the issue persists, consider reinstalling the operating system or contacting technical support.
See also:
How to Fix HP Printer Offline Issues
How to Fix Windows 10 Stuck on Boot Screen
6 Ways to Fix Mouse Double-Clicking Issue
8 Methods to Fix Can't Connect to WiFi
Fix Laptop Touchpad Not Working

|
ExplorerMax |

|
Driver Talent for Network Card | |
| Smart and advanced file explorer tool for Windows platforms | Download & Install Network Drivers without Internet Connection | |||
| 30-day Free Trial | Free Download |


