How to Fix Audio Device Disabled Issues on Windows 10
Jul. 18, 2024 / Updated by Seraphina to Windows 10
Encountering disabled audio devices on Windows 10 can be frustrating for users. This article will introduce several effective methods to help you re-enable disabled audio devices and restore normal audio functionality on your computer.
Method 1: Update Audio Drivers
Outdated, corrupted, or incompatible audio drivers can cause your computer's audio to malfunction. It is recommended to use Driver Talent to automatically detect and update drivers, saving time and avoiding the risk of downloading or installing the wrong drivers.
Click the download button to get the latest version of Driver Talent. After installation, open the software and click "Scan".
After the scan is complete, it will show which drivers are missing or need updating. Find the audio driver in the results list and click the "Download" button.
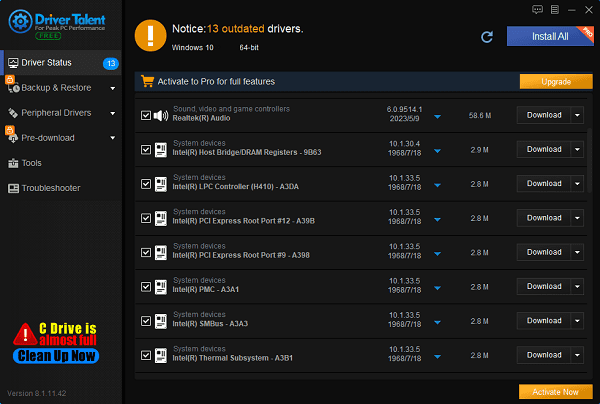
Once the update is complete, it is recommended to restart your computer to ensure the new driver takes effect properly.
Method 2: Check Audio Device Settings
Press Windows key + R, type mmsys.cpl, and press Enter.
In the "Playback" tab, find your audio device, right-click it, and select "Enable".
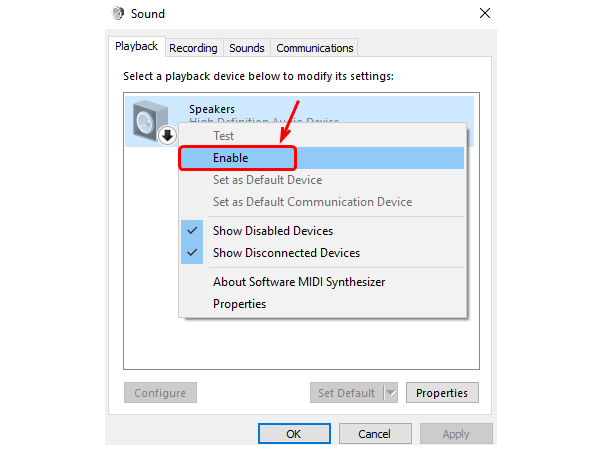
Switch to the "Recording" tab and ensure that your microphone or other recording devices are also enabled.
Method 3: Check Device Manager
Press Windows key + X and select "Device Manager".
Expand the "Sound, video and game controllers" category and find your audio device driver.
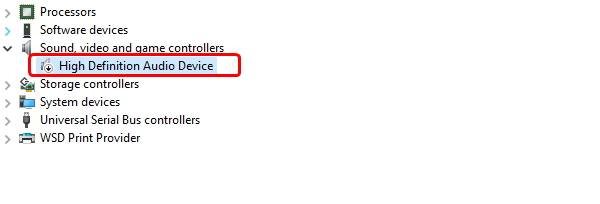
If there is a downward arrow next to the device, it means the audio device driver is disabled. Right-click the device and select "Enable Device".

If there is a yellow exclamation mark on the device, right-click it and select "Update Driver".
Method 4: Check Windows Audio Services
Press Windows key + R, type services.msc, and press Enter.
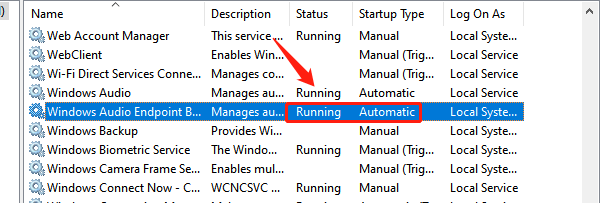
In the list of services, find "Windows Audio" service, right-click it, and select "Restart".
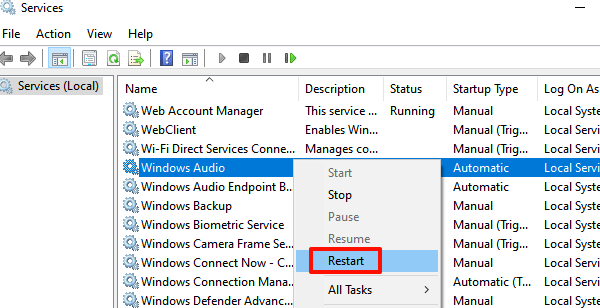
Ensure that the "Windows Audio Endpoint Builder" service is also running and set to "Automatic".
Method 5: Run Command Prompt
Press Windows key + X simultaneously on your keyboard and select "Command Prompt (Admin)".
When the User Account Control (UAC) prompt appears, click "Yes" to continue.
In the Command Prompt window, type the following commands:
net localgroup Administrators /add networkservice
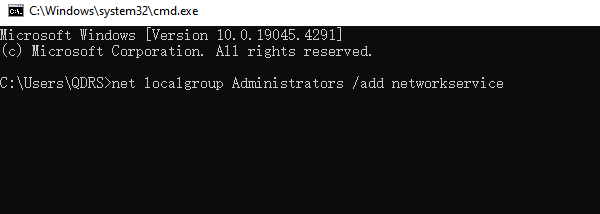
net localgroup Administrators /add localservice
exit
Press Enter after each command.
Check if your audio is restored.
Method 6: Run Audio Troubleshooter
Press Windows key + I to open the "Settings" app.
Select "Update & Security", then click "Troubleshoot".
On the "Troubleshoot" page, find and run the "Playing Audio" troubleshooter.
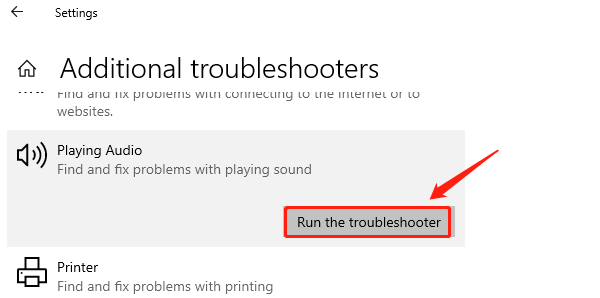
Follow the on-screen instructions to complete the troubleshooting process.
By following these steps, you should be able to effectively resolve the issue of disabled audio devices on Windows 10 and restore normal audio functionality on your computer. Hopefully, these methods help you, and your audio devices work smoothly.
See also:
What happens if you don't update drivers and how to fix it
Guide to AMD Driver Installation Error 202 Causes and Solutions
What is a motherboard driver and how to download
Five methods to disable system automatic updates win10
Six Ways to install Bluetooth on my PC

|
ExplorerMax |

|
Driver Talent for Network Card | |
| Smart and advanced file explorer tool for Windows platforms | Download & Install Network Drivers without Internet Connection | |||
| 30-day Free Trial | Free Download |


