Steps to Disable Automatic Updates in Windows 10
Oct. 29, 2024 / Updated by Seraphina to Windows 10

Windows 10's automatic update feature can disrupt your work and affect performance at inconvenient times. This article outlines several methods to disable automatic updates, helping you manage system updates more effectively.
Routine Computer Maintenance
Timely driver updates can prevent system instability caused by outdated or damaged drivers. It's recommended to use Driver Talent to automatically detect and update drivers, saving time and avoiding the risk of downloading incorrect drivers.
Click the download button to get the latest version of Driver Talent, install it, and open the software. Click "Scan" after installation.
After scanning, it will display any drivers that are not installed or need updating. Find the required driver in the list and click the "Download" button.
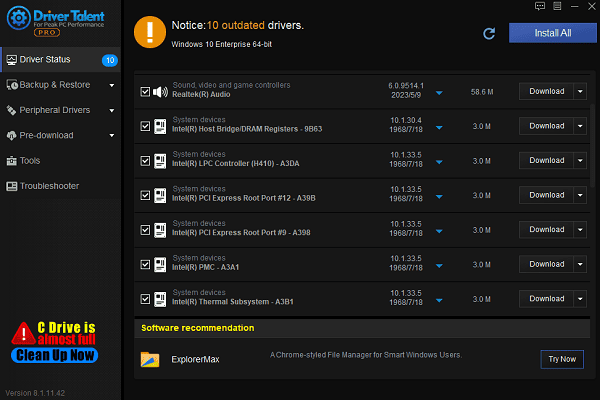
After updating, it's advisable to restart your computer to ensure the new drivers take effect.
Solution 1: Disable Automatic Updates via Settings
Click the "Start" menu, select "Settings" > "Update & Security" > "Windows Update".
Click "Pause updates" and choose the number of days to pause. After the pause period expires, you can choose to extend it.
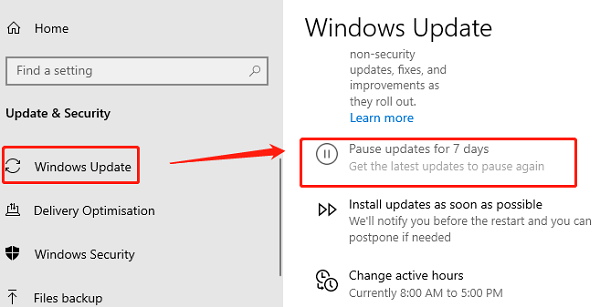
During the pause, the system will not automatically update, but you can manually check for and install necessary updates.
Solution 2: Disable Windows Update Service
Press Win + R, type "services.msc", and press Enter.
In the services list, find "Windows Update", right-click, and select "Properties".
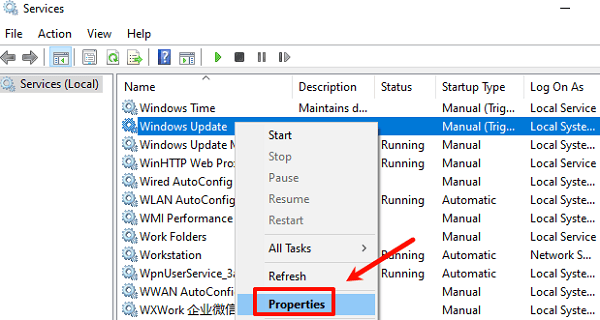
Click the "Stop" button under "Service Status".
Change the "Startup type" to "Disabled", click "Apply", and confirm. This will prevent the Windows Update service from starting automatically until you re-enable it.
Solution 3: Use Group Policy Editor
Press Win + R, type "gpedit.msc", and press Enter.
In the Group Policy Editor, expand "Computer Configuration" > "Administrative Templates" > "Windows Components" > "Windows Update".
Double-click on "Configure Automatic Updates", select "Disabled", and then click "Apply" and confirm. This will turn off the automatic update feature.
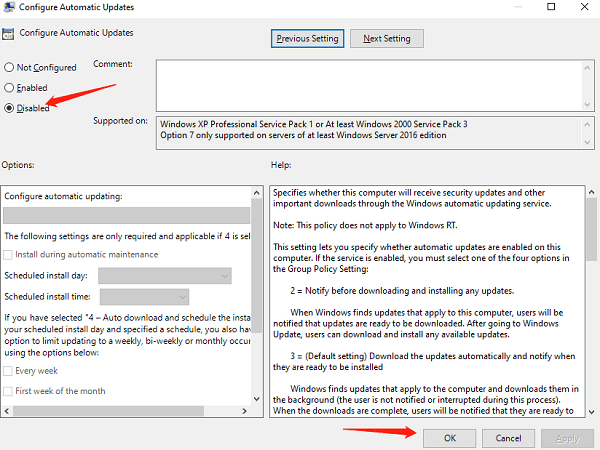
You can manually check for and install updates whenever necessary.
Solution 4: Modify the Registry
Press Win + R, type "regedit", and press Enter.
Expand the path:
"HKEY_LOCAL_MACHINE\SOFTWARE\Policies\Microsoft\Windows\WindowsUpdate\AU".
If this path doesn't exist, right-click "Windows", create a new key named "WindowsUpdate", then create another key under it named "AU".
In the AU folder, right-click in a blank area, create a new DWORD (32-bit) value, name it "Windows Update", and set its value to "1".
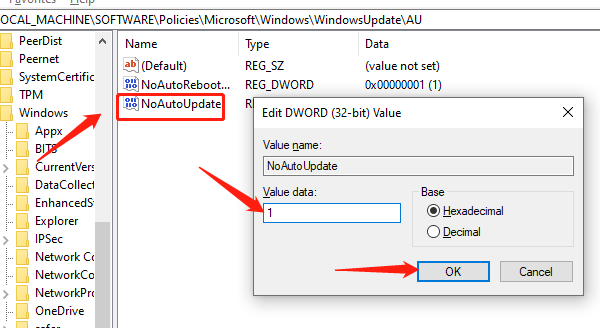
Restart your computer to apply the changes. This will prevent the system from automatically updating.
Solution 5: Set Your Network Connection to Metered
Click "Settings" > "Network & Internet" > "Wi-Fi".
Click on the connected Wi-Fi name, find the "Metered connection" option, and turn on "Set as metered connection".
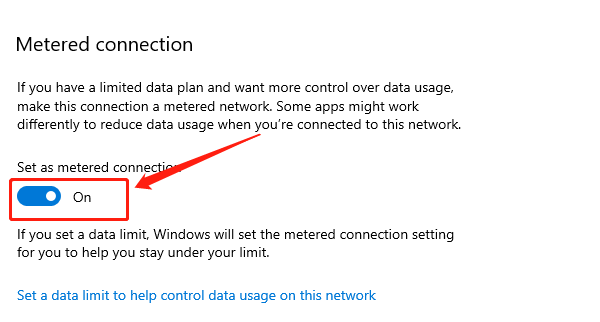
Enabling this option will reduce automatic updates and background activities, prompting updates only when necessary.
These methods allow you to control Windows 10 automatic updates, minimizing unnecessary background operations. To restore automatic updates, just re-enable the service or revert the settings.
See also:
5 Ways to Restore Keyboard Input on Your Computer
What happens if you install the wrong graphics driver
DRAGON BALL: Sparking! ZERO Officially Launches on October 11
How to Fix "No Audio Output Device is Installed" on Your Computer
How to Fix Windows 10 Update Error Code 0x80070643

|
ExplorerMax |

|
Driver Talent for Network Card | |
| Smart and advanced file explorer tool for Windows platforms | Download & Install Network Drivers without Internet Connection | |||
| 30-day Free Trial | Free Download |


