Network drivers are software that enable computers to properly identify, control, and communicate with network adapters. Specifically, network drivers are responsible for translating network requests sent by the operating system into commands understandable by the adapter and converting data from the adapter into a format that the operating system can handle. In essence, network drivers act as translators between the computer and the network adapter, ensuring effective communication and collaboration between them.
Contents:
1. Wireless network driver for Windows 10
2. Steps to Install Network Drivers
2). System Information (Windows)
1. Wireless network driver for Windows 10:
"Wireless network driver for Windows 10" refers to the software required to enable and manage wireless network functionality on a computer running the Windows 10 operating system. This driver facilitates communication between the computer's operating system and the wireless network adapter, allowing the computer to connect to and interact with wireless networks.

The specific driver needed depends on the brand and model of the wireless network adapter installed on the computer. Typically, users can obtain the appropriate drivers from the manufacturer's website or through Windows updates. Once installed, this driver enables the computer to detect, connect to, and communicate through wireless networks, providing access to the internet and other network resources.
2. Steps to Install Network Drivers:
1). Obtaining the Driver:
Identify the model and manufacturer of your network adapter. You can find this information in the Device Manager (Windows) or System Information (macOS).
Visit the manufacturer's official website or your computer manufacturer's website to find the latest drivers for your specific network adapter model and operating system. Download these drivers and save them to your computer.
2). Running the Installer:
Open the downloaded driver installation file (usually an ".exe" file or ".pkg" file).
Double-click to run the installer. On Windows, you may need to provide administrator privileges to run the installer.
3). Follow the Installation Wizard:
The installer will launch an installation wizard. Follow the prompts to complete the installation process step by step.
During the installation process, you may need to accept license agreements, choose installation locations, and configure other settings.
4). Completing the Installation:
After completing the installation wizard, wait for the installer to finish all necessary operations.
Upon completion, you may be prompted to restart your computer to allow the changes to take effect. Follow the prompts to restart your computer.
5). Verifying the Installation:
After restarting, verify that the installation was successful. You can check whether the network adapter is displayed without any warning symbols in Device Manager (Windows) or System Information (macOS).
6). Testing the Network Connection:
After updating the drivers, connect to your network and ensure that your internet connection is functioning properly.
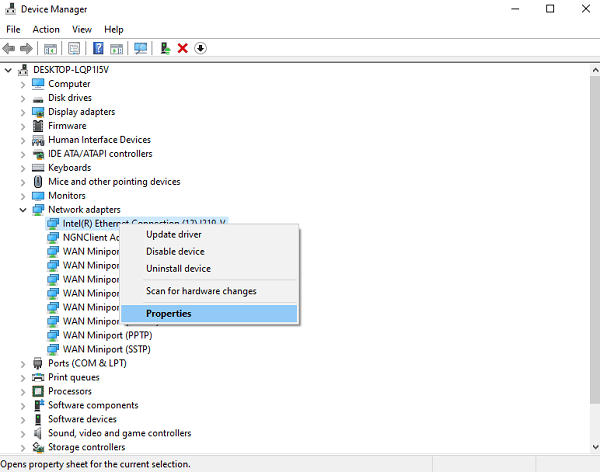
Right-click the "Start" button and select "Device Manager" from the context menu.
In the Device Manager window, expand the "Network adapters" category to view the list of network adapters installed on your computer.
Locate your network adapter from the list. Right-click it and select "Properties".

In the Properties window, go to the "Driver" tab. Here, you'll find information about the driver provider, driver date, and driver version.

2). System Information (Windows):
Press "Win + R" keys to open the Run dialog box.
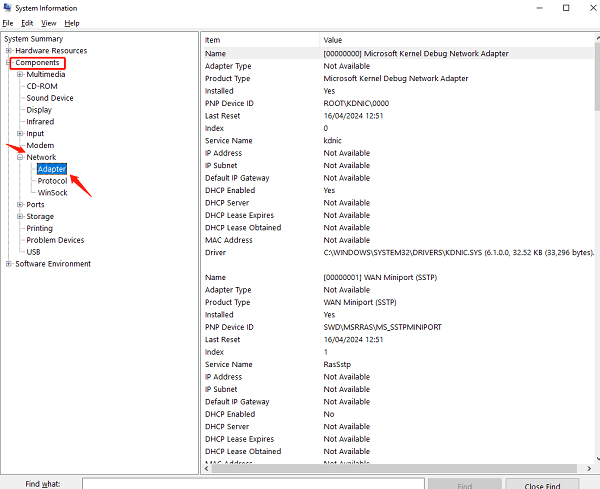
Type "msinfo32" and press "Enter" to open the System Information window.

In the System Information window, expand the "Components" category from the left pane and select "Network".
In the right pane, you'll see detailed information about your network adapter, including its name, manufacturer, driver provider, and driver version.

Open a terminal window.
Enter the command "lspci -v | grep -i network" and press "Enter". This command will list all network adapters installed on your system along with their details, including the driver in use.
Click the Apple menu and select "About This Mac".
In the "Overview" tab, click "System Report".
In the left sidebar, navigate to "Network" under the "Hardware" section.
In the right pane, you'll see information about your network adapter, including its name, type, and driver.
1). Identifying Your Network Adapter:
Determine the model and manufacturer of your network adapter. You can find this information in Device Manager (Windows) or System Information (macOS), as explained earlier.
2). Downloading the Latest Drivers:
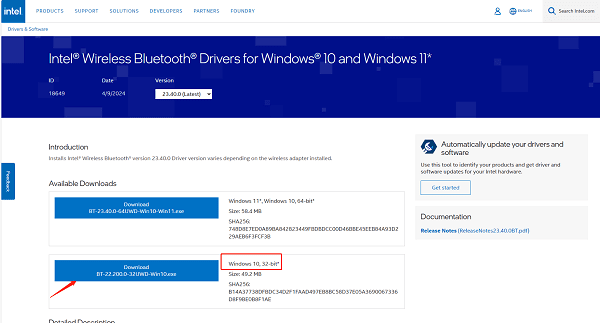
Windows: Visit the website of the network adapter manufacturer or your computer's manufacturer's website. Look for the support or downloads section and locate the drivers for your specific network adapter model and operating system. Download the latest version of the drivers.

macOS: Check for updates through "System Preferences". Click on the Apple menu, then go to "System Preferences" > "Software Update" to check for any available updates, including network driver updates.
3). Installing the Drivers:
Windows: After downloading the drivers, locate the downloaded file, usually in the "Downloads" folder, and double-click it to run the installer. Follow the on-screen instructions to complete the installation process.
macOS: Follow the prompts to install any available updates through the "Software Update" section in "System Preferences".
4). Restarting Your Computer:
After the installation is complete, restart your computer to ensure that the changes take effect.
5). Verifying the Installation:
After restarting, you can verify that the network drivers have been updated by checking Device Manager (Windows) or System Information (macOS) to confirm that your network adapter is listed without any warning symbols.
6). Testing the Network Connection:
Once the drivers are updated, connect to your network to ensure that your internet connection is working properly.
7). Automatic Update Tools (Optional):
It is recommended to use "Driver Talent" software for a one-click scan of your computer, which scans your system to find outdated drivers and automatically downloads and installs the latest versions. After installing the updates, restart your computer to ensure that the new network card driver is working properly.

The above is a guide on how to install network drivers and find network card drivers. I hope it's helpful to everyone. If you encounter issues with network cards, graphics cards, Bluetooth, sound card drivers, etc., you can use "Driver Talent" to detect and repair them. Additionally, Driver Talent supports driver downloads, installations, backups, and more, providing flexible driver management.
See also:
Is it essential to update computer drivers
Steps to clean up a full C drive on the computer
How to Solve the Issue of Keyboard Lights Not Turning On


