
Many Windows 10 users encounter error code 0x80072F8F during updates. This article offers solutions to help resolve the issue.
1. Update Device Drivers
Outdated or corrupted drivers can cause Windows 10 users to experience error code 0x80072F8F. Checking and updating device drivers promptly can help resolve this issue. We recommend using Driver Talent to automatically detect and update drivers, saving time and avoiding the risk of downloading or installing incorrect drivers.
Click the download button to get the latest version of Driver Talent. After installation, open the software and click "Scan".
Once the scan is complete, a list of missing or outdated drivers will appear. Find the driver that needs to be updated and click the "Download" button.
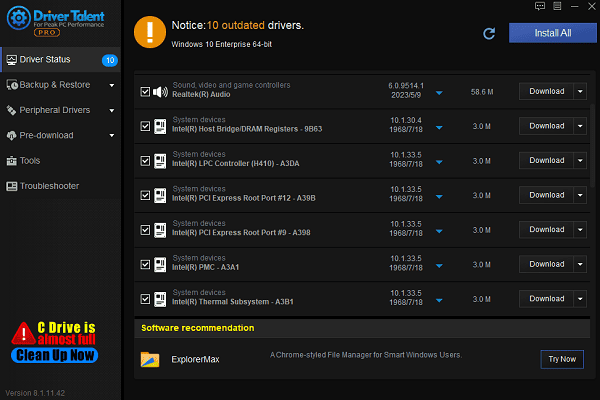
After updating, it is recommended to restart your computer to ensure the updated drivers are applied.
2. Install Root Certificate Updates
Press Windows + I to open the Settings page and select "Update & Security".
On the "Windows Update" page, click "View update history".
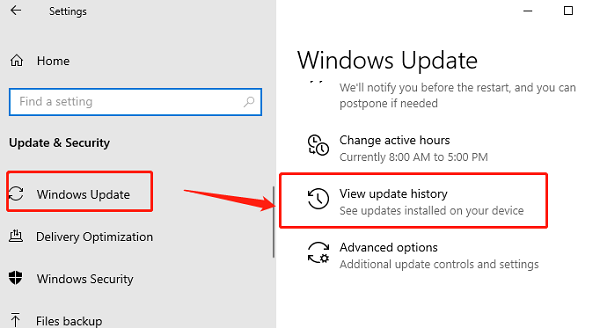
If there are any Root certificate updates, download and install them. If not, you can try manually downloading the root certificate updates from the official Microsoft website and install them.
3. Check Network Connection
Ensure that your computer is connected to a stable network (either Wi-Fi or wired connection).
Open a browser and visit a webpage to confirm if your internet connection is working properly.
If the network connection is unstable, try restarting your router or use a wired connection to improve stability.
4. Check Date and Time Settings
Right-click the time area at the bottom right corner of the taskbar and select "Adjust date/time".
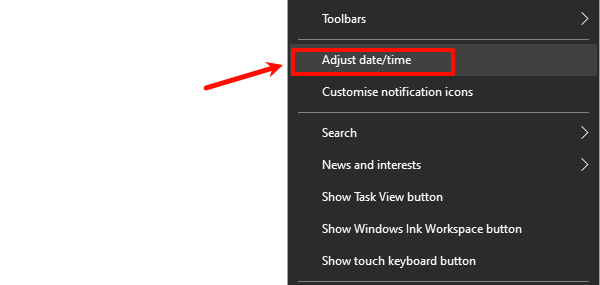
Ensure that the "Set time automatically" feature is enabled.
If it doesn't automatically sync, manually adjust the date and time to match the actual time.
Go back to the settings and click Sync now to check if the time is correctly synchronized.
5. Modify Registry Value Data
Press Windows + R, type "regedit", and press Enter to open the Registry Editor.
Navigate to the following path:
HKEY_LOCAL_MACHINE/SOFTWARE/Microsoft/Windows/CurrentVersion/Setup/OOBE
In the right window, find the "MediaBootInstall" entry, right-click on it, and select "Modify".
Change its value from 1 to 0, then click "OK".
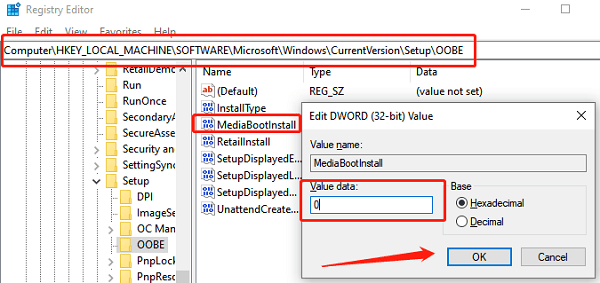
Close the Registry Editor and restart your computer.
Open CMD as Administrator and run the following command: slmgr /rearm
If the system shows the "Command completed successfully" message, click "OK" and restart your system to apply the changes.
6. Use System File Checker (SFC)
Press Windows + S, type "Command Prompt", and select "Run as Administrator".
In the command window, type the following command: sfc /scannow
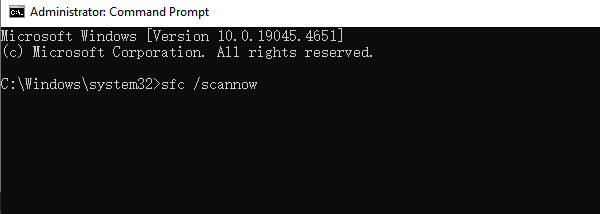
Press Enter to allow the system to automatically scan and repair corrupted system files.
After the scan is complete, restart your computer and try updating again.
7. Run Windows Update Troubleshooter
Press Windows + I to open "Settings".
Select "Update & Security", then click "Troubleshoot".
Choose "Windows Update", then click "Run the troubleshooter".
Follow the wizard to complete the troubleshooting process, and the system will automatically detect and fix any update issues.
Follow these steps to fix error code 0x80072F8F. If the problem continues, contact Microsoft support for help.
See also:
How to Fix Windows 10 Wireless Mouse Not Working
Quick Fix for Nvidia Driver Installation Failed Error
Fix Missing Network Adapter on Windows 10


