Some Windows 10 users may encounter the "DirectX 12 not supported" error while using their computers. This can result in games failing to launch, decreased graphics performance, or limited software functionality. This article provides detailed solutions to help you successfully enable DirectX 12.
1. Check for Driver Updates
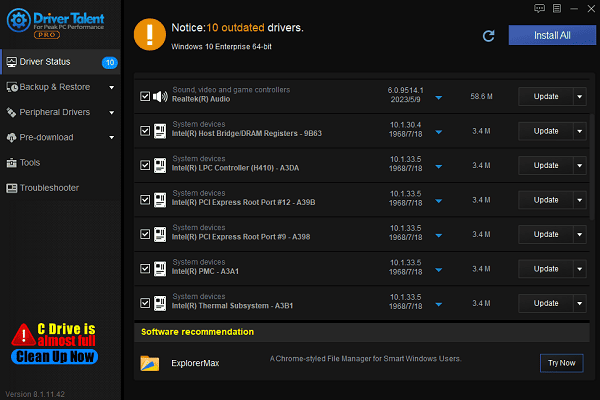
Graphics drivers are crucial for ensuring DirectX 12 functions properly. Outdated drivers may cause DirectX 12 to be unavailable. Checking and installing the latest graphics driver can effectively resolve this issue. It is recommended to use Driver Talent to automatically detect and update drivers, saving time and reducing the risk of downloading or installing incorrect drivers.
Click the download button to get the latest version of Driver Talent, install and open the software, then click "Scan".
After the scan is complete, a list of outdated or missing drivers will be displayed. Find the NVIDIA driver in the results list and click "Update".

Once the update is complete, restart your computer to ensure the new driver takes effect.
2. Check If Your GPU Supports DirectX 12
Press Win + R, type "dxdiag", and hit Enter.
Under the System tab, locate "DirectX Version". If it shows DirectX 12, your system supports it.
Under the "Display" tab, check "Driver Model". If it shows WDDM 2.0 or higher, your GPU supports DirectX 12.
If your GPU only supports DirectX 11 or lower, you may need to upgrade to a DirectX 12-compatible graphics card.
3. Use the DirectX Repair Tool
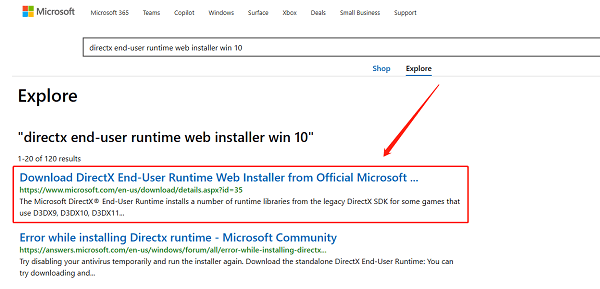
Visit the Microsoft website, download, and install the "DirectX End-User Runtime Web Installer".

During installation, the tool will automatically scan your system, detect missing files or outdated versions, and fix related issues.
Once installed, follow the on-screen instructions, select the "Repair" option, and let the tool automatically fix any DirectX-related issues.
After completion, restart your computer and check if DirectX 12 is properly enabled.
4. Modify Game Launch Options
Open the game launcher or settings, and look for "Graphics" or "Display" options.
If the game allows selecting a DirectX version, choose "DirectX 12".
If no option is available, try adding command-line parameters to the game's launch options.
For Steam games:
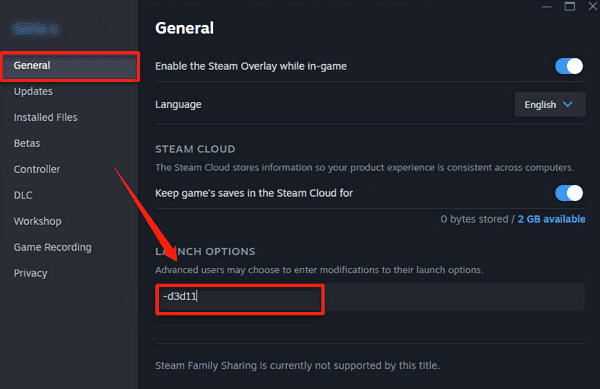
Right-click on the problematic game and select "Properties".
Under the General tab, find the Launch Options box and enter one of the following commands:
-d3d11 (for DirectX 11)
-vulkan (for Vulkan API)

You can enter one or both commands, separating them with a space (e.g., -d3d11 -vulkan).
Save the settings and restart the game to check if DirectX 12 is enabled.
5. Check for Windows Updates
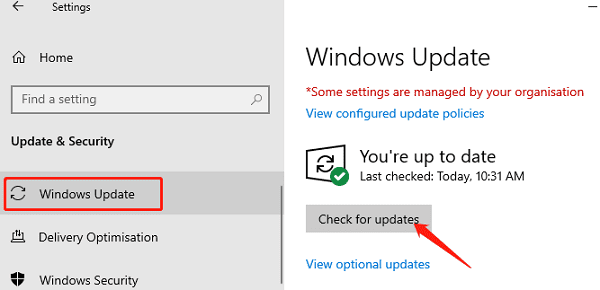
Press Win + I to open Settings, then go to "Update & Security".
Click "Check for updates"—if updates are available, Windows will automatically download and install them.

Restart your computer after the updates are complete.
Install the Latest DirectX Version:
Sometimes, DirectX updates do not install automatically, so you may need to manually download and install the latest version.
Visit the DirectX download page and download the latest installer.
Follow the installation wizard and restart your computer to ensure all updates take effect.
By following these steps, you should be able to successfully enable DirectX 12 and enjoy smoother gameplay and improved graphics performance. If the issue persists, consider checking hardware compatibility or contacting the game developer for support.
See also:
Effective Ways to Fix Computer Speakers Not Working
How to Fix Microphone Not Working on Windows 11
6 Ways to Resolve LogiLDA.dll Missing on Windows


