NVIDIA applications failing to run on Windows 10 can affect GPU settings, game optimization, and driver updates. This article provides several effective solutions to help restore the program's functionality.
1. Update NVIDIA Graphics Drivers
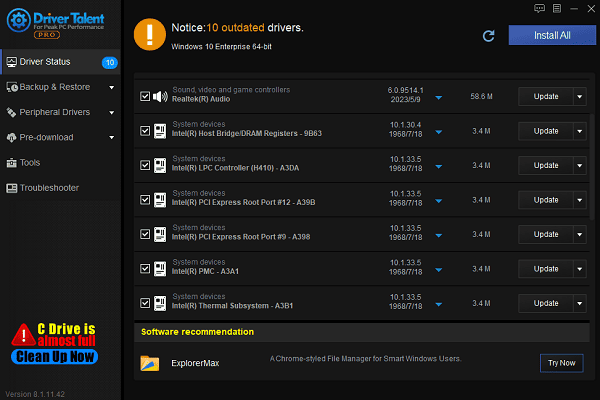
Outdated or corrupted drivers are one of the main reasons why NVIDIA applications fail to run properly. Updating your drivers can effectively resolve this issue. Using Driver Talent is recommended, as it automatically detects and updates drivers, saving time and reducing the risk of installing incorrect drivers.
Click the download button to get the latest version of Driver Talent, install and open the software, then click "Scan".
After the scan is complete, the software will list missing or outdated drivers. Locate the NVIDIA graphics driver in the results and click "Update".

Once the update is complete, restart your computer to ensure the new drivers take effect.
2. Run as Administrator
Locate the NVIDIA application you want to run (e.g., GeForce Experience).
Right-click the application icon and select "Run as administrator".
If the application launches successfully, you can enable administrator mode permanently:
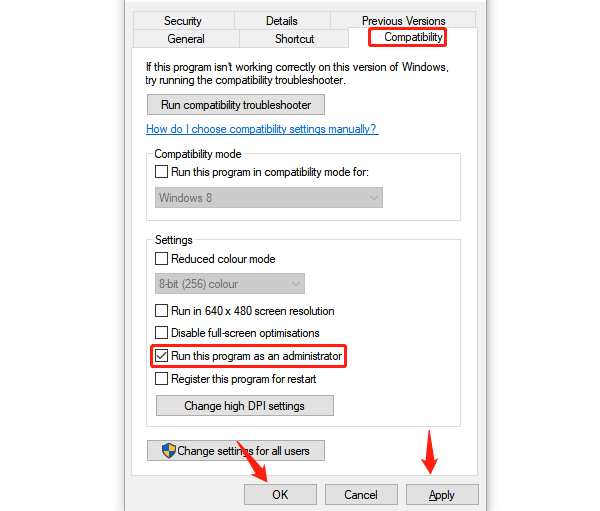
Right-click the application icon, select "Properties".
Go to the "Compatibility" tab, and check "Run this program as an administrator".

3. Check NVIDIA Services
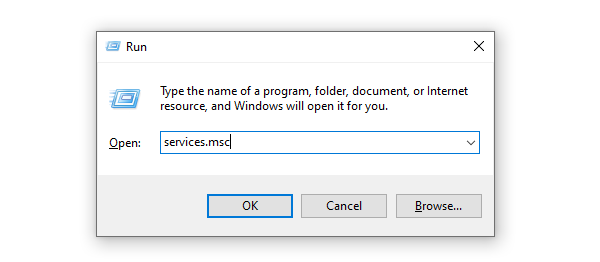
Press Win + R, type "services.msc", and press Enter to open the Services Manager.

Locate the following NVIDIA-related services:
NVIDIA Display Container LS
NVIDIA Telemetry Container
NVIDIA LocalSystem Container
Ensure these services show "Running" under the Status column. If not, right-click the service and select "Start".
If the services are running but the application still does not work, try right-clicking each service and selecting "Restart".
4. Reinstall the NVIDIA Application
Press Win + X and select "Apps and Features".
Find NVIDIA GeForce Experience or any other related application in the list, click it, and select "Uninstall".
After uninstallation, visit the official NVIDIA website to download the latest version of GeForce Experience or the necessary NVIDIA drivers.
Run the installer and follow the on-screen instructions to complete the installation.
5. Check for Windows Updates
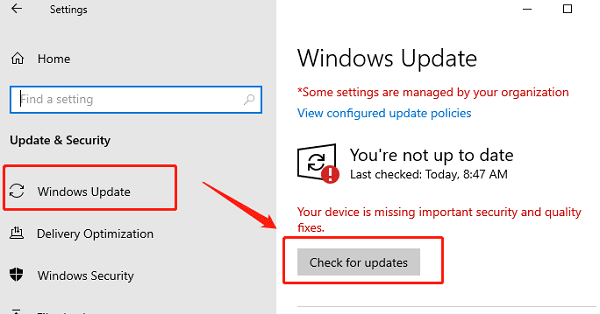
Press Win + I to open Settings, then go to "Update & Security".
In the "Windows Update" section, click "Check for updates".

If updates are available, install all updates and restart your computer.
After updating, relaunch the NVIDIA application and check if the issue is resolved.
By following these methods, you should be able to fix the NVIDIA application issue and restore normal GPU functionality. If the problem persists, consider contacting NVIDIA Support or seeking professional technical assistance.
See also:
How to Fix Microphone Not Working on Windows 11
6 Ways to Resolve LogiLDA.dll Missing on Windows
Ways to Fix ntdll.dll Crash Error on Windows


