Having a printer go offline can be frustrating, especially when you need to print something urgently. This guide provides detailed steps to troubleshoot and resolve common issues that cause printers to go offline, focusing on Brother and HP printers, and ensuring you can quickly get your printer back online.
Understanding the Problem
When a printer is marked as offline, it means that the computer is unable to communicate with the printer. This could be due to a variety of reasons, including connectivity issues, outdated or corrupted drivers, or incorrect settings. Addressing these issues systematically can help restore your printer to its operational state.
Step 1: Update Printer Drivers
Outdated or corrupted drivers are often a common cause of offline issues. You can update your printer drivers through the following methods:
1). Using Driver Talent Update Software
Driver Talent is a one-stop solution for easily managing device drivers. Whether you are a tech enthusiast or an average user, our intuitive software helps you keep drivers up to date, ensuring smooth device operation.
Download the latest version of Driver Talent and install it. Open the software and click "Scan".
After scanning, it will show which drivers are missing or need updating. Click the "Download" button.
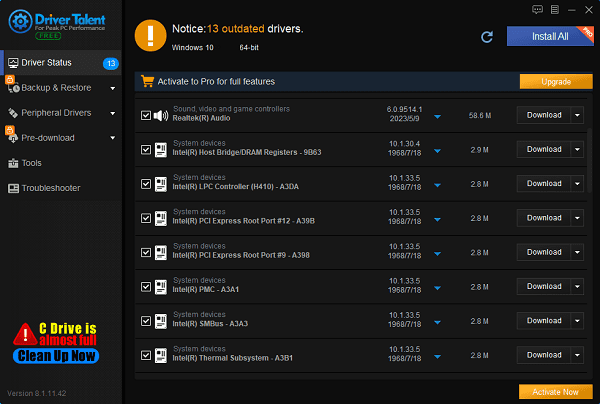
Once the update is complete, restart your computer to ensure the new drivers take effect.
2). Downloading from Official Websites
(1). For Brother Printers
Go to “Devices and Printers”, right-click on your Brother printer, and select “Remove device”.
Visit the Brother Official Website.
Enter your printer model in the search box.
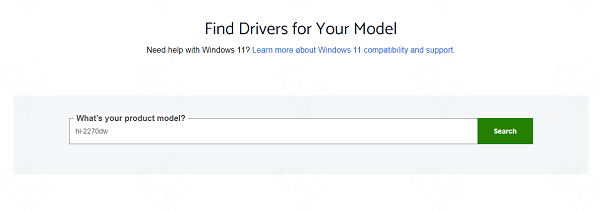
Navigate to the “Downloads” or “Software & Drivers” section.
Select your operating system version.
Download and install the latest driver package, following the on-screen prompts.
(2). For HP Printers
Visit the HP Official Website.
Click on “Download Drivers” or use the “Find My Product” tool by entering your printer model.
Select your product from the list and click on “Software and Driver Downloads”.
Choose your operating system and version.
Download the recommended or full-feature driver package.
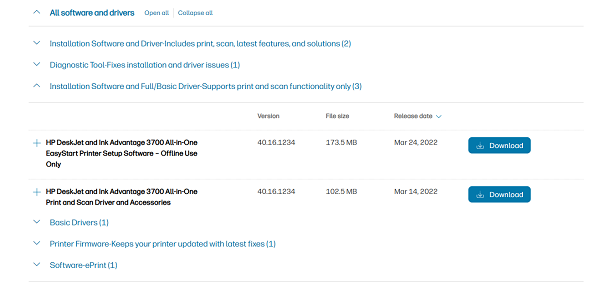
Run the downloaded installer and follow the installation wizard.
Step 2: Check Printer Power and Connections
1). Ensure the Printer is On
Confirm that your printer is powered on and that there are no error messages on the display panel.
2). Verify Cable Connections
For Wired Printers: Make sure the USB or Ethernet cable is securely connected to both the printer and the computer.
For Wireless Printers: Ensure that the printer is connected to the same Wi-Fi network as your computer. Check the printer's network settings for any connectivity issues.
Step 3: Set the Printer as Default
Open Control Panel: Navigate to the Control Panel on your computer.
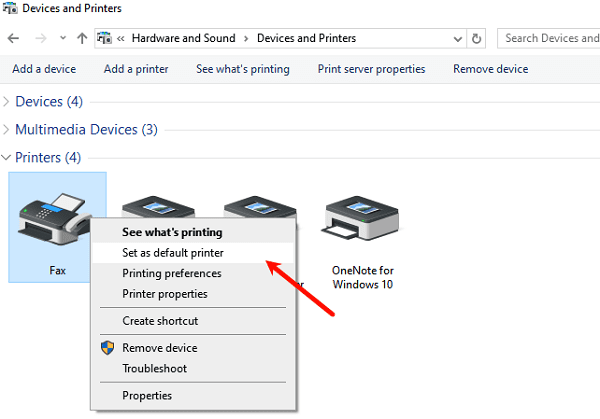
Devices and Printers: Select “Devices and Printers” to view the list of installed printers.
Set Default Printer: Right-click your printer and select “Set as default printer”. This ensures that all print jobs are sent to the correct printer.
Step 4: Clear the Print Queue
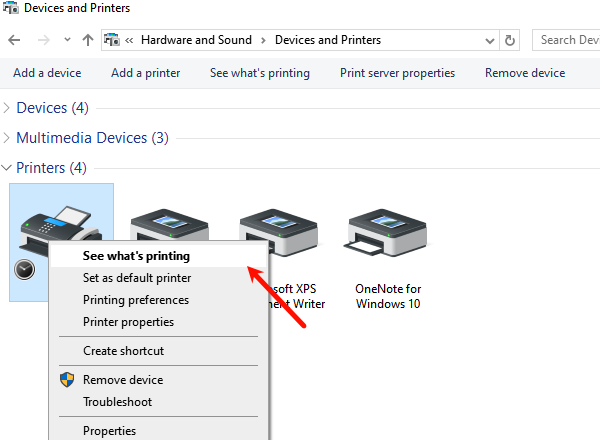
Windows: Open “Control Panel” > “Hardware and Sound” > “Devices and Printers”. Right-click your printer, select “See what's printing”, and cancel all pending tasks before attempting to print again.
macOS: Open “System Preferences” > “Printers & Scanners”. Right-click your printer and select “Reset printing system” (Note: This will clear all print queues and settings).
Step 5: Restart Print Spooler Service
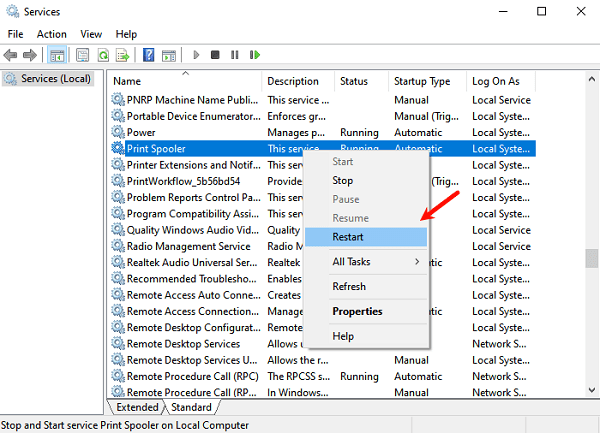
Open Services: Press Win + R, type services.msc, and press Enter.
Find Print Spooler: Scroll down to find the “Print Spooler” service.
Restart Service: Right-click “Print Spooler” and select “Restart”.
Step 6: Verify Network Settings (Wireless Printers)
Check Wi-Fi Connection: Ensure that your printer is connected to the correct Wi-Fi network. Reconnect if necessary.
Print Network Configuration Page: Print a network configuration page from your printer's settings to verify its IP address and network status.
Match IP Address: Ensure that the printer's IP address matches the IP address listed in your computer's printer properties.
Step 7: Use Printer Troubleshooting Tools
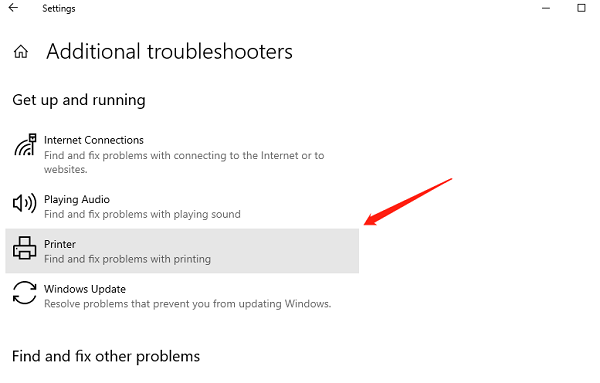
Windows: Search for “Troubleshoot” in the Start menu, select “Printer” under “Get up and running”, and follow the prompts.
macOS: Open “System Preferences” > “Printers & Scanners”, click the “Options & Supplies” button, then “Open Print Queue”. From the menu bar, click “Window” > “Show Printer Utility” for further diagnostics.
Step 8: Contact Manufacturer Support
If the above steps do not resolve the issue, consider contacting Brother or HP customer support for further assistance. They may provide specific guidance or confirm if the issue requires service.
By following these comprehensive steps, you should be able to resolve most issues that cause a printer to go offline. Regular maintenance, such as keeping your drivers updated and ensuring stable connections, can prevent many of these issues from occurring. Whether you're using a Brother or HP printer, these troubleshooting methods will help you restore your printer's functionality and improve your overall printing experience.
See also:
Guide to AMD Driver Installation Error 202 Causes and Solutions
What is a motherboard driver and how to dowmload
Five methods to disable system automatic updates win10


