A self-moving mouse cursor can be frustrating. This guide provides steps to fix the issue and restore normal functionality.
1. Check Driver Updates
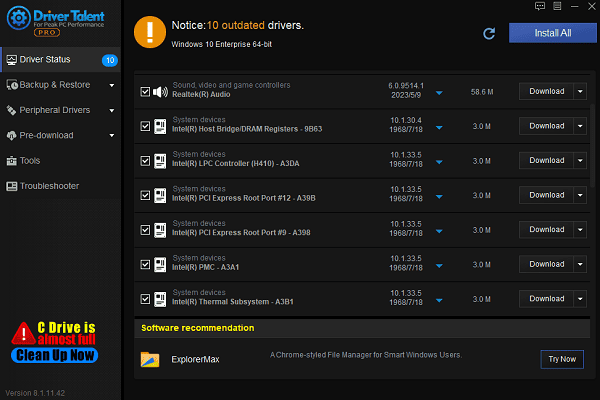
Outdated or corrupt drivers can cause the mouse cursor to move on its own. Ensuring that your device drivers are up-to-date is an effective step in resolving this issue. Using Driver Talent is recommended for automatically detecting and updating drivers, saving time and avoiding the risk of downloading or installing incorrect drivers.
Click the download button to get the latest version of Driver Talent. After installation, open the software and click "Scan".
After the scan is complete, the results will show which drivers are missing or need updates. Locate the mouse driver in the list and click "Download".

Once the update is complete, it's advisable to restart your computer to ensure the updated driver functions properly.
2. Modify Touchpad Settings
Disable the Touchpad (if an external mouse is connected):
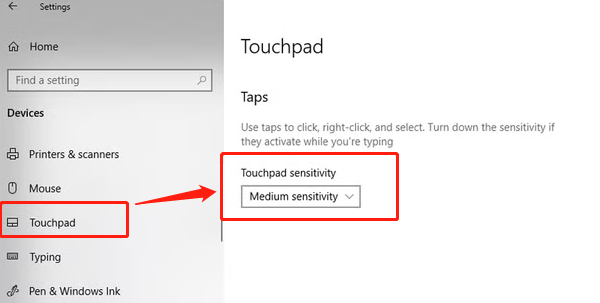
Press Win + I to open Settings, navigate to "Devices" > "Touchpad".
Toggle the touchpad switch to "Off".
If frequent toggling is required, select "Disable touchpad only" when an external mouse is connected.
Adjust Touchpad Sensitivity:
In the touchpad settings page, locate the "Touchpad Sensitivity" option.
Set the sensitivity to "Low sensitivity" or "Medium sensitivity".

Close the settings window and check if the cursor still moves on its own.
3. Adjust Mouse Pointer Settings
Adjust Pointer Speed:
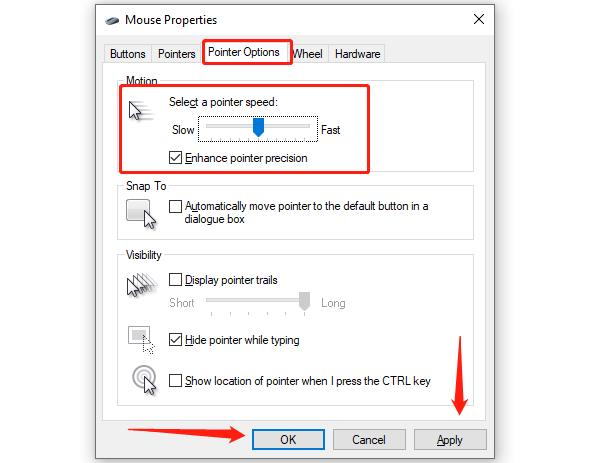
Press Win + R, type "main.cpl", and press Enter to open the Mouse Properties window.
Switch to the "Pointer Options" tab.
In the "Motion" section, adjust the slider to the middle position to ensure moderate pointer speed.

Disable Pointer Precision (optional):
Uncheck the box for "Enhance pointer precision" (if enabled).
Click "Apply" > "OK" and test the mouse's movement.
4. Clean the Mouse Sensor and Mousepad
Check the Sensor:
Turn off the mouse or unplug it, then gently clean the sensor area with a soft cloth.
Avoid using water or alcohol-based cleaners to prevent sensor damage.
Replace the Mousepad:
Ensure the mousepad surface is flat and suitable for your mouse type (optical or laser).
Avoid using the mouse on smooth or reflective surfaces (e.g., glass desktops).
After cleaning and replacing, reconnect the mouse and observe if the cursor returns to normal behavior.
5. Run Windows Hardware Troubleshooter
Press Win + S and type "cmd".
In the search results, right-click on "Command Prompt" and select "Run as administrator".
Enter the following command and press Enter: msdt.exe -id DeviceDiagnostic
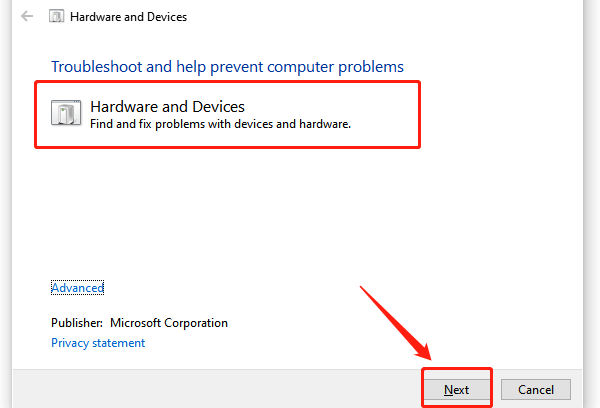
This will open the "Hardware and Devices Troubleshooter" window.

Click "Next" to start the detection process. The system will automatically scan and detect hardware issues.
Follow the on-screen instructions to complete the troubleshooting process.
If the system detects any issues, it will display repair options. Select "Apply this fix" to resolve them.
6. Reset the System
Press Win + I to open "Settings" and navigate to "Update & Security" > "Recovery".
Under "Reset this PC", click "Get started".
Choose "Keep my files" (recommended) to reset only system settings and applications.
For severe issues, choose "Remove everything", but ensure data is backed up beforehand.
Follow the on-screen instructions to complete the process. After the reset, check if the mouse cursor works properly.
These steps can help fix a self-moving mouse cursor. If the issue persists, try replacing the mouse or seeking technical support.
See also:
Fix Windows Update Error 0x80070057
Effective Fix for Windows Msvcr120.dll Missing Error
How to Fix Windows 10 Wireless Mouse Not Working


