Ensuring your Intel drivers are up to date is crucial for optimal device performance. This article offers a simple solution to help you easily download and update your Intel drivers.
1. Use Driver Management Tools
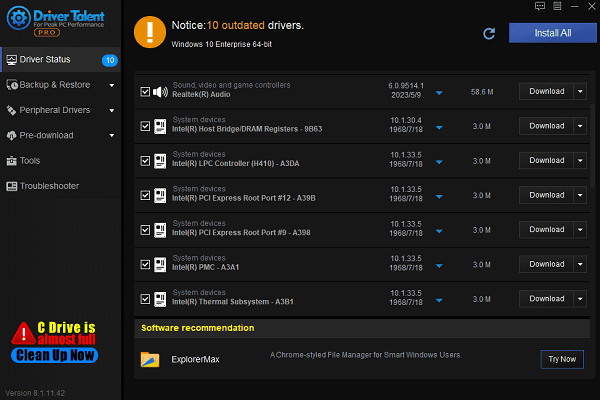
Old drivers can conflict with the operating system or other hardware. Updating Intel drivers can resolve compatibility issues with new hardware or operating systems. It is recommended to use Driver Talent to automatically detect and update drivers, saving time and avoiding the risk of downloading or installing incorrect drivers.
Click the download button to get the latest version of Driver Talent, and after installation, open the software and click "Scan".
Once the scan is complete, it will show which drivers are missing or need updating. Find the Intel drivers in the result list and click the "Download" button.

After the update is complete, it is recommended to restart the computer to ensure the updated drivers are properly applied.
2. Update via Device Manager
Press Win + X and select "Device Manager".
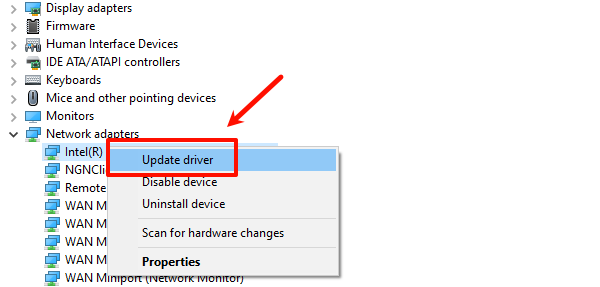
Locate the Intel device (such as graphics card, network card, processor, etc.) that you need to update the driver for.
Right-click the device and select "Update Driver".

Choose "Search automatically for updated driver software", and Windows will automatically search for and install the latest drivers.
After the update is complete, it is recommended to restart the computer to ensure the drivers are properly applied.
3. Download from the Official Intel Website
Visit the Intel official website using your browser.
In the navigation bar at the top of the page, find "Support" or "Download Center".
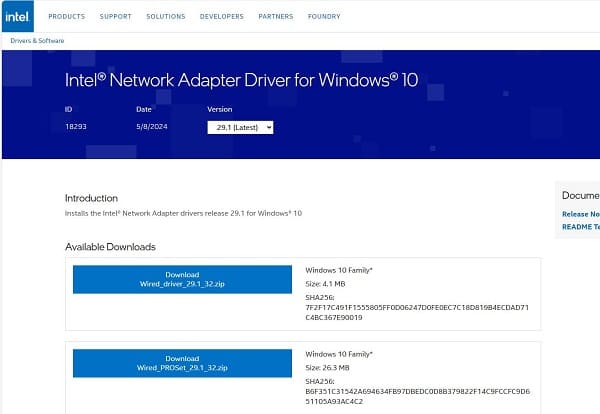
Choose the appropriate driver based on your hardware type (e.g., graphics driver, wireless network card driver, chipset driver, etc.).
Select the corresponding operating system version and click the "Download" button. Once the download is complete, run the installer and follow the prompts to complete the installation.

After installation, restart your computer to ensure the new drivers take effect.
4. Use the Intel Driver & Support Assistant
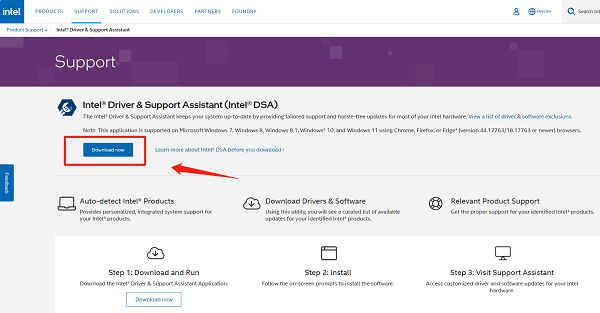
Visit the Intel official website to download and install the "Intel Driver & Support Assistant".

After installation, open the tool and click the "Scan" button. It will automatically detect your Intel hardware and list the drivers that need updating.
Based on the scan results, click the "Install" button, and the tool will automatically download and install the latest drivers.
After installation, it is recommended to restart your computer to ensure the new drivers are properly applied.
5. Common Intel Driver Issues and Solutions
Driver Installation Fails
Solution: Make sure the downloaded driver is compatible with your hardware model and operating system version. Try running the installer as an administrator or temporarily disable antivirus software during installation.
Driver Fails to Update Automatically
Solution: If Device Manager can't find the updated drivers, try visiting the Intel website or using the Intel Driver & Support Assistant to update manually.
Device Malfunctions After Driver Update
Solution: Try rolling back to the previous driver version. In Device Manager, right-click the device, select Properties, then click the Driver tab and choose Roll Back Driver.
Blue Screen or System Crashes
Solution: If a blue screen or system crash occurs after updating drivers, try starting Windows in Safe Mode, uninstalling the new driver, and reinstalling the previous driver version.
Updating Intel drivers is essential for stable hardware performance. If you face installation issues, follow the solutions in this article to troubleshoot and fix them.
See also:
How to Fix the Mouse Cursor Moving on Its Own Error
7 Ways to Fix the Spinning Blue Circle Issue in Windows 10
Effective Fix for Windows Update Error Code 0x800f0922


