[Solved] Headphones Plugged In but No Sound
Apr. 02, 2025 / Updated by Seraphina to Windows 10

When using a Windows computer, users may encounter the issue where the headphones are plugged in but produce no sound, affecting the normal audio function. This article provides several effective solutions to help you quickly restore proper headphone audio output.
1. Check the Headphone Connection
Try a Different Port: Plug the headphones into another audio jack (if available).
Test the Headphones: Insert them into another device (such as a phone or tablet) to check if they work.
Try Another Pair of Headphones: If other headphones also have no sound, the issue might be related to the computer's audio settings or drivers.
2. Update the Audio Driver
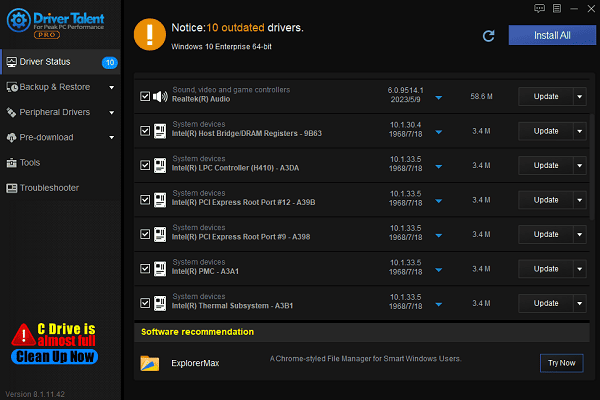
Outdated or corrupted drivers are a common cause of headphone issues. Ensuring that your audio driver is up to date can effectively resolve the problem. It is recommended to use Driver Talent for automatic driver detection and updates, saving time while avoiding incorrect driver installations.
Click the download button to get the latest version of Driver Talent, install and open the software, then click "Scan".
After scanning, a list of missing or outdated drivers will be displayed. Locate the audio driver in the results and click "Update".

Once the update is complete, restart your computer to ensure the new driver is applied properly.
3. Check Windows Sound Settings
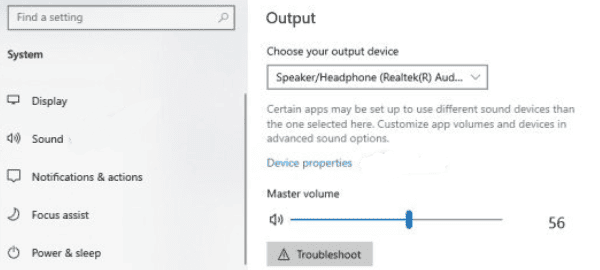
Right-click the volume icon on the taskbar and select "Open Sound Settings".
In the "Output Device" dropdown menu, ensure your headphones are selected.
Adjust the volume slider to ensure it is not muted.

Right-click the volume icon and select "Sounds". Under the "Playback" tab, ensure your headphones are set as the default device.
If the headphones are disabled, right-click them, select "Enable", and then "Set as Default Device".
Click "Test" to check if there is any audio output.
4. Check Realtek Audio Manager Settings
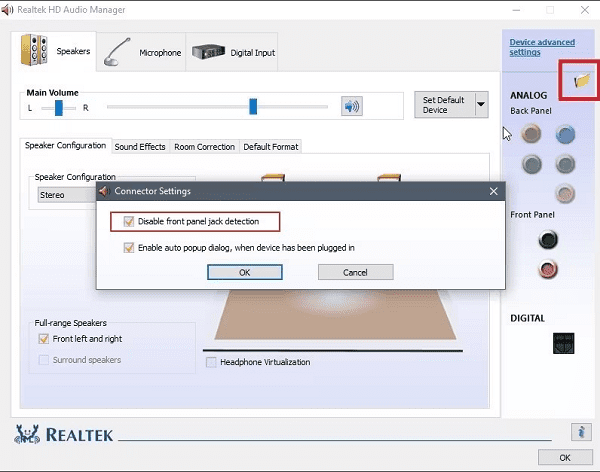
In the Windows search bar, type "Realtek Audio Console" or "Realtek HD Audio Manager" and open it.
Go to Playback Devices and ensure your headphones are enabled and set as the default device.
Click "Advanced Settings", enable or "disable Front Panel Jack Detection", and test the sound again.

5. Run the Audio Troubleshooter
Open Settings and go to "Update & Security".
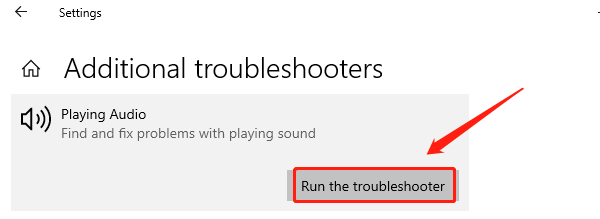
On the left, select "Troubleshoot", then click "Additional Troubleshooters".
Find "Playing Audio" and click "Run the Troubleshooter".

Follow the on-screen instructions to detect and fix any audio-related issues.
6. Re-enable the Audio Device
Press Win + X and select "Device Manager".
Expand "Sound, Video, and Game Controllers" and locate your audio device.
Right-click the device and select "Disable Device", then right-click it again and select "Enable Device".
Restart your computer and check if the headphones work.
By following these steps, you should be able to resolve the issue of headphones being plugged in but producing no sound. If the problem persists, it may be due to hardware failure, in which case replacing the headphones or contacting the computer manufacturer for further assistance is recommended.
See also:
How to Fix Windows 10 Update Error Code 0x80070643
Fixing Keyboard Not Working Issues in Windows 10
How to Fix Black Screen Issues on Windows 10
7 Ways to Fix Silent Hill 2 Remake Crashing Issues
How to Fix Laptop Not Connecting to WiFi

|
ExplorerMax |

|
Driver Talent for Network Card | |
| Smart and advanced file explorer tool for Windows platforms | Download & Install Network Drivers without Internet Connection | |||
| 30-day Free Trial | Free Download |


