Guide to Safely Updating BIOS
Jul. 23, 2024 / Updated by Seraphina to Windows 10
Updating the BIOS is crucial for better performance and compatibility, but improper handling can cause issues. This guide details safe steps to update the BIOS, helping you complete the process smoothly, avoid risks, and ensure system stability.
Tip: Updating Drivers
To improve computer performance and maintain system stability, updating device drivers is essential. We recommend using Driver Talent to automatically detect and update drivers, saving time and effort while avoiding the risk of downloading or installing incorrect drivers.
Click the download button to get the latest version of Driver Talent, install and open the software, and click "Scan".
After the scan is complete, it will show which drivers are not installed or need updating. Find the drivers that need updating in the results list and click the "Download" button.
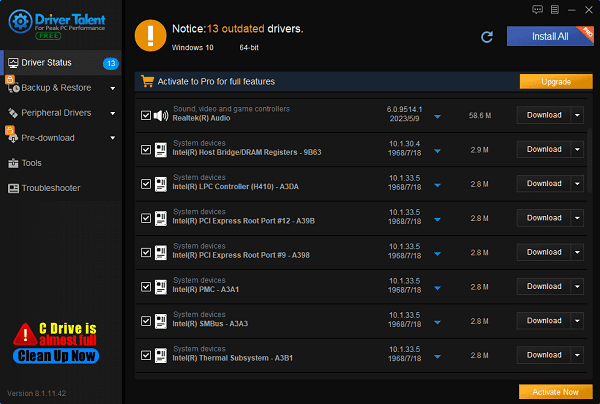
After the update is complete, it is recommended to restart the computer to ensure the updated drivers take effect.
Step 1: Check BIOS Version
1). Open the System Information Tool:
Type "msinfo" in the search box and press Enter. This will open the System Information interface.
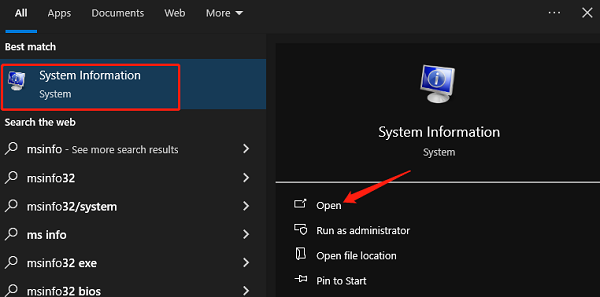
On this page, check the "BIOS Version/Date" information.
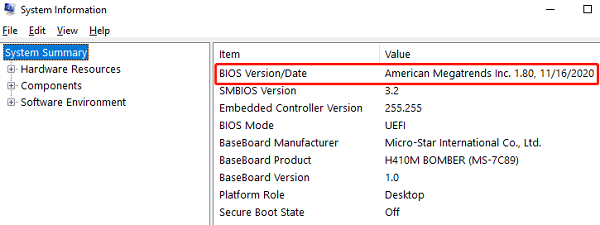
2). Check BIOS Version:
Press the Windows key, type cmd, and select "Command Prompt" to open it.
In the Command Prompt, enter the following command and press Enter: wmic bios get serialnumber
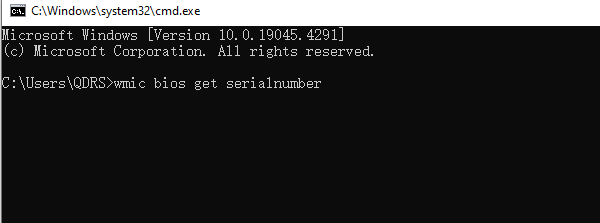
Note down the system serial number (also referred to as service tag), which is an alphanumeric code you might need later.
3). Compare BIOS Versions:
Visit your motherboard manufacturer's support website to find the BIOS version corresponding to your motherboard model. Compare the current version with the latest version to decide whether an update is necessary.
Step 2: Download the Latest Version of BIOS
1). Dell:
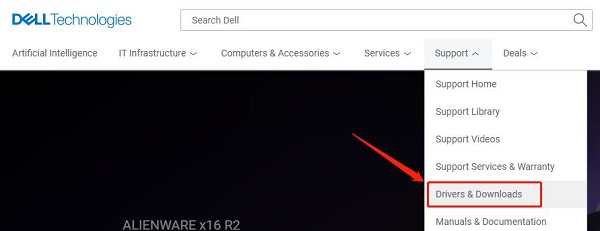
Visit the Dell Drivers & Downloads page, enter your service tag or model, and search.
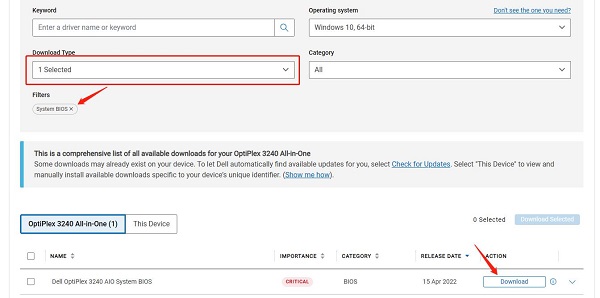
Select the "BIOS" category, confirm the latest version, and click download.
2). Asus:
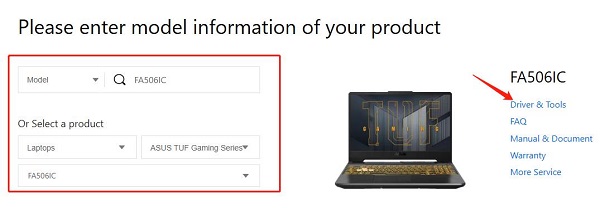
Visit the Asus Support page, enter your product model.
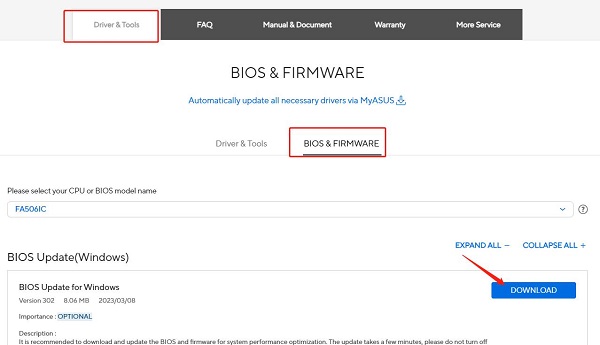
Choose "Drivers & Tools" > "BIOS & Firmware", find the latest version, and download it.
3). HP:
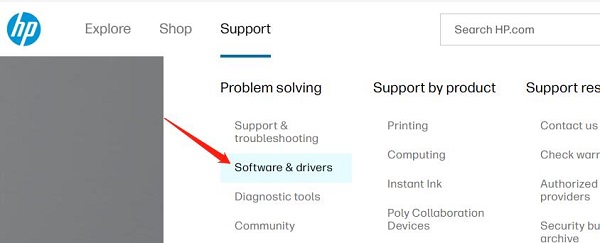
Visit the HP Customer Support page, enter your product model or serial number, and search.
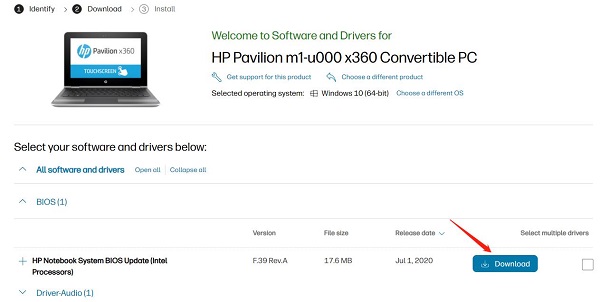
In the BIOS section, find the latest version and download it.
4). Lenovo:
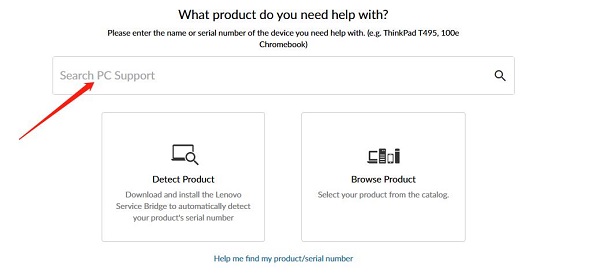
Visit the Lenovo PC Support page.
Enter your product serial number or let Lenovo auto-detect.
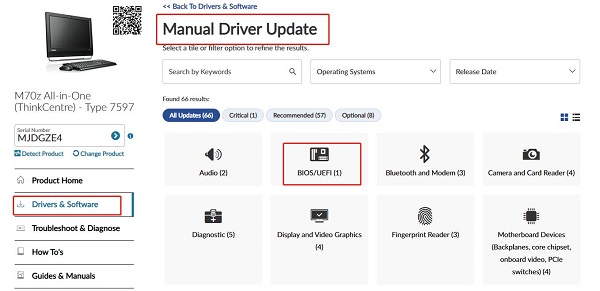
Choose "Drivers & Software" > "Manual Update" > "BIOS/UEFI" and download the latest BIOS update.
5). Other Major BIOS Vendors:
Visit websites such as American Megatrends, Gigabyte, or Phoenix Technologies to download the latest BIOS.
Ensure the downloaded BIOS file is saved to an easy-to-find location, such as the desktop or a dedicated folder.
Step 3: Flash Your BIOS
1). Prepare a USB Flash Drive:
Extract the downloaded BIOS file if needed and copy it to the root directory of the USB flash drive.
Do not place the BIOS file in a subfolder and do not rename the file.
Keep the USB drive plugged into the computer throughout the update process.
2). Enter BIOS Setup:
When the computer starts, press the corresponding hotkey to enter the BIOS setup screen:
Dell: Usually F12 or F2.
Asus, MSI, and Gigabyte: Usually Delete.
HP: Usually ESC.
3). Launch BIOS Update Tool:
①. Dell:
In the BIOS setup, select "USB Storage Device" and press Enter.
At the command prompt, type the full BIOS filename, e.g., O9010A12.exe, and press Enter.
Follow the on-screen instructions to complete the update process.
②. ASUS:
Press F7 to open Advanced Mode.
Select "Advanced" then "ASUS EZ Flash 3 Utility/Start EZ Flash".
Select the USB with the extracted BIOS file from the storage device list.
Select the BIOS file and confirm the update.
③. HP:
Click "Firmware Management" or "BIOS Management" on the HP PC Hardware Diagnostics UEFI screen.
Select "BIOS Update".
Click "Select BIOS Image to Apply", select HP_TOOLS – USB Drive.
Select the matching System Board ID BIOS file and apply the update.
④. MSI:
Navigate to "M-Flash" and agree to auto-reboot into Flash mode.
Select the USB drive with the BIOS file extracted earlier.
Select the BIOS file and accept the prompt.
Re-apply settings.
⑤. Gigabyte:
Navigate to "Q-Flash" (may need to press the ALT key to bring up the Q-Flash shortcut from the BIOS menu).
Select "Update BIOS".
Select the extracted BIOS from your storage drive.
Press Enter and agree to update your BIOS.
4). Wait for Update to Finish:
Ensure not to shut off your PC during the update process. Wait patiently for the update to finish.
Restart your computer when prompted or wait for it to restart automatically.
Follow this guide to safely update your computer's BIOS, improving performance and compatibility. Carefully follow the instructions, back up your data, and read your motherboard manufacturer's update guide. Hope this helps you update your BIOS smoothly and ensures your computer's stability and efficiency.
See also:
What is the printer driver and how to download it
Printer Offline Troubleshooting Guide
How to Update Bluetooth Drivers
Analyzing NVIDIA Driver Installation Failures and Solutions
Network Card Driver Update Guide

|
ExplorerMax |

|
Driver Talent for Network Card | |
| Smart and advanced file explorer tool for Windows platforms | Download & Install Network Drivers without Internet Connection | |||
| 30-day Free Trial | Free Download |


