Guide to Reinstalling Mouse Driver on Windows 11
Jun. 24, 2024 / Updated by Seraphina to Windows Driver Solutions
If your mouse encounters issues on Windows 11, reinstalling the driver may be an effective solution. Here are the detailed steps to help you reinstall the mouse driver on Windows 11.
Step 1: Uninstall the Mouse Driver
Open Device Manager:Press the "Windows key + X" on your keyboard, then select "Device Manager".
Locate the Mouse Device: In the Device Manager window, find and expand the "Mice and other pointing devices" category.
Uninstall the Current Driver: Right-click on your mouse device and select "Uninstall device". In the pop-up window, check the box next to "Delete the driver software for this device", then click "Uninstall".
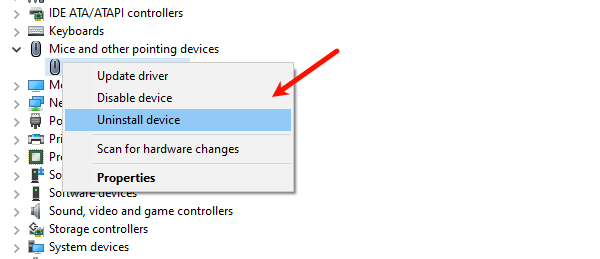
Restart Your Computer: After uninstallation is complete, restart your computer. This will prompt the system to attempt to reinstall the default mouse driver.
Step 2: Install the New Driver
1). Automatic Installation:
Outdated mouse drivers may cause input lag, drag-and-drop issues, and other problems. It is recommended to use Driver Talent to automatically detect and update your computer drivers, saving time and avoiding the risk of downloading or installing incorrect drivers.
Click the download button to get the latest version of Driver Talent. After installation, open the software and click "Scan".
After scanning, Driver Talent will display the drivers that are not installed or need updating. Find the mouse driver in the list and click "Download".
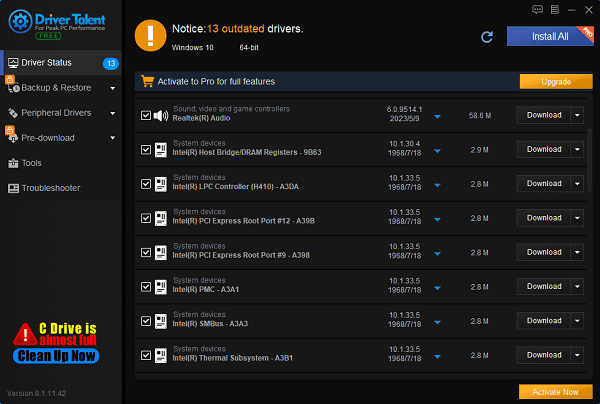
Once the update is complete, restart your computer to ensure the new driver takes effect.
Apart from this, the system may automatically reinstall the mouse driver after restarting. However, this method may not provide the latest driver. If you experience any mouse-related issues, we recommend using Driver Talent to detect and update any problematic drivers to ensure the proper functioning of your mouse.
2). Manual Installation:
If automatic updates do not resolve the issue, you can visit the manufacturer's website to find the latest driver for your mouse model.
(1). Visit Manufacturer's Website:
First, open a browser and go to the manufacturer's website. Common manufacturers include Logitech, Microsoft, Razer, etc.
(2). Navigate to the Support or Download Page:
On the manufacturer's website, find the "Support" or "Download" page. These pages typically offer options for driver and software downloads.

(3). Find the Latest Driver for Your Model:
On the support or download page, enter your mouse model and search for the applicable driver. Ensure you select a driver compatible with your operating system version (e.g., Windows 11).
(4). Download the Driver:
Click the download link to save the driver file to your computer.
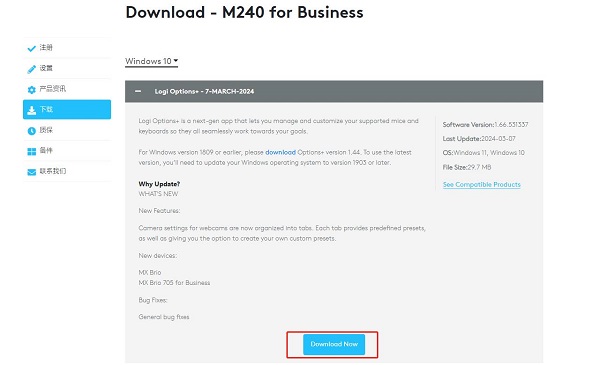
(5). Install the Driver:
Open the downloaded driver file and follow the on-screen installation instructions. This typically involves accepting the license agreement, selecting the installation location, and more.
(6). Restart Your Computer:
After the installation is complete, restart your computer to ensure the new driver works properly.
Step 3: Perform a System File Repair
1). Open Command Prompt (Admin):
On your keyboard, press the "Windows key + S" to open the search box and type "Command Prompt" or "cmd".
In the search results, right-click "Command Prompt" and select "Run as administrator".
2). Run the System File Checker (SFC) Tool:
In the Command Prompt window, type the following command and press Enter: sfc /scannow.
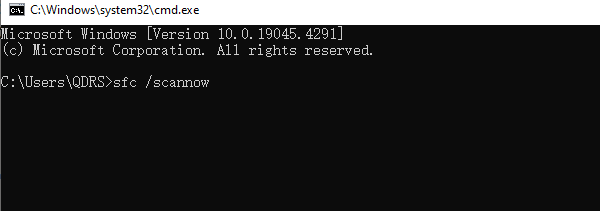
This command will start the System File Checker tool to scan all protected system files and replace any corrupted files. This process may take several minutes, so please be patient.
3). Review Scan Results:
After the scan is complete, Command Prompt will display the results. Based on the results, the system may repair any found corrupt files or indicate files it cannot repair. If the system indicates there are unrepairable files, you can further run the "DISM" tool for repair.
Enter the following command and press Enter: DISM /Online /Cleanup-Image /RestoreHealth.
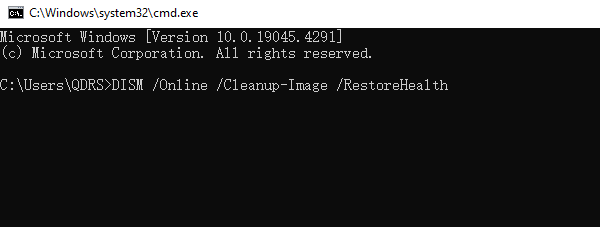
This command will use Windows Update to repair the system image's corruption. This process may also take some time.
4). Restart Your Computer:
After completing the system file repair, restart your computer to apply the changes.
By following the steps above, you should be able to successfully reinstall the mouse driver on Windows 11 and resolve any related issues. Keeping device drivers updated and functioning properly is key to ensuring the stability and efficiency of your computer. If problems persist, further technical support or hardware replacement may be needed.
See also:
Solutions for HyperX Cloud 2 Headset Not Working
How to Fix MSVCP140.dll Missing Error
How to fix Windows 11 Screen Flickering
8 Methods to Solve League of Legends Latency Issues
Guide to Fix Missing Wireless Network Adapter on Windows 10

|
ExplorerMax |

|
Driver Talent for Network Card | |
| Smart and advanced file explorer tool for Windows platforms | Download & Install Network Drivers without Internet Connection | |||
| 30-day Free Trial | Free Download |


