Some users face issues with Disk Management on Windows 10. This article offers solutions to fix the problem and ensure smooth disk management.
Routine Computer Maintenance
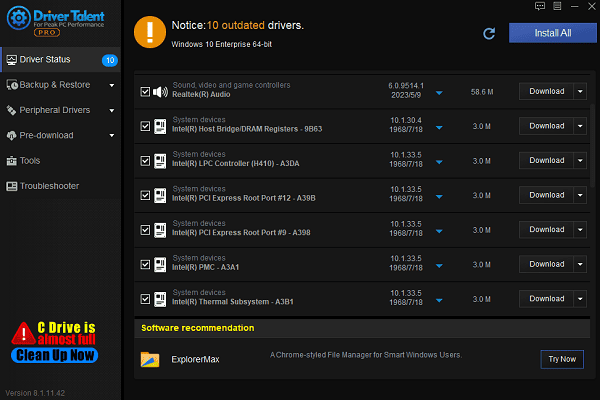
Outdated, damaged, or incompatible drivers can cause performance issues, hardware malfunctions, or system crashes. Use Driver Talent to automatically detect and update drivers, saving time and reducing the risk of errors.
Download the latest version of Driver Talent, install it, and open the software. Click "Scan".
The scan results will show any missing or outdated drivers. Select the drivers that need updating and click "Download".

After updating, restart your computer to ensure the new drivers are properly applied.
1. Restart Your Computer
Click the Start menu and select the Power icon.
Choose Restart and wait for the computer to reboot.
After restarting, try opening Disk Management again to see if the issue is resolved.
2. Run Disk Management as an Administrator
Press Windows + X to open the quick access menu.
Select Computer Management (or search for "Disk Management" in the Start menu).
In the left pane of Computer Management, click Disk Management.
If prompted for permissions, right-click Disk Management and choose Run as Administrator.
3. Check System File Integrity
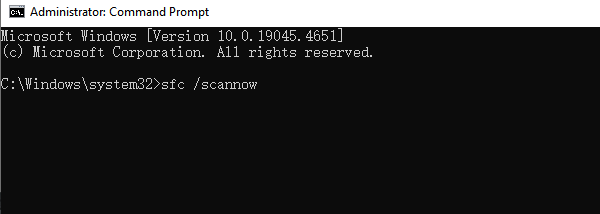
Open the Command Prompt as an administrator.
Enter the following command and press Enter: sfc /scannow

The system will automatically scan and repair corrupted files. Once the scan is complete, restart your computer and check if the problem is resolved.
4. Modify Related Services
Press Windows + R to open the Run dialog box.
Type "services.msc" and press Enter to open the Services Manager.
Locate the following services:
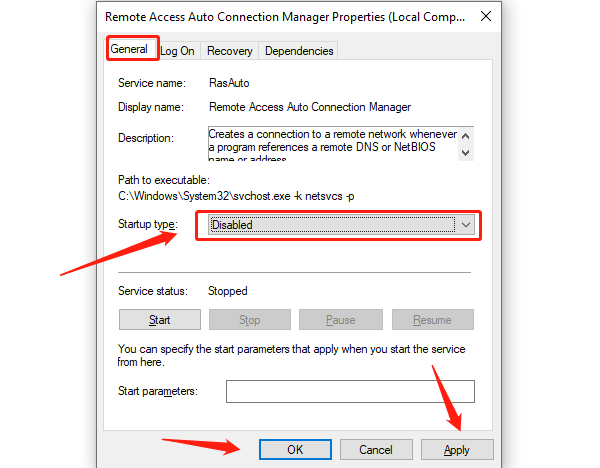
Remote Access Auto Connection Manager
Remote Access Connection Manager
Double-click each service, set the Startup Type to "Disabled", and click "Apply" and "OK".

Next, locate "Virtual Disk Service", double-click it, and set the Startup Type to "Manual" or "Automatic". Click "Apply" and "OK".
Restart your computer and check if Disk Management is functioning properly.
5. Run a DISM Scan
Open the Command Prompt as an administrator.
Enter the following command and press Enter:
DISM /Online /Cleanup-Image /RestoreHealth
The DISM tool will scan and automatically repair system issues. This process may take some time, depending on your system's performance and the extent of damage.
After the scan is complete, restart your computer and try using Disk Management again.
6. Check Hard Drive Health
Open the Command Prompt as an administrator.
Enter the following command and press Enter: chkdsk C: /f /r

Replace C: with the appropriate drive letter. The /f option fixes errors, and /r repairs bad sectors.
If prompted to schedule the disk check at the next restart, type Y and press Enter.
Restart your computer, and the system will automatically perform the disk check during boot.
7. Update Windows
Press Windows + I to open Settings.
Navigate to "Update & Security" and click "Check for Updates".
If updates are available, click "Download and Install" and wait for the process to complete.
Restart your computer and verify if the issue is resolved.
The methods above should help you fix Disk Management issues on Windows 10. If the problem persists, it may be necessary to inspect hardware components or seek professional technical support.
See also:
Guide to Reinstalling the Windows 10 Operating System
How to Fix God of War Keep Crashing on PC
Guide to Improving Graphics Performance


