How to Fix Microphone Not Working on Windows 11
Jan. 09, 2025 / Updated by Seraphina to Windows 11

Some Windows 11 users may face microphone issues. This article offers common solutions to help restore normal functionality.
1. Update Audio Drivers
Outdated or corrupted drivers are often the cause of the microphone not working. Checking for updates to the audio drivers is an effective way to fix the issue. We recommend using Driver Talent to automatically detect and update drivers, saving time and effort while avoiding the risk of downloading or installing incorrect drivers.
Click the download button to get the latest version of Driver Talent. After installation, open the software and click "Scan".
Once the scan is complete, it will display any missing or outdated drivers. Find the audio driver in the list and click the "Download" button.
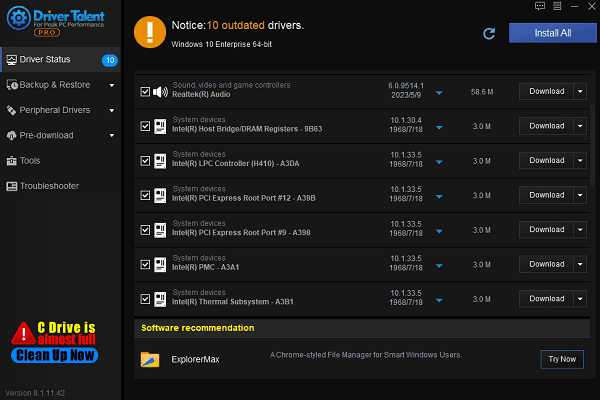
After the update is complete, it is recommended to restart your computer to ensure the updated drivers are applied correctly.
2. Ensure the Microphone is Enabled
Right-click the Start menu and select "Device Manager".
In Device Manager, expand "Audio inputs and outputs" and find your microphone device.
Right-click the microphone device and select "Enable Device" (if this option is available).
If the microphone is already enabled, try right-clicking to disable the device, wait a few minutes, and then select "Enable Device" again.
3. Check Microphone Privacy Settings
Open Settings and click "Privacy & Security".
Select "Microphone" and ensure the "Microphone access" and "Let apps access your microphone" switch is turned on.
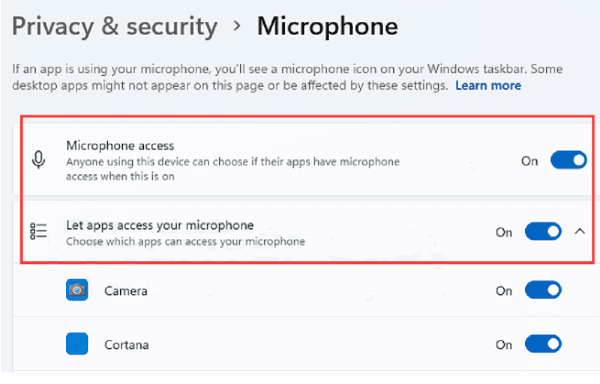
In the list of apps below, check if the app you want to use the microphone with has permission to access it. Ensure that the app is allowed to use the microphone.
4. Restart Audio Services
Press Win + R to open the Run dialog, type "services.msc", and press Enter.
In the Services window, find "Windows Audio" service.
Right-click the "Windows Audio" service and select "Restart".
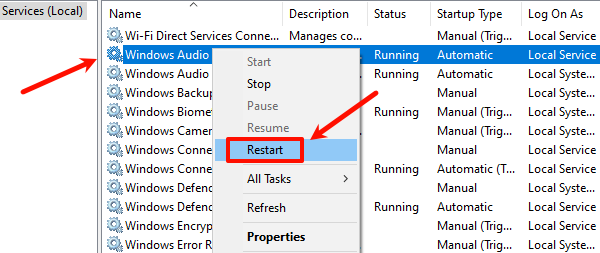
Also, check the "Windows Audio Endpoint Builder" service to ensure it is running.
After restarting the services, test if the microphone is functioning properly.
5. Disable Audio Enhancements
Press the Windows logo key + I to open Settings.
Go to the "System" tab, select "Sound", and then click "All Sound Devices".
Select "Properties", scroll down, and find "Audio Enhancements". Click the dropdown menu on the right and select "Off".
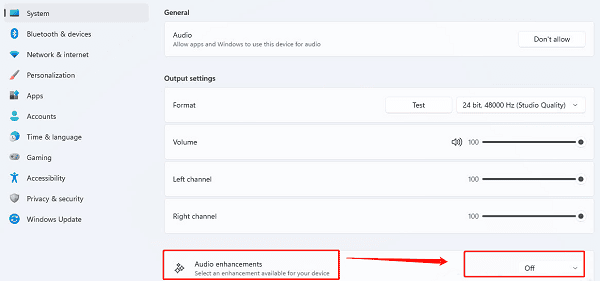
After completing these steps, test if the audio works normally.
6. Run the Audio Troubleshooter
Open Settings, select "System".
Click "Troubleshoot", then select "Other Troubleshooters".
In "Other Troubleshooters", find "Audio" and click the "Run" button.
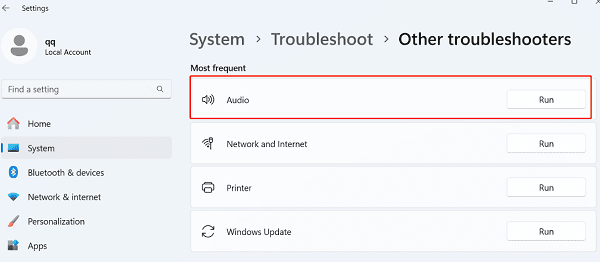
Follow the on-screen prompts to complete the troubleshooting process, and check if the microphone is working properly.
7. Check the Operating System
Open Settings and select "Update & Security".
Under the "Windows Update" section, click "Check for updates".
If updates are available, click "Download and Install", and restart the computer after the update is complete.
Once updated, test the microphone to see if it is working properly.
By following these methods, you can fix the microphone issue in Windows 11. If the problem persists, contact the device manufacturer or technical support for help.
See also:
6 Methods to Fix No Sound on Windows 11
How to Fix Windows 10 Missing Network Adapter
6 Methods to Fix Windows 10 Network Adapter Not Working
How to Repair Corrupted Files in Windows 10
Resolve Path of Exile 2 Crashing on PC

|
ExplorerMax |

|
Driver Talent for Network Card | |
| Smart and advanced file explorer tool for Windows platforms | Download & Install Network Drivers without Internet Connection | |||
| 30-day Free Trial | Free Download |


