Fix Windows 10 System Crash
Nov. 06, 2024 / Updated by Seraphina to Windows 10

Many Windows 10 users may encounter system crashes during use. This article outlines several effective solutions to help you fix this issue and restore normal operation to your computer.
1. Update Drivers
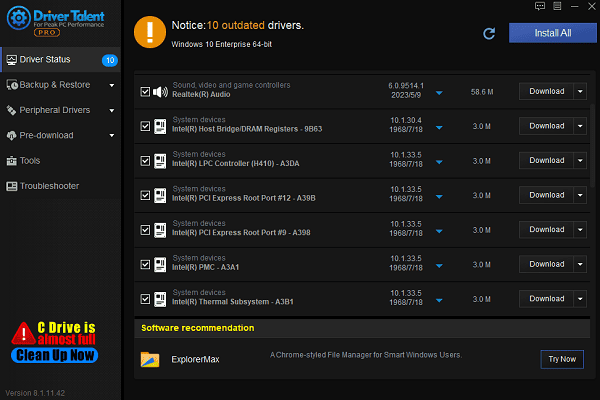
Outdated or incompatible hardware drivers are one of the common causes of system crashes. In particular, graphics, network, and chipset drivers can cause frequent crashes if they are incompatible or corrupted. We recommend using Driver Talent to automatically detect and update drivers, saving you time and avoiding the risk of downloading or installing incorrect drivers.
Click the download button to get the latest version of Driver Talent. After installation, open the software and click "Scan".
After the scan is complete, it will display the drivers that are either missing or need updating. Find the drivers you need to update and click the "Download" button.

Once the update is complete, it is recommended to restart your computer to ensure the updated drivers take effect.
2. Run the System File Checker (SFC)
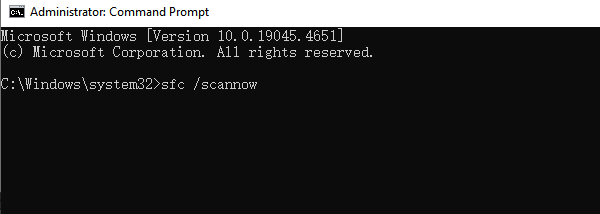
Press Win + X to open the quick menu, then select "Command Prompt (Admin)" or "Windows PowerShell (Admin)".
In the command window, type the following command: sfc /scannow

Press Enter to execute the command. The system will automatically scan and repair any corrupted system files. This process may take a few minutes.
After the scan is complete, restart your computer and check if the system crash issue is resolved.
If SFC cannot fix all the issues, you can proceed with the next step.
3. Check the Hard Drive
Press Win + X to open the quick menu, then select Command Prompt (Admin) or Windows PowerShell (Admin).
In the command window, type the following command: chkdsk C: /f /r

(Here, C: is the system drive. If your system is installed on a different drive, replace C: with the appropriate drive letter. The /f parameter will fix detected errors, and /r will locate bad sectors and recover readable information.)
The system will prompt you whether to check the disk the next time you restart. Type Y (Yes) and press Enter.
Restart your computer, and the system will check the disk and fix any hard drive issues during startup.
4. Boot into Safe Mode
Restart your computer, and during boot-up, continuously press F8 (or Shift + F8 on some devices) to select Safe Mode.
If you cannot access Safe Mode, you can try entering Safe Mode via Windows Recovery Environment (WinRE):
Hold the power button to force shutdown while the computer is starting up. Repeat this process three times until the Automatic Repair screen appears.
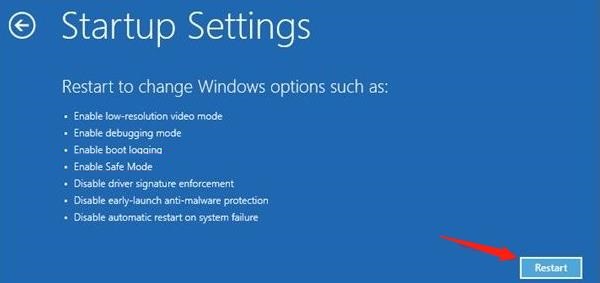
Select Troubleshoot >Advanced Options >Startup Settings, then click Restart.

After restarting, press F4 (or 4) to enter Safe Mode.
Once in Safe Mode, you can perform basic tasks, such as uninstalling recently installed software, drivers, or performing other system repair operations.
5. Check for System Updates
Open Settings and click on "Update & Security".
Under "Windows Update", click "Check for Updates".
If updates are available, click "Download and Install".
After the installation is complete, restart your computer and check if the system has returned to normal.
6. Startup Repair
Restart your computer and enter the Windows Recovery Environment (WinRE) for the repair screen.
Hold the power button to force shutdown three times during startup until the Automatic Repair screen appears.
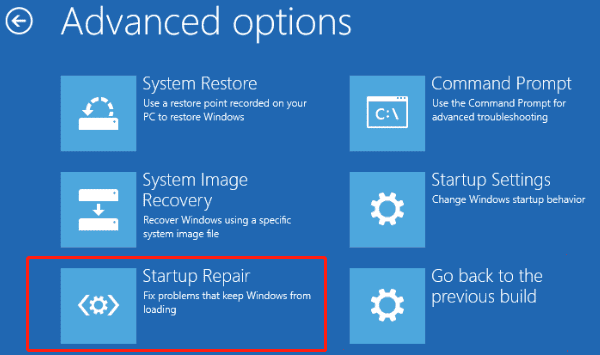
Select "Troubleshoot" > "Advanced Options" > "Startup Repair".

The system will automatically check and fix any startup issues. After completion, restart your computer and check if it can boot up normally.
7. Restore the System to a Previous State
Open the Control Panel, and click "Recovery".
Click "Open System Restore", then click "Next".
Choose Restore to a previous restore point and select an appropriate restore point (the system will list all created restore points). Then click Next.
Follow the prompts to complete the system restore process. The system will revert to the state saved in the restore point.
After restoration, your computer will reboot and return to the state it was in at the time of the restore point.
8. Check the System Logs
Press Win + X and select "Event Viewer".
In the left panel, expand "Windows Logs", and click "System".
Look for related error logs, especially around the time of the crash. You should see error codes, event IDs, or other crash-related information.
Based on the log information, you can try fixing related program or driver issues or search for online solutions based on the error details.
Follow these steps to diagnose and fix Windows 10 crashes. If the issue persists, contact technical support for further assistance.
See also:
How to Fix CoD Vanguard Not Launching on PC
How to Resolve Crashing Issues in Warframe
Steps to Disable Automatic Updates in Windows 10
6 Solutions to Reduce Lag in Ready or Not
How to Repair League of Legends

|
ExplorerMax |

|
Driver Talent for Network Card | |
| Smart and advanced file explorer tool for Windows platforms | Download & Install Network Drivers without Internet Connection | |||
| 30-day Free Trial | Free Download |


