Guide to Fix Mouse Cursor Disappearing
Nov. 26, 2024 / Updated by Seraphina to Windows 10

If your mouse cursor disappears on Windows, this article offers solutions to help you fix the issue and restore normal functionality.
1. Restart Your Device
Reconnect the Mouse:
For wired mouse, unplug the connection; for wireless mouse, turn off the power or remove the battery.
Wait a few minutes before reconnecting the mouse, ensuring the port is clean and secure.
Restart Your Computer:
Click the Start menu, select "Power > Restart".
If the pointer is entirely unresponsive, press Ctrl + Alt + Del to open Task Manager and use the keyboard to select "Restart".
After rebooting, check if the pointer returns to normal.
2. Check for Driver Updates
Mouse drivers are essential for proper functionality. Outdated or corrupted drivers may cause the cursor to disappear. Using Driver Talent to automatically detect and update drivers can save time and prevent incorrect driver installation.
Download the latest version of Driver Talent, install it, and open the software. Click "Scan".
After the scan, identify any missing or outdated drivers. Find the mouse driver in the results and click "Download".
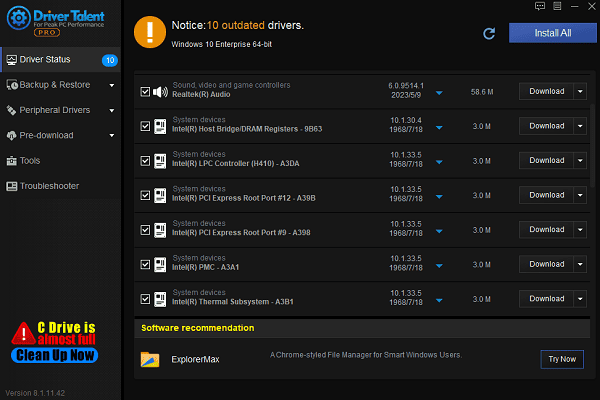
After updating, restart your computer to ensure the updated driver takes effect.
3. Configure Pointer Size
Press Win + I to open Settings.
Go to "Devices > Mouse".
On the mouse page, click "Additional mouse options" on the right.
Navigate to the "Pointers" tab.
Under "Scheme", select a larger pointer style.
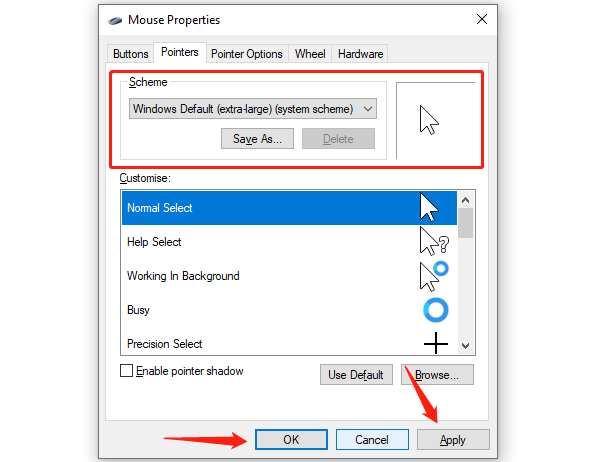
Click "Apply" and "OK" to save changes.
Check if the new pointer settings make the cursor easier to locate.
4. Adjust Pointer Settings
Press Win + S and search for "Mouse Settings". Open the Mouse Settings page.
Click "Additional mouse options" for advanced settings.
Navigate to the "Pointer Options" tab.
In the "Motion" section, adjust the pointer speed slider to ensure the speed is not too slow.
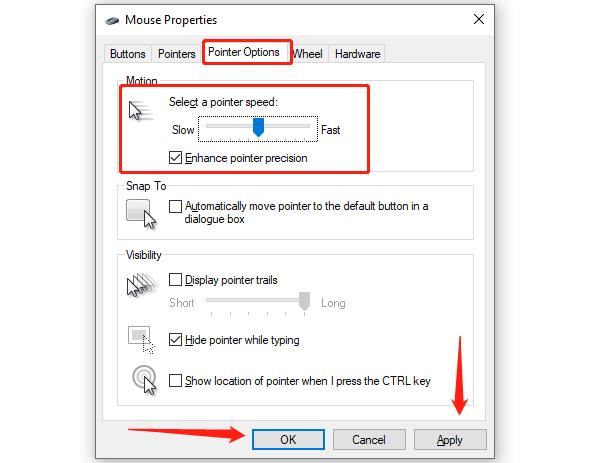
If mouse movement is erratic, uncheck "Enhance pointer precision".
Click "Apply" and "OK" to save changes.
Test the mouse movement to confirm normal functionality.
5. Modify Registry Settings
Press Win + R, type "regedit", and press Enter.
If prompted by User Account Control, select "Yes".
In the Registry Editor, navigate to the following path: HKEY_CURRENT_USER\Control Panel\Mouse
Locate the "MouseTrails" key and double-click to open it.
Set the value to 0 and click "OK".
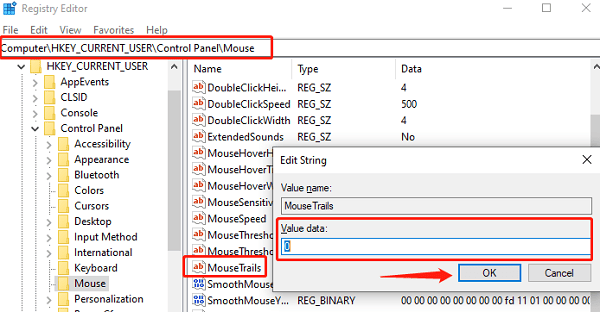
Close the Registry Editor and restart your computer to apply the changes.
6. Run Hardware Troubleshooter
Press Win + S and type "cmd".
In the search results, right-click Command Prompt and select "Run as Administrator".
Enter the following command and press Enter: msdt.exe -id DeviceDiagnostic
The Hardware and Devices Troubleshooter window will open.
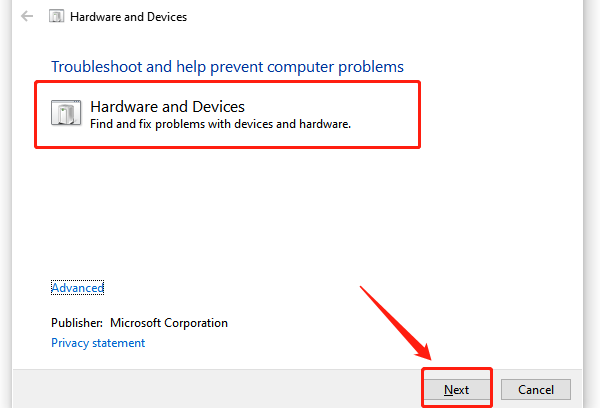
Click "Next" to begin the detection process. The system will automatically scan for hardware issues.
Follow the on-screen prompts to complete troubleshooting. If issues are detected, choose Apply this fix to resolve them.
7. Scan for Malware or Viruses
Press Win + S, search for "Windows Security", and open it.
Select "Virus & Threat Protection" and click "Quick Scan".
If no issues are found, click "Scan Options" and select "Full Scan".
Wait for the scan to complete, then follow any prompts to remove threats.
If you suspect deeper issues, use a professional antivirus tool for further cleaning.
After the scan, restart your computer and check if the cursor issue is resolved.
Follow these steps to resolve mouse pointer issues. If the problem continues, contact technical support or replace your mouse.
See also:
Solution for High CPU Usage by Windows Driver Foundation
How to Fix Windows 10 Disk Management Not Working
Guide to Fixing WiFi Adapter Driver Issues
How to Fix Windows 10 Blue Screen Issues
8 Methods to Fix Audio Not Working in Windows 11

|
ExplorerMax |

|
Driver Talent for Network Card | |
| Smart and advanced file explorer tool for Windows platforms | Download & Install Network Drivers without Internet Connection | |||
| 30-day Free Trial | Free Download |


