The "Failed to play test tone" error can stop your computer from producing sound. This article provides six methods to fix the issue and restore audio functionality.
Method 1: Update Audio Drivers
Outdated, corrupted, or incompatible audio drivers can cause the "Failed to play test tone" error. It is recommended to use Driver Talent to automatically detect and update drivers, saving time and effort while avoiding the risk of downloading or installing the wrong drivers.
Click the download button to get the latest version of Driver Talent. After installation, open the software and click "Scan".
After the scan, it will display which drivers need to be installed or updated. Find the audio driver in the results list and click the "Download" button.
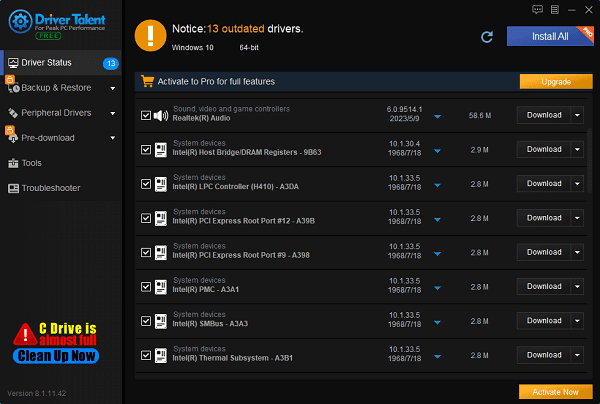
After updating, it is recommended to restart the computer to ensure that the updated driver takes effect.
Method 2: Restart Audio Services
Press the Windows key + R to open the Run dialog, type services.msc, and press Enter.
Find and right-click the Windows Audio service in the list, then select Restart.
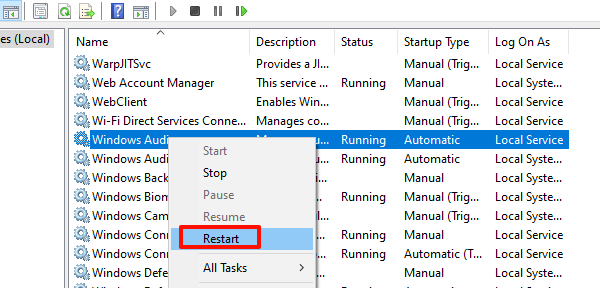
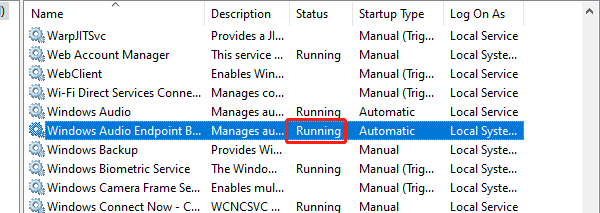
Ensure the Windows Audio Endpoint Builder service is also running. If not, right-click and select Start.
Method 3: Check Windows Audio Service Dependencies
Press the Windows key + R to open the Run dialog, type services.msc, and press Enter.
Find the Windows Audio service, right-click it, and select Properties.
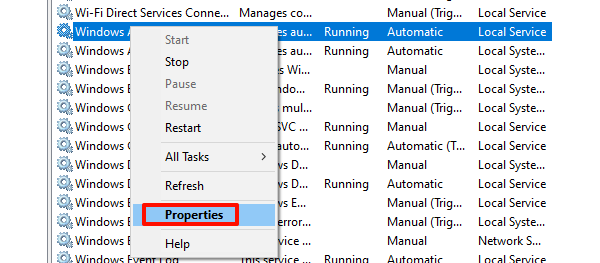
Go to the Dependencies tab and ensure all dependent services are running.
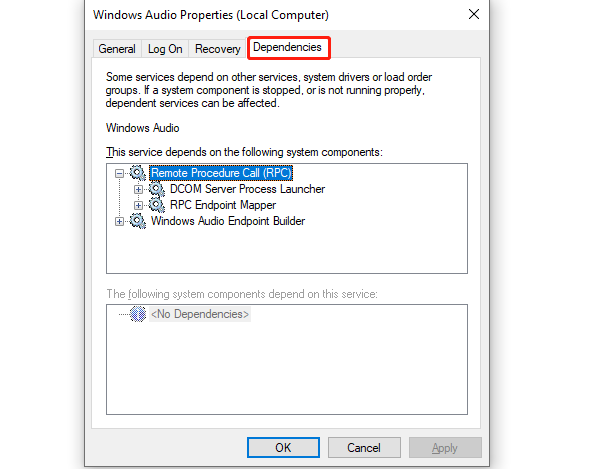
Method 4: Disable Audio Enhancements
Right-click the volume icon in the bottom-right corner of the taskbar and select Sounds.
In the Playback tab, select your default playback device and click Properties.
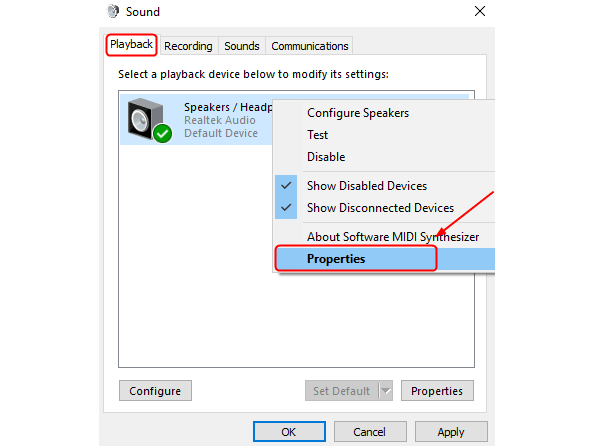
Go to the Enhancements tab and check the box for Disable all sound effects.
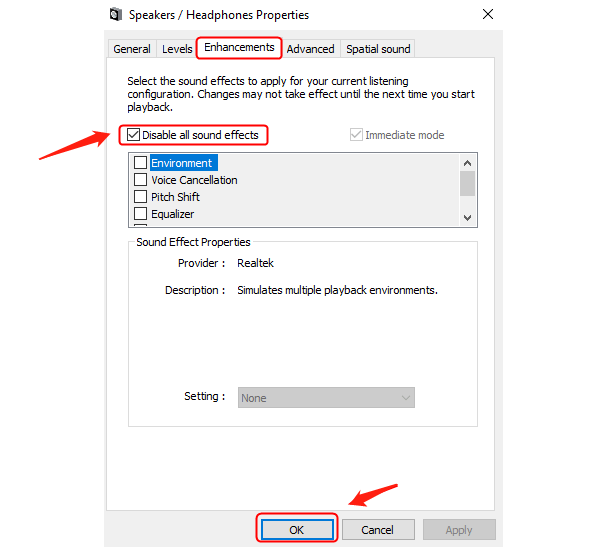
Click Apply and OK, then test the audio.
Method 5: Change the Sample Rate
Press the Windows key + R simultaneously, type mmsys.cpl, and press Enter.
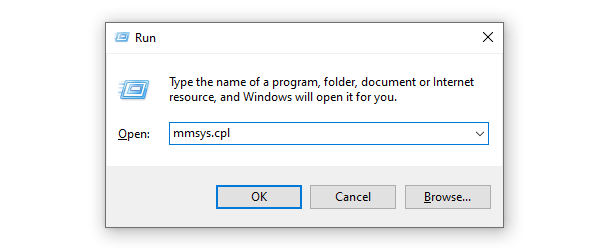
Navigate to the Playback tab, right-click your default sound device, and select Properties.
Click the Advanced tab. You might see the default sample rate set to 16 bit, 44100 Hz. Change it to another sample rate, such as 16 bit, 48000 Hz.
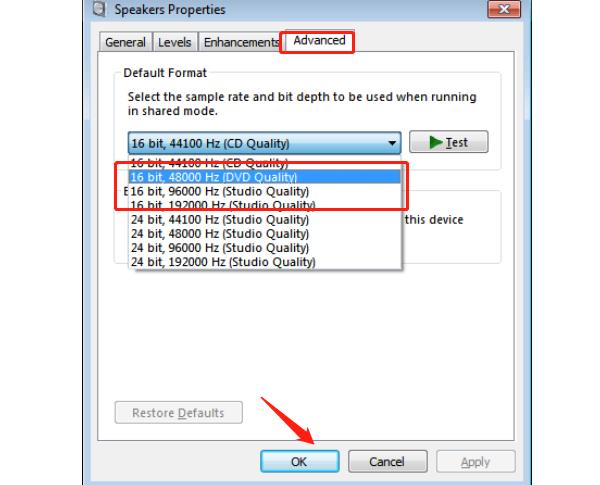
Click the Apply button and see if the problem persists.
If the problem remains, click Restore Defaults and test the sound again.
Method 6: Change Audio Service Log-On Settings
Press Windows key + R, type services.msc, and press Enter to open the Services Manager window.
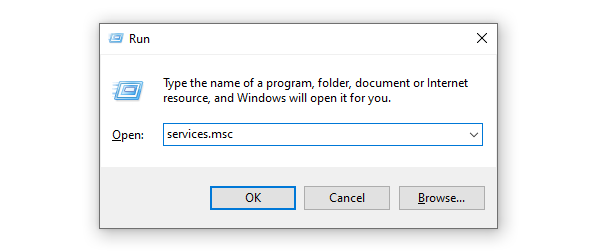
Locate and right-click on Windows Audio service, then select Properties.
Select the Log On tab and choose the This account option.
In the This account field, enter Local Service as the account.
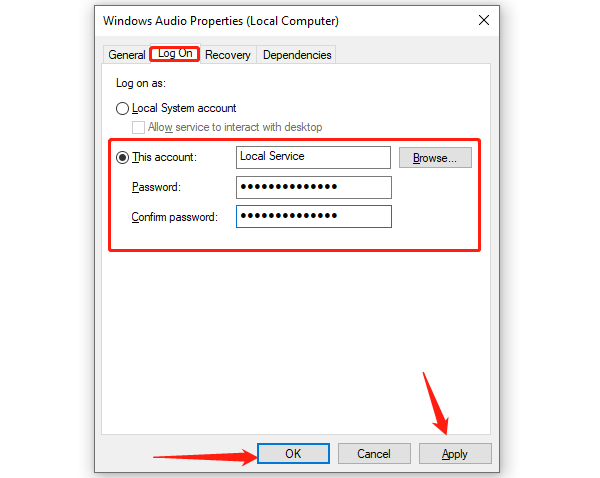
Set a new password if required, and then click OK.
After changing the log-on settings, you need to restart the Windows Audio service for the changes to take effect.
By trying these six methods, you should be able to fix the "Failed to play test tone" error and restore audio functionality. Hope these steps help you resolve your audio issues and get your device producing clear sound again.If you need further help, feel free to contact us.
See also:
Can Steam Deck Connect to TV and Ways to Fix Steam No Connection
What is a computer system and drivers update
Steps to Fix Network Adapter Not Working


