How to Fix Disabled Audio Devices on Windows 10
Jul. 04, 2024 / Updated by Seraphina to Windows 10
If your audio devices are disabled on Windows 10, you won't be able to play sound, affecting your daily use and entertainment experience. Here are some effective methods to help you fix this issue and restore your user experience.
Method 1: Update Audio Drivers
Outdated, corrupted, or incompatible audio drivers can cause audio devices to be disabled. It's recommended to use Driver Talent to automatically detect and update audio drivers, saving time and avoiding the risk of downloading or installing incorrect drivers.
1). Download and install Driver Talent:
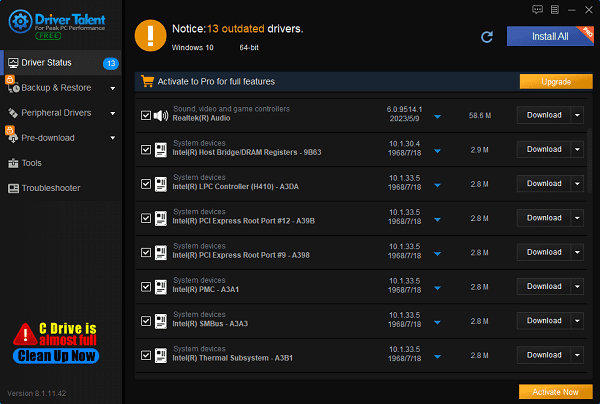
Click the download button to get the latest version of Driver Talent. After installation, open the software and click "Scan".
2). Scan for updates:
Once the scan is complete, it will show any drivers that are missing or need updating. Find the audio driver in the results list and click "Download".
3). Restart your computer:
After updating, restart your computer to ensure the updated driver is properly applied.
Method 2: Enable Audio Devices
1). Open Sound Settings:
Right-click the speaker icon in the lower right corner of the taskbar and select "Sounds".
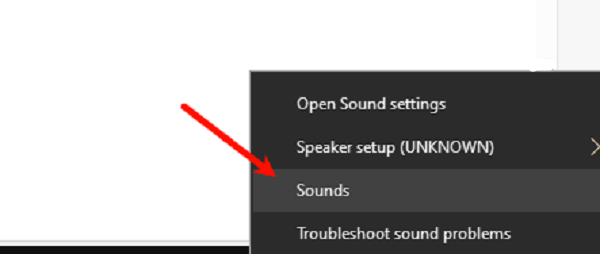
Switch to the "Playback" tab.
2). Enable the device:
In the playback device list, right-click on an empty area and select "Show Disabled Devices".
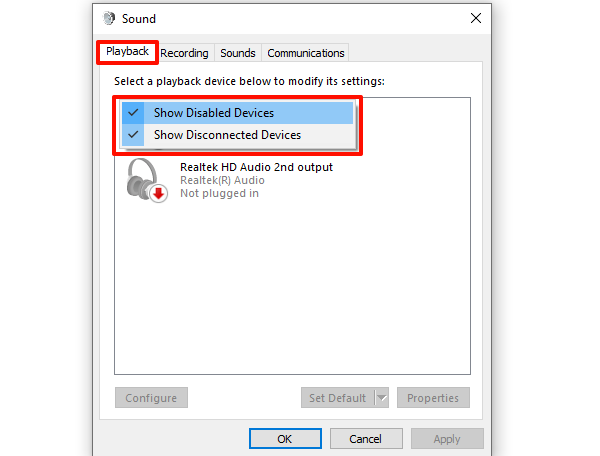
Find your audio device, right-click it, and select "Enable".
Method 3: Run Command Prompt
1). Open Command Prompt (Administrator):
Press the Windows logo key + X to open the quick menu.
Select "Command Prompt (Admin)" or "Windows PowerShell (Admin)".
Click "Yes" to allow changes when prompted by User Account Control (UAC).
2). Enter and execute commands:
Type the first command: net localgroup Administrators /add networkservice and press Enter. This command adds the Network Service account to the Administrators group.
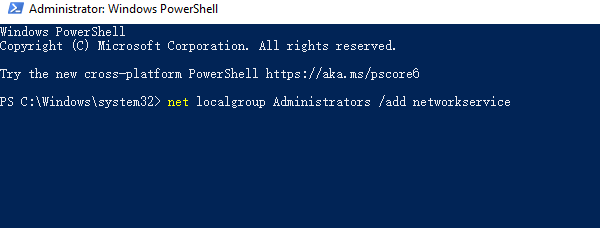
Type the second command: net localgroup Administrators /add localservice and press Enter. This command adds the Local Service account to the Administrators group.
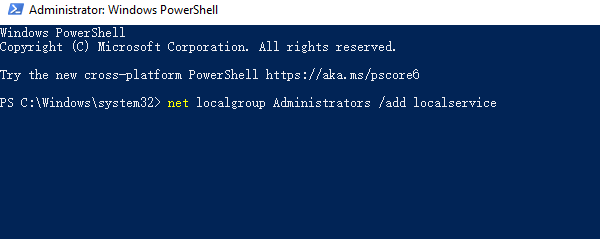
Type exit and press Enter to close the Command Prompt window.
3). Restart your computer:
Restart your computer to ensure the changes take effect. Check if the audio is restored after the reboot.
Method 4: Check Device Manager Settings
1). Open Device Manager:
Press Win + X and select "Device Manager".
2). Enable the device:
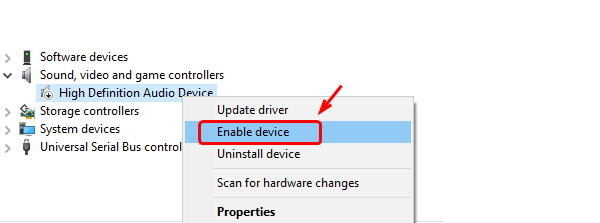
Expand "Sound, video and game controllers".
Find your audio device, right-click it, and select "Enable device".
Method 5: Run Audio Troubleshooter
1). Open Troubleshoot settings:
Press Win + I to open Settings, then select "Update & Security".
2). Run the audio troubleshooter:
In the left menu, select "Troubleshoot".
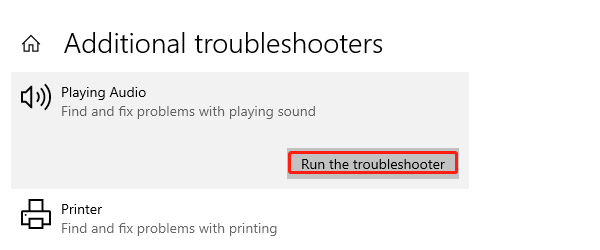
Find "Playing Audio" and click "Run the troubleshooter".
Method 6: Restart Windows Audio Services
1). Open Services Manager:
Press Win + R to open the Run dialog, type services.msc, and press Enter.
2). Restart audio services:
Find the "Windows Audio" service, right-click it, and select "Restart".
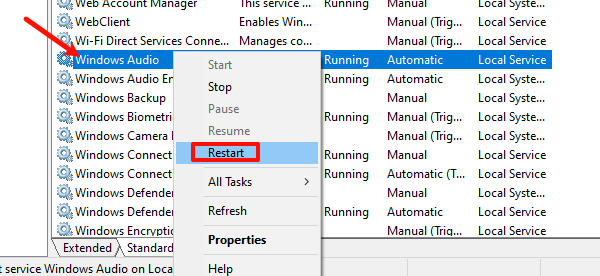
Ensure the startup type for this service is set to "Automatic".
Method 7: Check Connections and Hardware
1). Check audio cables:
Ensure all audio cables are properly connected and not loose.
2). Test other ports:
Try connecting your audio device to different audio ports or use another audio device to rule out hardware issues.
Following these methods should resolve disabled audio devices on Windows 10. If the issue persists, contact your device manufacturer's support or refer to official documentation. Hopefully, these methods will restore sound to your system.
See also:
5 Ways to Fix Corsair Headset Not Working
Six Ways to Fix Lag Issues in The Sims 4 on PC
Guide to Updating HDMI Drivers on Windows 10
7 Ways to Fix Unidentified Network on Windows 11
How to Resolve High CPU Usage by ntoskrnl.exe on Windows

|
ExplorerMax |

|
Driver Talent for Network Card | |
| Smart and advanced file explorer tool for Windows platforms | Download & Install Network Drivers without Internet Connection | |||
| 30-day Free Trial | Free Download |


