Computer freezing is a common issue during computer usage that can disrupt your workflow and entertainment experience. Below are eight effective methods to help you diagnose and fix computer freezing problems, ensuring smooth operation of your system.
Method 1: Check for Hardware Issues
Check Cooling: Ensure your computer's cooling system is functioning properly. Clean dust from cooling fans and heatsinks to maintain good airflow.
Inspect Hardware Connections: Ensure all hardware components (like memory, hard drive, graphics card, etc.) are securely connected. Consider reseating them if necessary.
Run Hardware Diagnostic Tools: Use built-in hardware diagnostic tools to detect any hardware failures.
Method 2: Update Drivers
Faulty or outdated drivers can cause computer issues. It's recommended to use Driver Talent to automatically detect and update your computer's drivers, saving time and avoiding the risk of downloading or installing incorrect drivers.
Click the download button to get the latest version of Driver Talent. After installation, open the software and click "Scan".
Once the scan completes, it will display which drivers are either not installed or need updating. Find the necessary drivers in the list and click "Download".
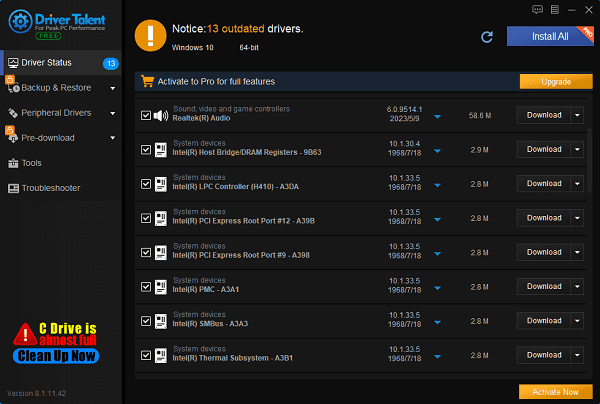
After updating, it's advisable to restart your computer to ensure the updated drivers take effect.
Method 3: Check System Files
Computer freezing problems may stem from missing, corrupted, or damaged system files. You can repair them using the following methods:
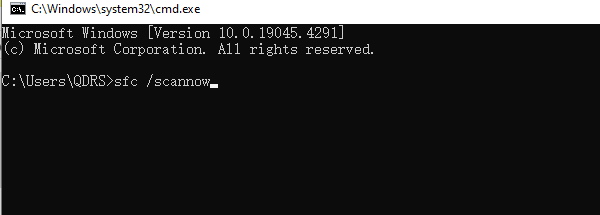
1). Run System File Checker (SFC):
Open Command Prompt (Run as administrator), type sfc /scannow, and press Enter.
Wait for the system to scan and repair any corrupted system files.
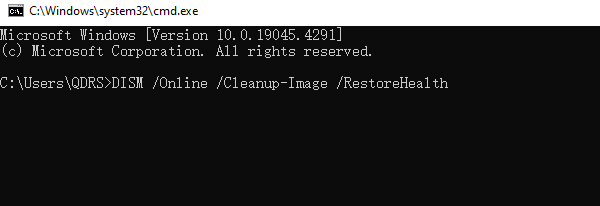
2). Run Deployment Imaging Service and Management Tool (DISM):
In Command Prompt, type DISM /Online /Cleanup-Image /RestoreHealth, and press Enter.
Wait for the tool to scan and repair the system image.
Method 4: Adjust Virtual Memory
Virtual memory extends physical memory (RAM) using part of the hard drive. Adjusting virtual memory can help improve system performance.
1). Press the Windows logo key + Pause key to open the "System" window.
2). Click on "Advanced system settings".
3). In the "Advanced" tab, click on "Settings..." under the Performance section.
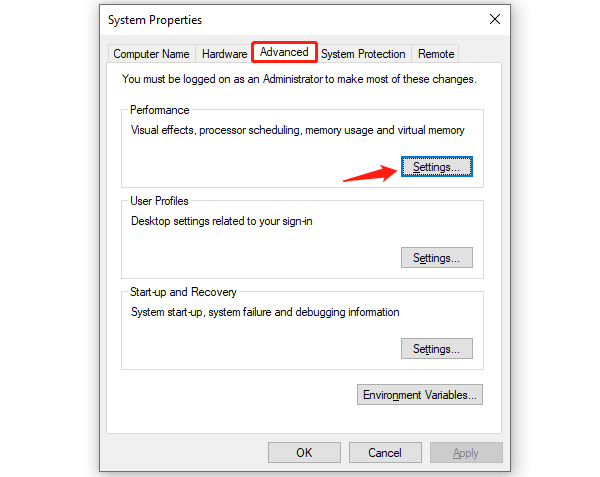
4). Click on the "Advanced" tab, then click "Change..." under the Virtual memory section.
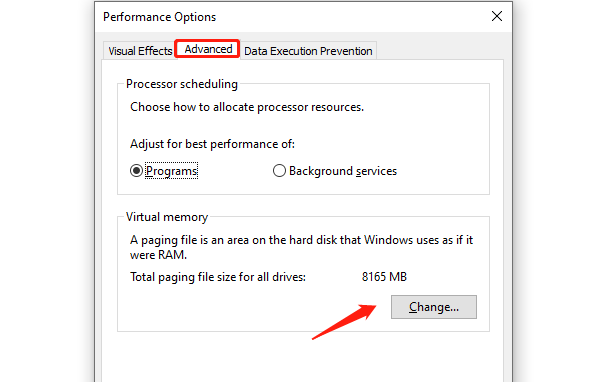
5). Ensure the option "Automatically manage paging file size for all drives" is unchecked.
6). Select your Windows drive (usually C:), choose "Custom size", and enter the Initial size and Maximum size:
Initial size: Enter the recommended value.
Maximum size: Set it to about 1.5 times your physical RAM size (e.g., for 16 GB RAM, set it to no more than 24 GB).
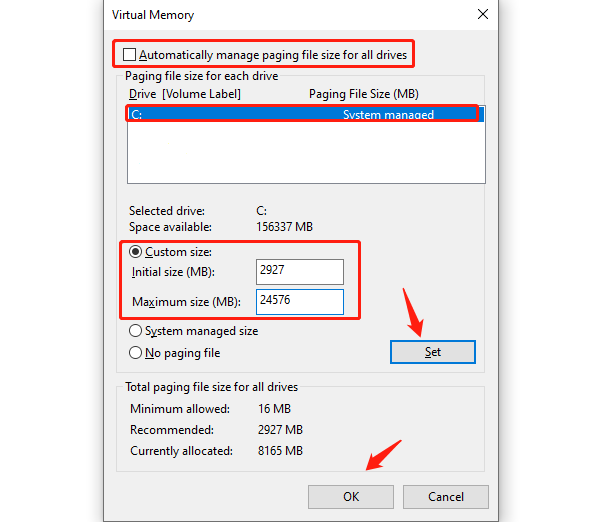
7). Click "Set", then "OK".
8). Restart your computer to apply the changes.
Method 5: Change Hard Drive Power Plan Settings
Keeping the hard disk drive (HDD) always on may resolve the issue.
Press the Windows logo key + R to open the "Run" dialog box.
Type powercfg.cpl and press Enter.
In the Preferred Plans tab, click "Change plan settings".
Click "Change advanced power settings".
Expand "Hard disk" > "Turn off hard disk after", set the value to "Never", then click "OK".
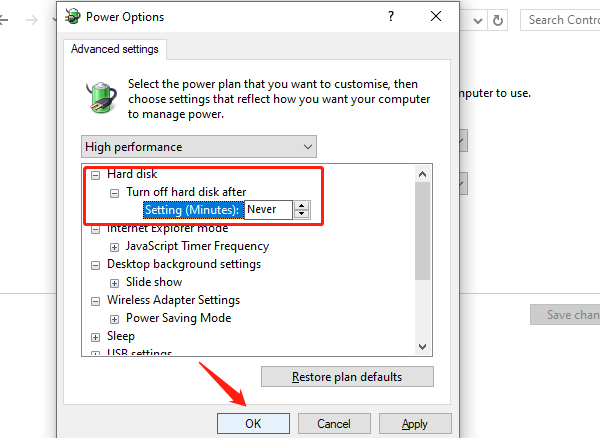
After setting, restart your computer to ensure the changes take effect.
Method 6: Run Windows Memory Diagnostic Tool
Faulty or damaged RAM sticks can cause this issue. You can check them using the Windows Memory Diagnostic Tool.
Ensure all work on the computer is saved and closed.
Press the Windows logo key + R to open the "Run" dialog box.
Type mdsched.exe and press Enter.
Click "Restart now and check for problems (recommended)".
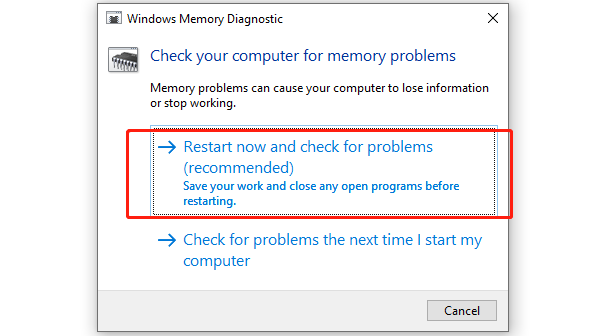
Windows will automatically restart and enter the memory diagnostic tool. Wait for the test to complete.
After the test, the computer will automatically restart and display the results.
Check for any memory error reports; if found, repair or replace the faulty RAM sticks.
Method 7: Scan for Viruses and Malware
Resolve computer issues by scanning and removing viruses or malware.
Open your antivirus software (such as Windows Defender or another third-party antivirus).
Perform a full scan to check for viruses and malware on your computer.
Remove or quarantine any threats found.
After the scan is complete, restart your computer and check if the problem is resolved.
Method 8: Perform System Restore
If the above methods do not resolve the issue, try performing a system restore to revert your computer to a previous state.
Ensure all work on the computer is saved and closed.
Press the Windows logo key, type "recovery", and click "Create a restore point".
Under the "Advanced recovery tools" tab, click "Open System Restore...".
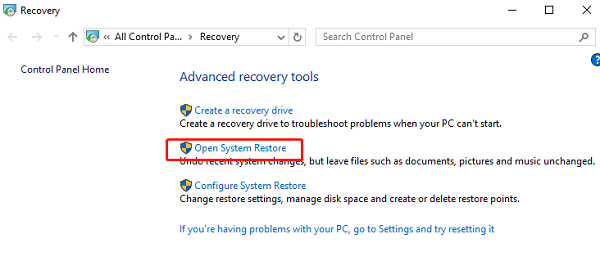
Choose "Recommended restore" or select another restore point, then click "Next".
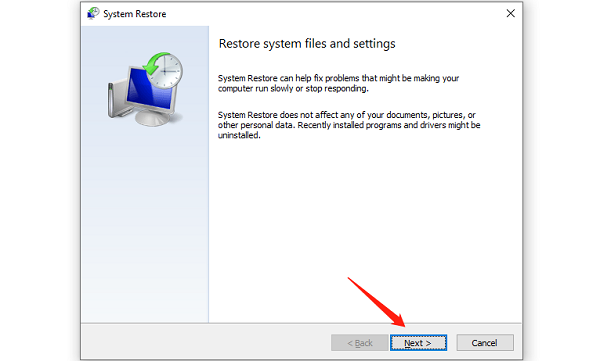
Follow the on-screen instructions to complete the system restore.
After the system restore is complete, your computer will automatically restart.
By following these methods, you should be able to effectively resolve computer freezing issues, restoring system stability and performance. If the problem persists, consider seeking professional technical support. Hopefully, these methods will help you smoothly resolve computer freezing issues and restore normal operation to your computer.
See also:
How to Fix High CPU Usage by System Interrupts Process
8 Methods to Fix Crashes in Starfield
How to Easily Fix a Black Screen on a Dell Laptop


