
"Audio device is disabled" is a common audio issue for Windows users, which often results in the computer being unable to play any sound. This article will provide several common and effective solutions to help you quickly restore the normal functioning of your audio device.
1. Check for Driver Updates
Outdated or corrupted audio drivers are one of the main causes of audio devices being disabled. Ensuring that your audio drivers are up to date is the first step in resolving this issue. We recommend using Driver Talent to automatically detect and update drivers, saving you time and preventing the risk of downloading or installing incorrect drivers.
Click the download button to get the latest version of Driver Talent, install it, and open the software. Click "Scan" to check for missing or outdated drivers.
Once the scan is complete, find the audio driver in the result list and click the "Update" button.
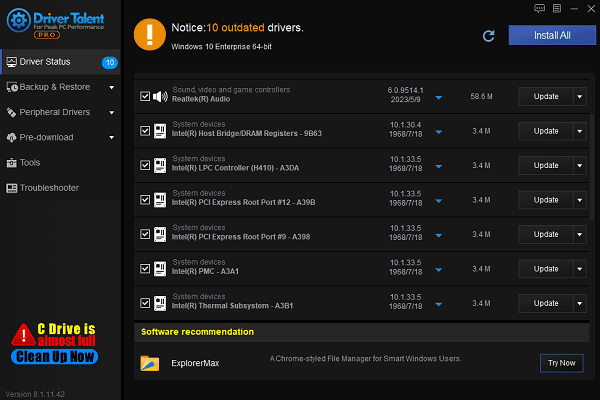
After the update is complete, it is recommended to restart your computer to ensure the updated driver takes effect.
2. Enable Disabled Audio Devices
Right-click the volume icon on the taskbar and select "Playback Devices".
Under the Playback tab, right-click on a blank space and select "Show Disabled Devices".
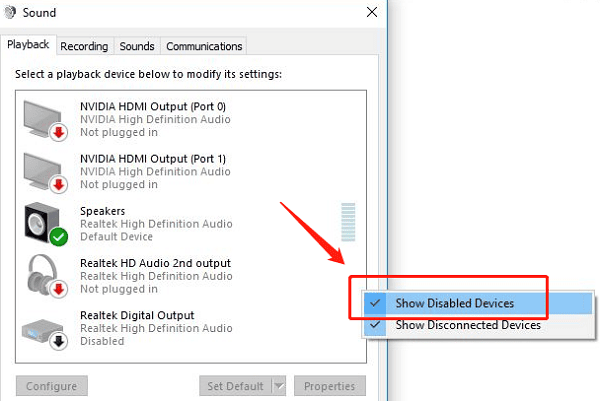
Find the disabled audio device, right-click on it, and select "Enable".
If the device restores to normal, you can click "Set as Default Device" to ensure the system uses this device.
3. Restart Windows Audio Services
Press Win + R to open the Run dialog, type "services.msc", and press Enter.
In the Services window, locate "Windows Audio" and "Windows Audio Endpoint Builder" services.
Right-click these two services and select "Restart". If the services are not started, select "Start".
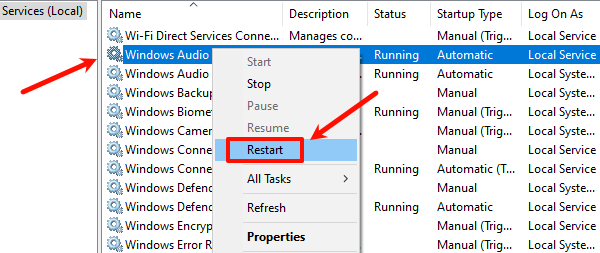
Ensure the startup type for both services is set to "Automatic" so that they automatically start each time the computer is turned on.
4. Reset Audio Settings
Press Win + I to open Settings, and go to "System" > "Sound".
In the Sound settings, find "Advanced Sound Options", and click "App volume and device preferences".
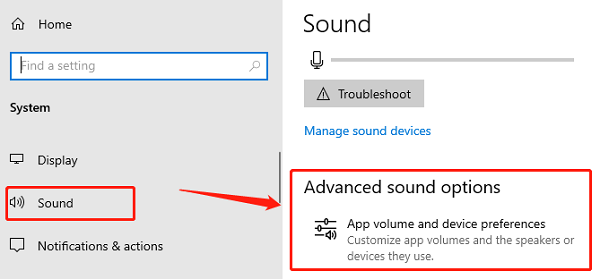
Check the audio output settings for each application and reset them to default.
If there are multiple audio output devices, choose the default device and ensure it is enabled.
By resetting your audio settings, you can ensure all audio devices are correctly configured.
5. Run the Audio Troubleshooter
Press Win + I to open Settings, and select "Update & Security".
Select "Troubleshoot", and click on "Additional Troubleshooters".
Find the "Playing Audio" option and click "Run the Troubleshooter".
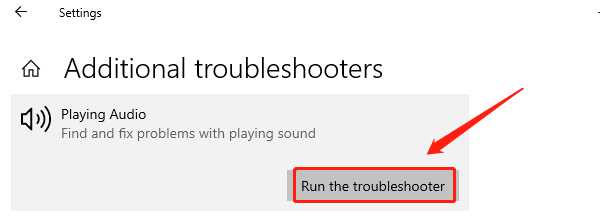
The system will automatically diagnose and provide repair suggestions. Follow the prompts to complete the repair process.
6. Check Hardware Connections
Check if the audio device is properly plugged into the computer's headphone jack or audio output port.
If it's a USB audio device, ensure that it is correctly connected and that the computer recognizes it.
Check if the audio cable is damaged, ensuring the connection is stable.
By following the above methods, you can quickly resolve the "Audio device is disabled" issue in Windows and restore your audio device to normal functionality. If the problem persists, it is recommended to contact professional technical support for further troubleshooting.
See also:
HP DeskJet 2755e Driver Update Steps for Windows 10
How to Fix Mouse Arrow Disappearance on Windows 10
6 Ways to Fix an Unresponsive Wireless Mouse


