VRChat is a popular virtual reality social platform that connects users worldwide. However, it may sometimes crash on PCs, affecting the user experience. This guide provides methods to help you resolve this issue and smoothly enjoy virtual socializing.
Method 1: Update Graphics Drivers
Outdated or corrupted graphics drivers can cause VRChat to crash. It is recommended to use Driver Talent to automatically detect and update drivers, saving time and avoiding the risk of downloading or installing incorrect drivers.
Download the latest version of Driver Talent. Install and open the software, then click "Scan".
After the scan, it will show which drivers are missing or need updating. Find the graphics driver in the result list and click the "Download" button.
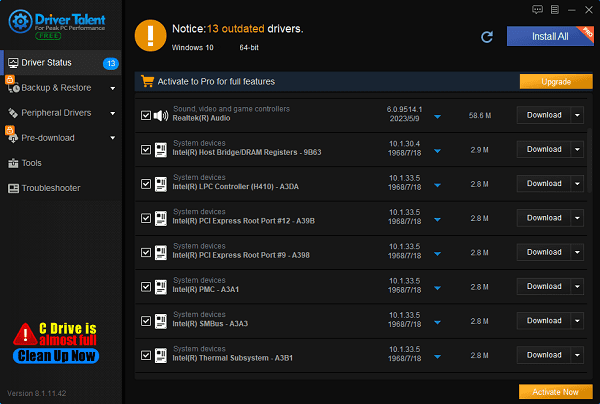
After the update is complete, it is recommended to restart your computer to ensure that the updated drivers take effect.
Method 2: Verify Game File Integrity
Open the Steam client and go to "Library".
Find and right-click VRChat, then select "Properties".
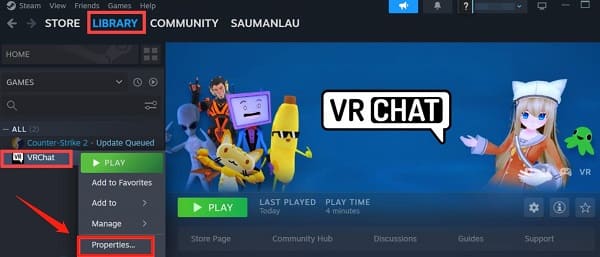
Select the "Installed Files" tab and click "Verify integrity of game files".

Method 3: Lower Game Settings
Open VRChat.
Go to the settings menu and lower the resolution and graphics quality.
Save the settings and restart the game.
Method 4: Reset Your Avatar
Enter VRChat.
Press Ctrl + (the slash under Backspace) to reset your avatar to default.
If this doesn't solve the issue, you can also reset your avatar on the VRChat official website:
Visit the VRChat official website.
Log in to your account.
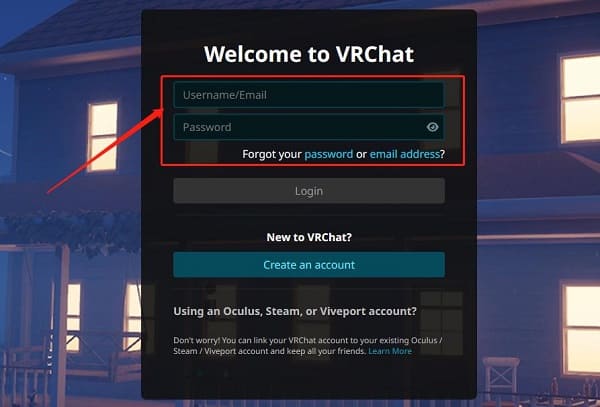
Go to the AVATARS tab.
Select the Reset to Default Avatar option.
Method 5: Disable Background Applications
Press Ctrl + Shift + Esc to open Task Manager.
Go to the Startup tab.
Right-click on unnecessary applications and select Disable.
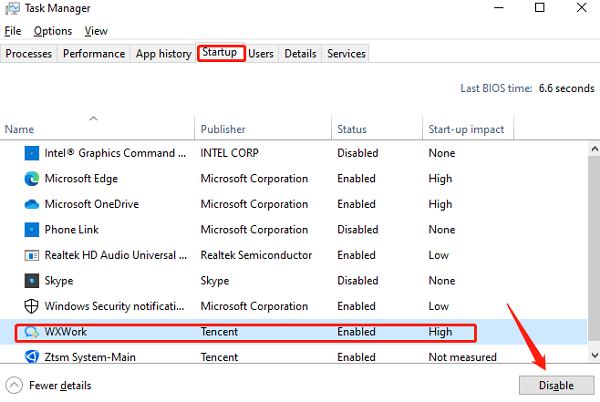
Restart your computer to ensure these applications do not automatically run at startup.
Method 6: Allow VRChat Through Firewalls
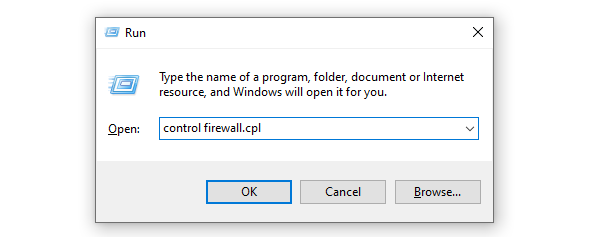
Press Windows + R to open the Run box.
Type control firewall.cpl and press Enter.
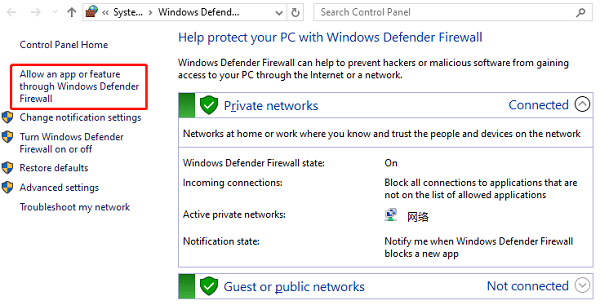
From the left navigation pane, click Allow an app or feature through Windows Defender Firewall.
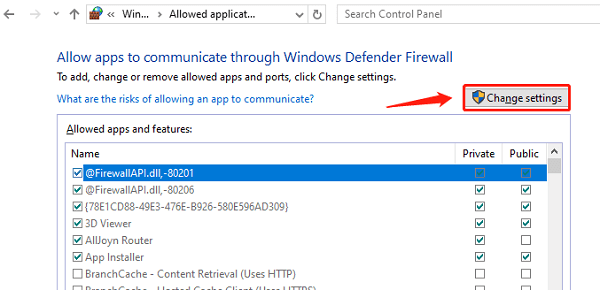
Scroll down and check if VRChat is on the list. If not, click Change settings.
Click Allow another app….
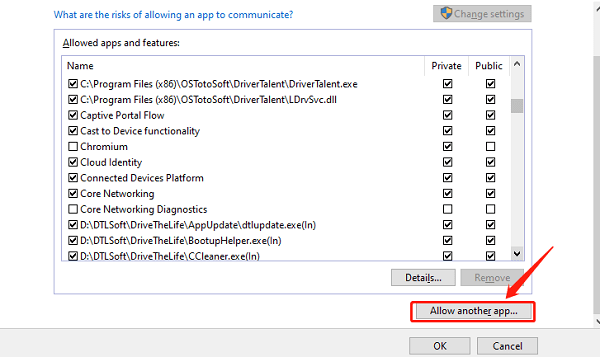
Click Browse… and navigate to the VRChat installation folder (if you don't know the folder location, right-click on the VRChat shortcut and select Open file location).
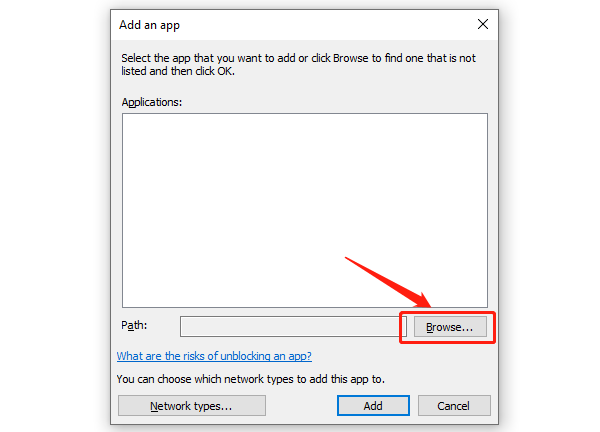
Find VRChat.exe and follow the on-screen instructions to add VRChat to the list. Ensure both Private and Public are checked. Click OK when done.
Method 7: Clear Cache
Type cmd in the Windows search bar.
Right-click on Command Prompt in the results and select "Run as administrator".
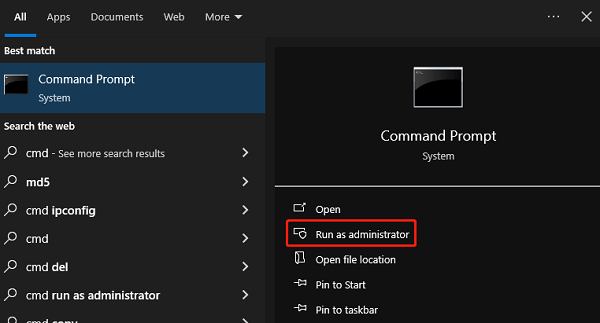
In the Command Prompt window, copy and paste the following command:
rmdir /S /Q %AppData%\..\LocalLow\VRChat\vrchatCookies && rmdir /S /Q %AppData%\..\LocalLow\VRChat\vrchatHTTPCache && rmdir /S /Q %AppData%\..\LocalLow\VRChat\vrchatUnity && rmdir /S /Q %AppData%\..\LocalLow\VRChat\vrchatVRCHTTPCache && rmdir /S /Q %TEMP%\VRChat && REG DELETE HKCU\Software\VRChat\vrchat /va.
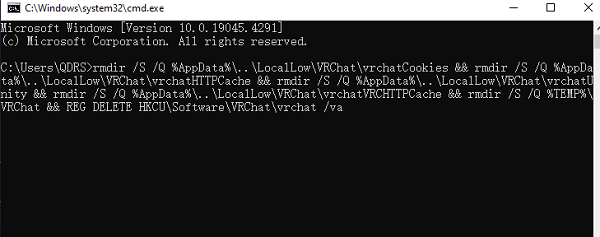
Press Enter to run the command.
When prompted to delete all keys under the VRChat key, press Y and Enter.
If this command gives you error messages, run the following command to clear the VRChat cache:
rmdir /S /Q %USERPROFILE%\AppData\LocalLow\VRChat\vrchat && rmdir /S /Q %TEMP%\VRChat && REG DELETE HKCU\Software\VRChat\vrchat /va.
Method 8: Create a New Account
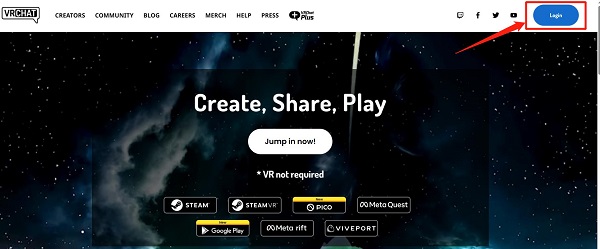
Visit the VRChat official website.
Log in to VRChat with your Steam/Oculus account.
Open the quick menu and select Settings.
Click Upgrade Account at the bottom of the menu and follow the instructions to merge your accounts.
Method 9: Reinstall VRChat
If the above methods don't work, try reinstalling VRChat:
Open the Steam client and go to "Library".
Right-click VRChat and select "Uninstall".
After uninstallation is complete, reinstall VRChat.
By trying the above methods, you should be able to resolve VRChat crashing on your PC. If the problem persists, contact VRChat support or a professional technician. Hopefully, these solutions will enhance your VRChat experience and allow you to enjoy the virtual reality world smoothly.
See also:
How to Properly Update Graphics Drivers
How do I Reinstall My Mouse Driver for Windows
Unmissable Tactics for Motherboard Driver Downloads


