6 Methods to Fix USB-C Port Not Working in Windows
Jul. 14, 2024 / Updated by Seraphina to Windows 10
We often rely on USB-C ports to connect devices, and when they don't work, it can disrupt our work and daily life. Many users have noticed issues with USB-C ports after system or driver updates. If you're facing this problem, here are some solutions.
Method 1: Check Physical Connection
Ensure the USB-C port is not physically damaged and free of any obstructions.
When inserting the device, make sure the plug is fully inserted into the port.
Method 2: Update USB Drivers
Outdated, corrupted, or incompatible USB drivers can cause the USB-C port to stop working in Windows. It is recommended to use Driver Talent for automatic driver detection and updates, saving time and avoiding incorrect driver downloads or installations
Click the download button to get the latest version of Driver Talent, install it, and then open the software and click "Scan".
After the scan, it will show which drivers are missing or need updating. Find the USB driver in the results list and click the "Download" button.
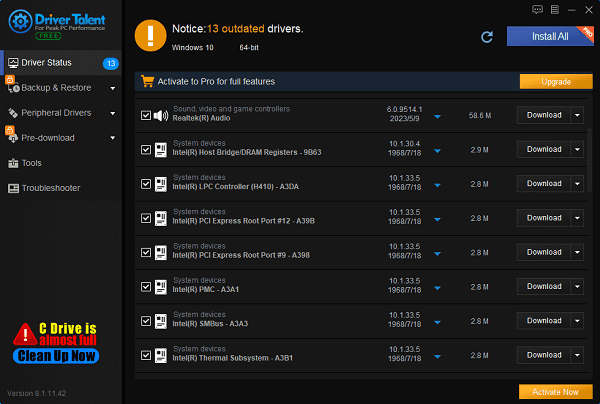
After updating, it is recommended to restart your computer to ensure the new drivers take effect.
Method 3: Check Power Management Settings
1). Open Power Options:
Press the Windows key + S to open the search box.
Type "Choose a power plan" and select it.
2). Adjust Power Plan:
In the Power Options window, you will see the currently selected power plan. Options typically include "Balanced", "High performance", and "Power saver".
Select the power plan that best matches your computer configuration. It is recommended to choose "High performance" for maximum USB port performance and stability.
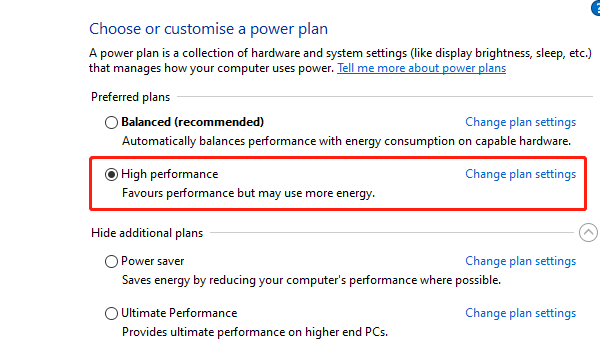
If there is no "High performance" option, select "Change plan settings" and adjust the displayed advanced power settings.
3). Adjust USB Selective Suspend Settings:
Click "Change plan settings".
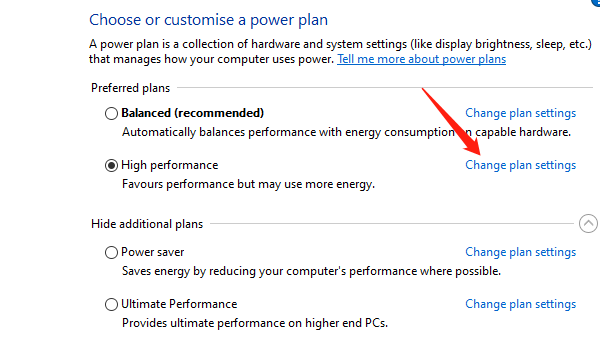
Click "Change advanced power settings".
Expand "USB settings" and double-click "USB selective suspend setting" to open its properties.
If you are using a desktop, select "Disabled" to turn off USB selective suspend.
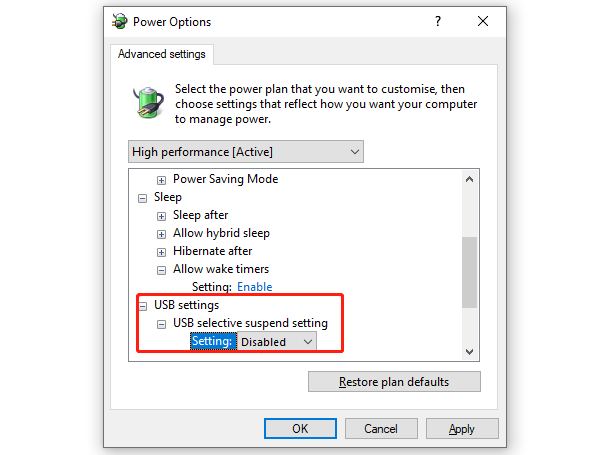
If you are using a laptop, disable it for both "On battery" and "Plugged in", then click "Apply" and "OK" to save the changes.
Method 4: Enable USB Issue Notifications
Click the notification icon on the right side of the taskbar.
Open "All settings".
Go to "System" > "Notifications & actions".
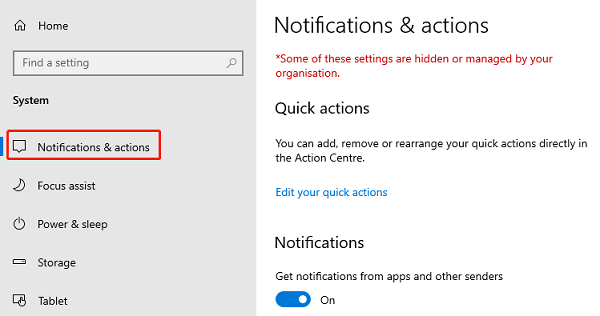
Ensure the "Show all USB notifications" option is enabled under the "Notifications" section.
Method 5: Run Windows Troubleshooter
Press the Windows key + I to open "Settings".
Go to "Update & Security" > "Troubleshoot".
Select "Additional troubleshooters" and find the "Hardware and Devices" option.
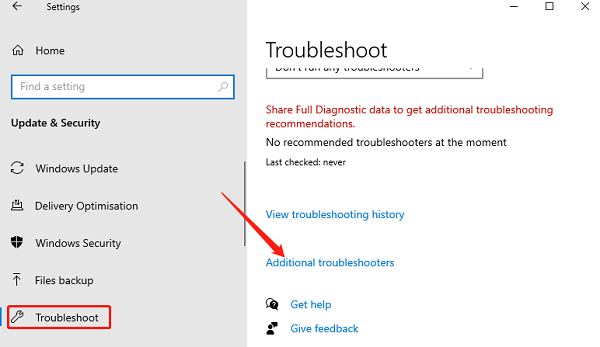
Run the troubleshooter, which can help detect and fix any issues with the USB-C port.
Method 6: Check for Windows Updates
1). Open Windows Update Settings:
Click on Settings, and navigate to "Update & Security".
Select Windows Update.
2). Check for Updates:
In the Windows Update settings window, click the "Check for updates" button.
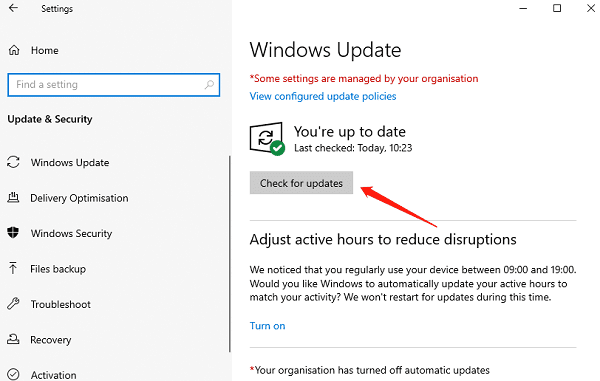
Windows will automatically detect if there are any available updates.
3). Install Updates:
If updates are available, click the "Download" and "Install" buttons to begin the installation.
After the update, you may need to restart your computer for the changes to take effect.
By following these methods, you can fix the USB-C port issue on Windows. Proper USB-C port functionality is crucial for seamless device connectivity. Hope these suggestions help, and wish you a quick resolution to your problem, so you can resume normal device use.
See also:
How to Fix SteamVR Not Working Issues
6 Ways to Fix a Jumping Mouse Scroll Wheel
Guide to Fixing Network Adapter Issues on Windows
How to Resolve Windows 10 Installation Failure Issues
Guide to Fixing Microphone Not Working on Windows 11

|
ExplorerMax |

|
Driver Talent for Network Card | |
| Smart and advanced file explorer tool for Windows platforms | Download & Install Network Drivers without Internet Connection | |||
| 30-day Free Trial | Free Download |


