Intel USB 3.0 drivers play a crucial role in ensuring your USB devices operate smoothly on Windows 10. Below is a detailed guide on how to download and install Intel USB 3.0 drivers for Windows 10, helping you complete the process seamlessly.
Method 1: Automatic Download and Update of Drivers
Outdated, damaged, or incompatible USB drivers can cause computer issues. It's recommended to use Driver Talent for automatic driver detection and updates, saving time and avoiding the risk of downloading or installing incorrect drivers.
Click the download button to get the latest version of Driver Talent. After installation, open the software and click "Scan".
After scanning, Driver Talent will display which drivers are not installed or need updating. Find the USB driver in the results list and click "Download".
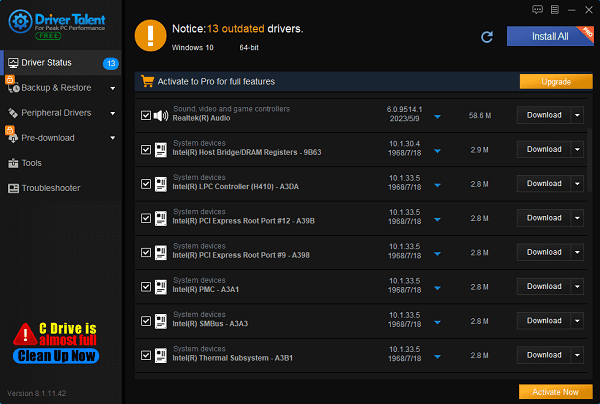
After the update is complete, it's advisable to restart your computer to ensure the updated drivers take effect.
Method 2: Manual Download and Installation of Drivers
Step 1: Identify Your Intel USB 3.0 Controller
①. Open Device Manager: Press Windows + X, then select "Device Manager".
②. Find USB Controllers: Expand the "Universal Serial Bus controllers" section.
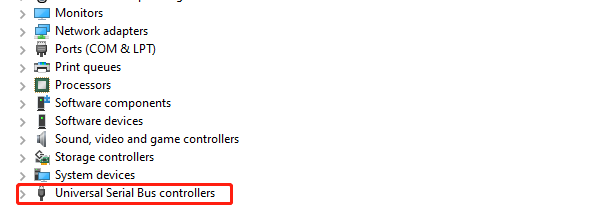
③. Check Intel USB 3.0 Controller: Look for entries containing "Intel USB 3.0".
Step 2: Access the Intel Download Center
①. Open a browser: Launch your web browser and visit the Intel Download Center.
②. Search for Drivers:
Enter "intel usb 3.0 extensible host controller driver windows 10" in the search box.
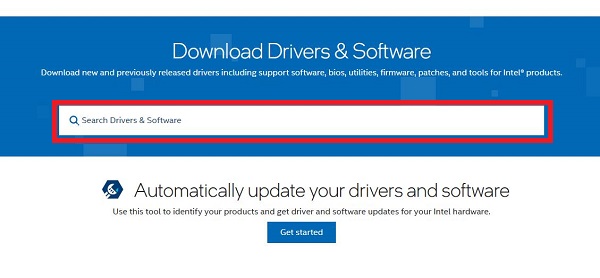
Find the driver that matches your device.
Step 3: Download the Driver
①. Select the driver: Choose the appropriate driver for your system from the search results.
②. Download the driver: Click the "Download" button and save the file to your computer.
Step 4: Install the Driver
If you cannot install the driver in Windows 10 using the setup file (.exe), follow these steps to manually install it using the .inf file:
①. Unzip the downloaded driver file to a specified location.
②. Simultaneously press the Windows key + R, type "devmgmt.msc", and press Enter to open Device Manager.
③. Expand the "Universal Serial Bus controllers" category, find Intel® USB 3.0 eXtensible Host Controller. If the driver is missing or damaged, there will be a yellow mark next to the device. The device name may appear as "Unknown USB Device".
④. Right-click on the device, select "Update Driver Software...".
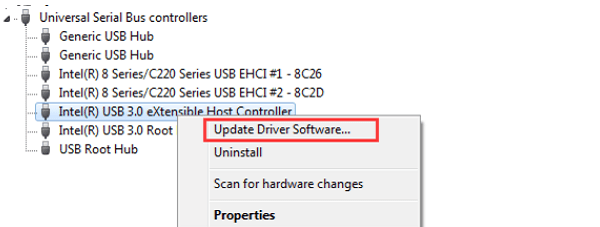
⑤. Choose "Browse my computer for drivers".
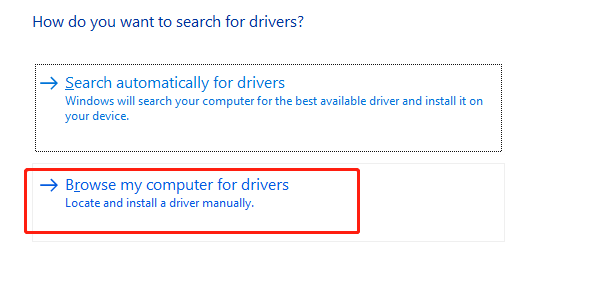
⑥. Select "Let me pick from a list of available drivers on my computer".
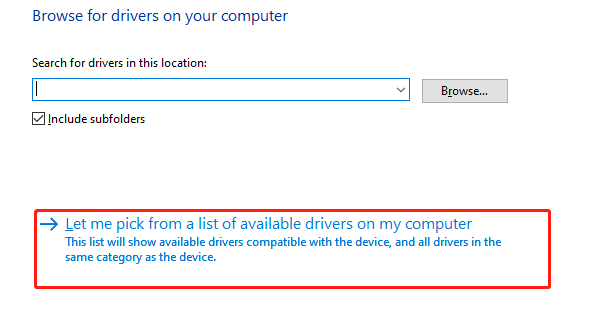
⑦. Click "Have Disk...".
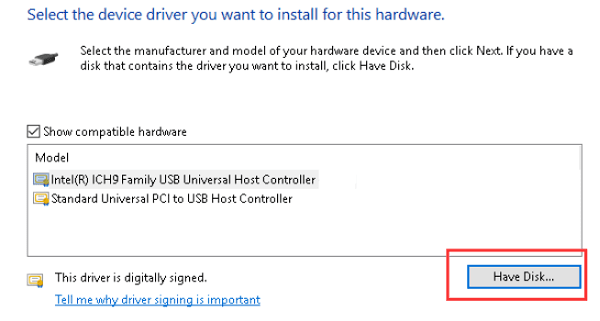
⑧. Click "Browse...", navigate to the folder where you saved the unzipped driver file.
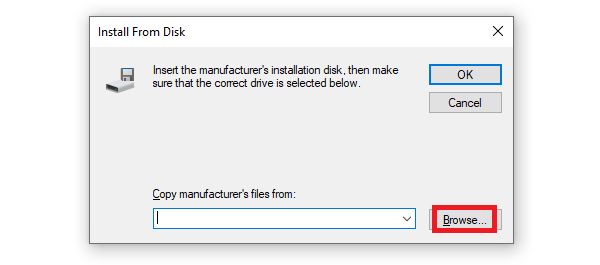
⑨. Select the .inf file, then follow the on-screen instructions to install the driver.
Step 5: Restart Your Computer
After installation, restart your computer to ensure the driver is properly activated.
By using these methods, you can easily download and install the Intel USB 3.0 driver for Windows 10, ensuring your USB devices operate smoothly and efficiently. We hope this guide helps you complete the driver download and installation process smoothly.
See also:
How to Fix AMD FreeSync Not Working Issue
How to Fix Bluetooth Not Working Issues
How to Fix Disabled Audio Devices on Windows 10


