NVMe SSDs are known for their high-speed data transfer capabilities, significantly boosting computer performance. This article guides you through downloading and installing the necessary drivers on Windows to ensure your NVMe SSD operates at its best.
Method 1: Automatic Installation of NVMe Drivers
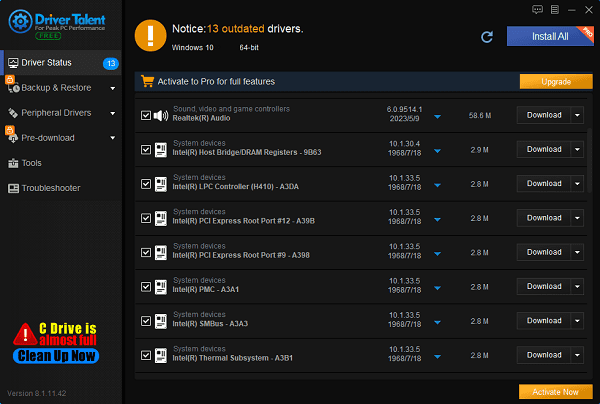
Driver Talent offers a streamlined solution for managing device drivers, ensuring they are always up to date to keep your devices running smoothly. It saves time and mitigates the risk of downloading or installing incorrect drivers.
Click the download button to get the latest version of Driver Talent.
After installation, run the software and click "Scan".
Once the scan is complete, the software will show which drivers need installation or updating. Find the NVMe driver in the list and click "Download".

After the update, it's recommended to restart your computer to ensure the updated drivers take effect.
Method 2: Manual Installation of NVMe Drivers
Manually installing NVMe drivers requires downloading the correct driver from the SSD manufacturer's official website and installing it on your computer.
Step 1: Identify Your NVMe SSD Manufacturer and Model
Before you begin, locate the manufacturer and specific model of your NVMe SSD. This information is usually found on the SSD label or in your computer's system information.
Step 2: Visit the manufacturer's website
Open your browser and visit the official website of your NVMe SSD manufacturer.
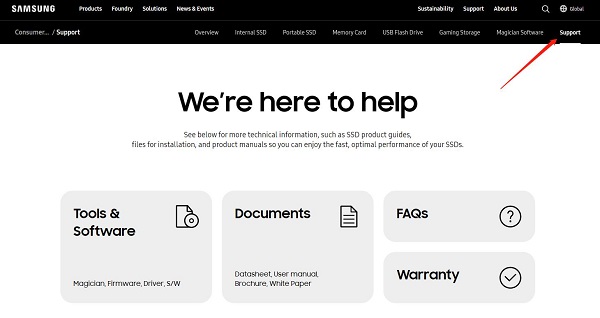
For example, for Samsung: Open Samsung Support Center.

Step 3: Download the Driver
Use the search bar on the support page to enter your NVMe SSD model number.

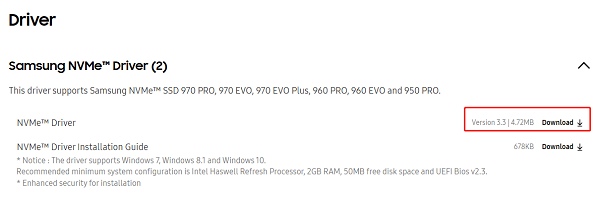
Find and select the latest NVMe driver compatible with your operating system (e.g., Windows 10, Windows 11).
Click the download link to save the driver file to your computer.

Step 4: Extract the File (if applicable)
If the driver file is in a compressed format like .zip, extract it:
Right-click the downloaded compressed file.
Select "Extract to current folder" or a similar option.
Step 5: Install the Driver
Navigate to the extracted folder and locate the installation file (usually .exe).
Double-click the installation file to start the installation wizard.
Follow the on-screen instructions provided by the installation wizard.
After installation, you may be prompted to restart your computer to activate the driver. Save your work and restart your computer.
Step 6: Verify Driver Installation
Press Win + X keys together and select "Device Manager".
Check under "Disk drives" or "Storage controllers" to see if your NVMe SSD is correctly recognized and displayed.

If the driver installation was successful, your NVMe SSD should appear in the device list without any error indicators.
Following these steps should guide you to successfully download and install NVMe drivers manually. If you face any issues, refer to the manufacturer's guide or support page for help. We hope this article helps you smoothly install NVMe drivers and boosts your computer's performance.
See also:
Six Quick Fixes for No Signal on Monitor
How to Fix Qualcomm Atheros QCA61x4A Driver Issues
Guide to Fixing Sound Card Driver Installation Issues


